Aerbax's Citadel: Difference between revisions
imported>An Adventurer m Text replace - "[[Black Death Catacombs Quiddity Ingot|" to "[[Quiddity Ingot (BDC)|" |
imported>Asamace No edit summary |
||
| (60 intermediate revisions by 10 users not shown) | |||
| Line 1: | Line 1: | ||
{{Related|Aerbax's Citadel (POI)|2008/02 - Aerbax's Defeat}} ''(Live Event)'' | |||
''' | |||
{{Links Header|'''[[Empowered Armor of Perfect Light Sets|Empowered Armor of Perfect Light Quests]]'''<br> | |||
[[Black Death Catacombs Quiddity Seed Quest|Black Death Catacombs Quiddity Seed]] - [[Ithaenc Quiddity Seed Quest|Ithaenc Quiddity Seed]] - [[Knorr Quiddity Seed Quest|Knorr Quiddity Seed]] - [[Aerbax's Citadel|Aerbax's Citadel]]}}<br> | |||
{{Quest Summary | {{Quest Summary | ||
| Patch Introduced = [[The Beast With Many Heads]] | | Patch Introduced = [[The Beast With Many Heads]] | ||
| Related Quests = | | Related Quests = [[Paragon Weapons]] | ||
| Updated = | | Updated = [[Foolish Ambition]],<br>[[Risks and Rewards]],<br>[[The Risen Princess]],<br>[[Spring 2014]] | ||
| | | | ||
| Live Image = | | Live Image = Aerbax's Shadow Live.jpg | ||
| Live Image Caption = | | Live Image Caption = [[Aerbax's Shadow]] | ||
| Quest Type = Locked Fellowship | | Quest Type = Locked Fellowship | ||
| Kill Task = False | | Kill Task = False | ||
| Start Location = Center of the [[Obsidian Plains]] | | Start Location = Center of the [[Obsidian Plains]] | ||
| Timer = | | Timer = 20 hours | ||
| Level Restrictions = None | | Level Restrictions = None | ||
| Level Suggestions = 180+ | | Level Suggestions = 180+ | ||
| Item Rewards = [[Aerbax's Defeat]] | | Contracts = [[Contract for Aerbax's Defeat]] | ||
| Luminance Reward = | | Item Rewards = [[Aerbax's Defeat]]<br>[[Empowered Helm of the Perfect Light]]<br>[[Empowered Girth of the Perfect Light]]<br>[[Empowered Greaves of the Perfect Light]]<br>[[Empowered Tassets of the Perfect Light]]<br>[[Fortified Mana Forge Key]] | ||
| MMD Reward = 8 | |||
| Luminance Reward = 25,000 | |||
| Max XP Reward = 400,000,000 | | Max XP Reward = 400,000,000 | ||
| Titles = | | Titles = Aerbax's Bane | ||
| | | | ||
| Link Walk Through = True | | Link Walk Through = True | ||
| Line 32: | Line 34: | ||
}} | }} | ||
== Quest Overview == | == Quest Overview == | ||
== Walk Through == | == Walk Through == | ||
# Using the [[Dangerous Portal Device]] at your mansion, portal to the center of the [[Obsidian Plains]]. | # Using the [[Dangerous Portal Device]] at your mansion, portal to the center of the [[Obsidian Plains]]. | ||
#* Alternatively, you can make a short from from the nearby [[Black Spawn Den]], | #* Alternatively, you can make a short from from the nearby [[Black Spawn Den]], tie to the [[Singularity Bore]] @ 64.1S, 63.8W, or use [[Rynthid Recall]]. | ||
# Collect 3 unique Harmonic Crystals by killing and looting them from the [[Virindi Artificer]] at each of the three gates surrounding the citadel. You only need one set of crystals per fellowship, and they are givable: | # Collect 3 unique Harmonic Crystals by killing and looting them from the [[Virindi Artificer]] at each of the three gates surrounding the citadel. You only need one set of crystals per fellowship, and they are givable: | ||
#* [[North Gate Harmonic Crystal]] - 63.3S 63.7W | #* [[North Gate Harmonic Crystal]] - 63.3S 63.7W | ||
| Line 45: | Line 46: | ||
# Once your fellow is buffed and ready, the quest leader will hand the 3 Harmonic Crystals to the [[Emissary of Asheron (Aerbax's Citadel)|Emmisary of Asheron]], which will lock the fellowship. | # Once your fellow is buffed and ready, the quest leader will hand the 3 Harmonic Crystals to the [[Emissary of Asheron (Aerbax's Citadel)|Emmisary of Asheron]], which will lock the fellowship. | ||
#* '''Note:''' Once the fellowship is locked, you have '''one hour to complete the quest'''. | #* '''Note:''' Once the fellowship is locked, you have '''one hour to complete the quest'''. | ||
# Everyone should now use the [[ | # Everyone should now use the [[Harmonic Transference Field]] to be portaled on to [[Aerbax's Citadel (POI)|citadel platform]]. | ||
#* '''Note:''' If you die, disconnect, or are portaled off the platform (yes Aerbax can do that to you), simply portal recall to the [[South Gate]] and use one of the portals at the '''TOP''' of the dungeon to be sent back to the device room. Just like before, use the [[ | #* '''Note:''' If you die, disconnect, or are portaled off the platform (yes Aerbax can do that to you), simply portal recall to the [[South Gate]] and use one of the portals at the '''TOP''' of the dungeon to be sent back to the device room. Just like before, use the [[Harmonic Transference Field]] to be portaled back to the citadel platform and join your group. | ||
# While fighting [[Aerbax's Shadow]], he will portal several times to the platforms surrounding his citadel based on his HP %. Each time he portals he will start at 100% HP, but his total HP will be reduced. | # While fighting [[Aerbax's Shadow]], he will portal several times to the platforms surrounding his citadel based on his HP %. Each time he portals he will start at 100% HP, but his total HP will be reduced. | ||
#* '''90%''' HP - Portals to '''EAST''' platform. | #* '''90%''' HP - Portals to '''EAST''' platform. | ||
| Line 53: | Line 54: | ||
#* '''60%''' HP - Portals to '''SOUTH''' platform. | #* '''60%''' HP - Portals to '''SOUTH''' platform. | ||
#* '''33%''' HP - Portals to '''CENTER''' platform. | #* '''33%''' HP - Portals to '''CENTER''' platform. | ||
# Once [[Aerbax's Shadow]] is slain, use the [[Emissary's Return Portal]] that appears to return to the [[Emissary of Asheron (Aerbax's Citadel)|Emmisary of Asheron]], and speak with him for your reward. In addition to XP | # Once [[Aerbax's Shadow]] is slain, loot an [[Aerbax Mask Shard]] from the ground and use the [[Emissary's Return Portal]] that appears to return to the [[Emissary of Asheron (Aerbax's Citadel)|Emmisary of Asheron]], and speak with him for your reward. In addition to XP you also receive a piece of armor from the [[Empowered Armor of the Perfect Light]] set. | ||
#* '''1st Run:''' [[Empowered Helm of the Perfect Light]] | #* '''1st Run:''' [[Empowered Helm of the Perfect Light]] | ||
#* '''2nd Run:''' [[Empowered Girth of the Perfect Light]] | #* '''2nd Run:''' [[Empowered Girth of the Perfect Light]] | ||
#* '''3rd Run:''' [[Empowered Greaves of the Perfect Light]] | #* '''3rd Run:''' [[Empowered Greaves of the Perfect Light]] | ||
#* '''4th Run:''' [[Empowered Tassets of the Perfect Light]] | #* '''4th Run:''' [[Empowered Tassets of the Perfect Light]] | ||
#* | #* As of [[The Risen Princess]] event, the 4 rewards now cycle. | ||
'''Note:''' [[Aerbax's Shadow]] is worth about 200 million xp when killed. | '''Note:''' [[Aerbax's Shadow]] is worth about 200 million xp when killed. | ||
| Line 76: | Line 77: | ||
== Items == | == Items == | ||
{{Item Table | {{Item Table|Caption=Quest Items | ||
|Caption=Quest Items | | North Gate Harmonic Crystal | ||
|North Gate Harmonic Crystal | | East Gate Harmonic Crystal | ||
|East Gate Harmonic Crystal | | West Gate Harmonic Crystal | ||
|West Gate Harmonic Crystal | | Harmonic Transference Field | ||
| | |||
}} | }} | ||
{{Item Table | {{Item Table|Caption=Rewards | ||
|Caption= | | Aerbax Mask Shard | ||
|Aerbax Mask Shard | | Empowered Helm of the Perfect Light | ||
| | | Empowered Girth of the Perfect Light | ||
| Empowered Greaves of the Perfect Light | |||
| Empowered Tassets of the Perfect Light | |||
| Fortified Mana Forge Key | |||
}} | }} | ||
| Line 103: | Line 99: | ||
{{Quest Task | {{Quest Task | ||
| Description = Speak to the [[Emissary of Asheron]] after deafeating [[Aerbax's Shadow]] | | Description = Speak to the [[Emissary of Asheron]] after deafeating [[Aerbax's Shadow]] | ||
| Max XP = | | Max XP = 400,000,000 | ||
| Percent of Level = 100 | | Percent of Level = 100 | ||
| Level Cap = 201 | | Level Cap = 201 | ||
| Line 116: | Line 112: | ||
| Table Rows = | | Table Rows = | ||
{{Title | {{Title | ||
| Title = Aerbax | | Title = Aerbax's Bane | ||
| Task = Speak to the [[Emissary of Asheron]] after deafeating [[Aerbax's Shadow]] | | Task = Speak to the [[Emissary of Asheron]] after deafeating [[Aerbax's Shadow]] | ||
}} | }} | ||
}} | }} | ||
== Images == | == Images == | ||
<gallery widths=200px heights=200px perrow=3> | <gallery widths=200px heights=200px perrow=3> | ||
File:Harmonic Transference Field Live.jpg|Harmonic Transference Field | |||
File:Citadel from below.jpg|Aerbax's Citadel from Below | |||
File:pathup.jpg|Path up to the Citadel from the Platform | |||
File:Aerbaxcenter.jpg|Aerbax at the Center | |||
File:Aerbaxplatform.jpg|Aerbax on a Platform | |||
</gallery> | </gallery> | ||
| Line 141: | Line 129: | ||
'''Speaking with Emissary of Asheron:''' | '''Speaking with Emissary of Asheron:''' | ||
<br> | <br> | ||
<font color=darkgoldenrod>Emissary of Asheron tells you, "Good, you made it." | <font color=darkgoldenrod>Emissary of Asheron tells you, "Good, you made it."<br> | ||
Emissary of Asheron tells you, "I have been sent here by Lord Asheron to help you stop Aerbax."<br> | |||
Emissary of Asheron tells you, "I have been sent here by Lord Asheron to help you stop Aerbax." | Emissary of Asheron tells you, "I have been unable to destroy this device. Aerbax realized what you were doing and protected his last device somehow."<br> | ||
Emissary of Asheron tells you, "However, I have studied the device and believe there is a way to use it's resonant magic field."<br>Emissary of Asheron tells you, "Scouts report that Aerbax's forces are even now attempting to repair the other devices you destroyed. Return to the other Gates and bring me back the crystals they are using to repair the devices. Once I have all three crystals I believe I can send a fellowship of you through to the platforms above."</font> | |||
Emissary of Asheron tells you, "I have been unable to destroy this device. Aerbax realized what you were doing and protected his last device somehow." | |||
Emissary of Asheron tells you, "However, I have studied the device and believe there is a way to use it's resonant magic field." | |||
<br> | |||
Emissary of Asheron tells you, "Scouts report that Aerbax's forces are even now attempting to repair the other devices you destroyed. Return to the other Gates and bring me back the crystals they are using to repair the devices. Once I have all three crystals I believe I can send a fellowship of you through to the platforms above."</font> | |||
---- | ---- | ||
'''Turning in Harmonic Crystals:'''<br> | |||
'''Turning in Harmonic Crystals:''' | <font color=green>You give Emissary of Asheron West Gate Harmonic Crystal.</font><br> | ||
<br> | <font color=darkgoldenrod>Emissary of Asheron tells you, "You haven't brought me the East Gate Harmonic Crystal yet."</font><br><font color=darkgoldenrod>Emissary of Asheron tells you, "You haven't brought me the North Gate Harmonic Crystal yet."</font><br> | ||
<font color=green>You give Emissary of Asheron West Gate Harmonic Crystal.</font | <font color=darkgoldenrod>Emissary of Asheron tells you, "Return to me when you have them and I will prepare you and a Fellowship of your choosing for travel to Aerbax's Platforms above."</font><br> | ||
<font color=green>You give Emissary of Asheron North Gate Harmonic Crystal.</font><br> | |||
<font color=darkgoldenrod>Emissary of Asheron tells you, "You haven't brought me the East Gate Harmonic Crystal yet."</font> | <font color=darkgoldenrod>Emissary of Asheron tells you, "You haven't brought me the East Gate Harmonic Crystal yet."</font><br> | ||
<br> | <font color=darkgoldenrod>Emissary of Asheron tells you, "Return to me when you have them and I will prepare you and a Fellowship of your choosing for travel to Aerbax's Platforms above."</font><br> | ||
<font color=darkgoldenrod>Emissary of Asheron tells you, "You haven't brought me the North Gate Harmonic Crystal yet."</font | <font color=green>You give Emissary of Asheron East Gate Harmonic Crystal.</font><br> | ||
<font color=darkgoldenrod>Emissary of Asheron tells you, "Excellent! You have brought me all three Harmonic Crystals."</font><br> | |||
<font color=darkgoldenrod>Emissary of Asheron tells you, "Return to me when you have them and I will prepare you and a Fellowship of your choosing for travel to Aerbax's Platforms above." | <font color=darkgoldenrod>Emissary of Asheron tells you, "Have you prepared a fellowship friend?"</font><br> | ||
<font color=darkgoldenrod>[Fellowship] Emissary of Asheron says, "Good, I am attuning your fellowship to the resonant magic field surrounding the device. Be warned, this spell will only allow you access to Aerbax's platforms for one hour before it fails and Aerbax expels you."</font><br> | |||
<font color=green>You give Emissary of Asheron North Gate Harmonic Crystal.</font | <font color=darkgoldenrod>[Fellowship] Emissary of Asheron says, "Please return to me if you succeed in defeating Aerbax and I will reward you."</font><br> | ||
<font color=green>Your fellowship is now locked. You may not recruit new members. If you leave the fellowship, you have 15 minutes to be recruited back into the fellowship.</font> | |||
<font color=darkgoldenrod>Emissary of Asheron tells you, "You haven't brought me the East Gate Harmonic Crystal yet."</font | |||
<font color=darkgoldenrod>Emissary of Asheron tells you, "Return to me when you have them and I will prepare you and a Fellowship of your choosing for travel to Aerbax's Platforms above."</font | |||
<font color=green>You give Emissary of Asheron East Gate Harmonic Crystal.</font | |||
<font color=darkgoldenrod>Emissary of Asheron tells you, "Excellent! You have brought me all three Harmonic Crystals."</font | |||
<font color=darkgoldenrod>Emissary of Asheron tells you, "Have you prepared a fellowship friend?"</font | |||
<font color=darkgoldenrod>[Fellowship] Emissary of Asheron says, "Good, I am attuning your fellowship to the resonant magic field surrounding the device. Be warned, this spell will only allow you access to Aerbax's platforms for one hour before it fails and Aerbax expels you."</font | |||
<font color=darkgoldenrod>[Fellowship] Emissary of Asheron says, "Please return to me if you succeed in defeating Aerbax and I will reward you."</font | |||
<font color=green>Your fellowship is now locked. You may not recruit new members. If you leave the fellowship, you have 15 minutes to be recruited back into the fellowship. | |||
---- | ---- | ||
<font color=darkgoldenrod>Aerbax's Shadow tells you, "I am Aerbax. I am afraid that I must end some of you in a moment. Take comfort in the knowledge that you have facilitated a great awakening of all sentient races on Dereth."</font> | |||
<font color= | |||
---- | ---- | ||
'''Reward text for first fellowship:'''<br> | |||
'''Reward text for first fellowship:''' | <font color=green>You've earned 1,000,000,000 experience.<br> | ||
<br> | |||
<font color=green>You've earned 1,000,000,000 experience. | |||
Emissary of Asheron gives you Empowered Helm of the Perfect Light.</font> | Emissary of Asheron gives you Empowered Helm of the Perfect Light.</font> | ||
---- | ---- | ||
'''Repeating the quest after earning all four pieces of armor:'''<br> | |||
<font color=darkgoldenrod>Emissary of Asheron tells you, "Well done! Aerbax's Shadow has lost his hold on the planar energies his device has been extracting. We must stay vigilant for he will continue to gain power as long as he holds the platforms. Return in 29 days to defeat Aerbax's Shadow again and I will reward you further."</font><br> | |||
<font color=green>You've earned 400,000,000 experience.</font><br> | |||
'''Repeating the quest after earning all four pieces of armor:''' | |||
<font color=darkgoldenrod>Emissary of Asheron tells you, "Well done! Aerbax's Shadow has lost his hold on the planar energies his device has been extracting. We must stay vigilant for he will continue to gain power as long as he holds the platforms. Return in 29 days to defeat Aerbax's Shadow again and I will reward you further."</font | |||
<font color=green>You've earned 400,000,000 experience.</font | |||
<font color=darkgoldenrod>Emissary of Asheron tells you, "I see you have completed the Perfect Light Armor Set. I am impressed human."</font> | <font color=darkgoldenrod>Emissary of Asheron tells you, "I see you have completed the Perfect Light Armor Set. I am impressed human."</font> | ||
== Notes == | == Notes == | ||
* During [[The Risen Princess]] event the quest was updated and should now cycle through the armor rewards correctly. | |||
* During the [[Risks and Rewards]] event, a [[Fortified Mana Forge Key]] was added as one of the rewards. | |||
* During the [[Foolish Ambition]] event, a [[Empowered Girth of the Perfect Light]] was added as one of the rewards. Other bugs and fixes were also made such as timer estimates for fellows waiting to start as well as the ability to skip straight to the portal device at the end. | |||
* As part for the [[Spring 2014]] update the mask shard can be brought to [[Summercrown]] to acquire the [[Luminous Amber of the 3rd Tier Paragon]]. | |||
[[Category:MMD Reward]] | |||
[[Category: | |||
Latest revision as of 08:27, 21 January 2017
Related topics: Aerbax's Citadel (POI), 2008/02 - Aerbax's Defeat (Live Event)
|
Empowered Armor of Perfect Light Quests Black Death Catacombs Quiddity Seed - Ithaenc Quiddity Seed - Knorr Quiddity Seed - Aerbax's Citadel |
| Walk Through ___ Maps ___ Items ___ XP ___ Titles ___ Images ___ Lore & Dialog ___ Notes |
| |||||||||||||||||||||||||||||||||||||||
 | |||||||||||||||||||||||||||||||||||||||
Quest Overview
Walk Through
- Using the Dangerous Portal Device at your mansion, portal to the center of the Obsidian Plains.
- Alternatively, you can make a short from from the nearby Black Spawn Den, tie to the Singularity Bore @ 64.1S, 63.8W, or use Rynthid Recall.
- Collect 3 unique Harmonic Crystals by killing and looting them from the Virindi Artificer at each of the three gates surrounding the citadel. You only need one set of crystals per fellowship, and they are givable:
- North Gate Harmonic Crystal - 63.3S 63.7W
- East Gate Harmonic Crystal - 64.0S 62.9W
- West Gate Harmonic Crystal - 64.1S 64.7W
- When you have your crystals, your fellowship (max 9 people) will enter the South Gate portal (tieable & recallable) @ 65.0S 63.8W and run to the very bottom.
- Note: Its a long run to the bottom, but its safe. Make sure you have everything you need for the quest before making the trip.
- Once your fellow is buffed and ready, the quest leader will hand the 3 Harmonic Crystals to the Emmisary of Asheron, which will lock the fellowship.
- Note: Once the fellowship is locked, you have one hour to complete the quest.
- Everyone should now use the Harmonic Transference Field to be portaled on to citadel platform.
- Note: If you die, disconnect, or are portaled off the platform (yes Aerbax can do that to you), simply portal recall to the South Gate and use one of the portals at the TOP of the dungeon to be sent back to the device room. Just like before, use the Harmonic Transference Field to be portaled back to the citadel platform and join your group.
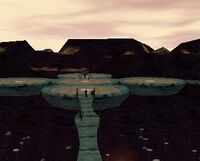
- While fighting Aerbax's Shadow, he will portal several times to the platforms surrounding his citadel based on his HP %. Each time he portals he will start at 100% HP, but his total HP will be reduced.
- 90% HP - Portals to EAST platform.
- 77% HP - Portals to NORTH platform.
- 72% HP - Portals to WEST platform.
- 60% HP - Portals to SOUTH platform.
- 33% HP - Portals to CENTER platform.
- Once Aerbax's Shadow is slain, loot an Aerbax Mask Shard from the ground and use the Emissary's Return Portal that appears to return to the Emmisary of Asheron, and speak with him for your reward. In addition to XP you also receive a piece of armor from the Empowered Armor of the Perfect Light set.
- 1st Run: Empowered Helm of the Perfect Light
- 2nd Run: Empowered Girth of the Perfect Light
- 3rd Run: Empowered Greaves of the Perfect Light
- 4th Run: Empowered Tassets of the Perfect Light
- As of The Risen Princess event, the 4 rewards now cycle.
Note: Aerbax's Shadow is worth about 200 million xp when killed.
Maps
| Dungeon | Coordinates | Wiki Map | ACmaps | Other | Quests |
| South Gate | 65.0S 63.8W | -- | -- | -- |
Items
| Quest Items | ||||||||
| North Gate Harmonic Crystal | East Gate Harmonic Crystal | West Gate Harmonic Crystal | Harmonic Transference Field | |||||
Experience Rewards
| Task Required | First Run Max Experience | Percentage & Level Cap | Repeated Run Max XP | Repeated Run Percentage & Level Cap | |
| Speak to the Emissary of Asheron after deafeating Aerbax's Shadow | 400,000,000xp |
100% up to level 201 |
400,000,000xp | 40% up to level 201 | |
|
| |||||
| See Level Costs for per level information. | |||||
Title Rewards
| Task Required | Title Reward |
| Speak to the Emissary of Asheron after deafeating Aerbax's Shadow | Aerbax's Bane |
|
| |
| See Titles for a list of all available titles. | |
Images
-
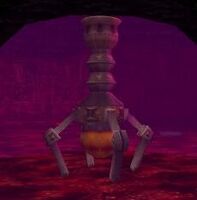
Harmonic Transference Field
-
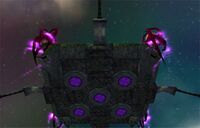
Aerbax's Citadel from Below
-
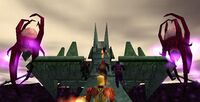
Path up to the Citadel from the Platform
-
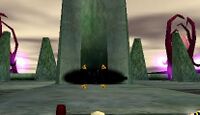
Aerbax at the Center
-
Aerbax on a Platform
Lore & Dialog
Speaking with Emissary of Asheron:
Emissary of Asheron tells you, "Good, you made it."
Emissary of Asheron tells you, "I have been sent here by Lord Asheron to help you stop Aerbax."
Emissary of Asheron tells you, "I have been unable to destroy this device. Aerbax realized what you were doing and protected his last device somehow."
Emissary of Asheron tells you, "However, I have studied the device and believe there is a way to use it's resonant magic field."
Emissary of Asheron tells you, "Scouts report that Aerbax's forces are even now attempting to repair the other devices you destroyed. Return to the other Gates and bring me back the crystals they are using to repair the devices. Once I have all three crystals I believe I can send a fellowship of you through to the platforms above."
Turning in Harmonic Crystals:
You give Emissary of Asheron West Gate Harmonic Crystal.
Emissary of Asheron tells you, "You haven't brought me the East Gate Harmonic Crystal yet."
Emissary of Asheron tells you, "You haven't brought me the North Gate Harmonic Crystal yet."
Emissary of Asheron tells you, "Return to me when you have them and I will prepare you and a Fellowship of your choosing for travel to Aerbax's Platforms above."
You give Emissary of Asheron North Gate Harmonic Crystal.
Emissary of Asheron tells you, "You haven't brought me the East Gate Harmonic Crystal yet."
Emissary of Asheron tells you, "Return to me when you have them and I will prepare you and a Fellowship of your choosing for travel to Aerbax's Platforms above."
You give Emissary of Asheron East Gate Harmonic Crystal.
Emissary of Asheron tells you, "Excellent! You have brought me all three Harmonic Crystals."
Emissary of Asheron tells you, "Have you prepared a fellowship friend?"
[Fellowship] Emissary of Asheron says, "Good, I am attuning your fellowship to the resonant magic field surrounding the device. Be warned, this spell will only allow you access to Aerbax's platforms for one hour before it fails and Aerbax expels you."
[Fellowship] Emissary of Asheron says, "Please return to me if you succeed in defeating Aerbax and I will reward you."
Your fellowship is now locked. You may not recruit new members. If you leave the fellowship, you have 15 minutes to be recruited back into the fellowship.
Aerbax's Shadow tells you, "I am Aerbax. I am afraid that I must end some of you in a moment. Take comfort in the knowledge that you have facilitated a great awakening of all sentient races on Dereth."
Reward text for first fellowship:
You've earned 1,000,000,000 experience.
Emissary of Asheron gives you Empowered Helm of the Perfect Light.
Repeating the quest after earning all four pieces of armor:
Emissary of Asheron tells you, "Well done! Aerbax's Shadow has lost his hold on the planar energies his device has been extracting. We must stay vigilant for he will continue to gain power as long as he holds the platforms. Return in 29 days to defeat Aerbax's Shadow again and I will reward you further."
You've earned 400,000,000 experience.
Emissary of Asheron tells you, "I see you have completed the Perfect Light Armor Set. I am impressed human."
Notes
- During The Risen Princess event the quest was updated and should now cycle through the armor rewards correctly.
- During the Risks and Rewards event, a Fortified Mana Forge Key was added as one of the rewards.
- During the Foolish Ambition event, a Empowered Girth of the Perfect Light was added as one of the rewards. Other bugs and fixes were also made such as timer estimates for fellows waiting to start as well as the ability to skip straight to the portal device at the end.
- As part for the Spring 2014 update the mask shard can be brought to Summercrown to acquire the Luminous Amber of the 3rd Tier Paragon.
