Clutch of Kings (Browerk): Difference between revisions
imported>Atarax |
imported>Zen1605 No edit summary |
||
| (194 intermediate revisions by 11 users not shown) | |||
| Line 1: | Line 1: | ||
{{ | {{Links Header|'''[[Clutch of Kings]]'''<br>[[Clutch of Kings (Reeshan)|Reeshan]] - [[Clutch of Kings (Kiree)|Kiree]] - [[Clutch of Kings (Broodu)|Broodu]] - [[Clutch of Kings (Keerik)|Keerik]] - [[Clutch of Kings (Rehir)|Rehir]] - [[Clutch of Kings (Browerk)|Browerk]]}}<br> | ||
{{Quest Summary | |||
[[ | | Patch Introduced = [[On Bended Knee]] | ||
| Related Quests = [[Clutch of Kings]] | |||
| Updated = [[Unfinished Business]] | |||
| | | | ||
| Live Image = Clutch of Kings (Browerk) Live.jpg | |||
| | | Live Image Caption = Browerk. | ||
| | | Quest Type = Group | ||
| Kill Task = False | |||
| | | Start Location = [[Ayan Baqur]] | ||
| | | Timer = 20 Hours | ||
| Level Restrictions = 60+ | |||
| | | Level Suggestions = 80+ | ||
| Contracts = [[Contract for Clutch of Kings: Browerk]] | |||
| Item Rewards = [[Ancient Armored Helm]]<br>[[Browerk's Hide]]<br>[[Armsman's Robe]]<br>[[Dangerous Portal Device]]<br>[[Gem of Damage Addition]]<br>[[Gem of Damage Modification]]<br>[[Gem of Mana Management]]<br>[[Gem of Inner Brilliance]]<br>[[Mana Forge Key]] (125+) | |||
| Luminance Reward = | |||
| | | Max XP Reward = 56,184,660 (+50,000,000 possible reward) | ||
| Titles = Browerk Killer | |||
| Browerk Killer | | | ||
| | | Link Walk Through = True | ||
| Link Maps = True | |||
| | | Link Items = True | ||
| | | Link XP Rewards = True | ||
| Link Title Rewards = True | |||
| | | Link Images = True | ||
| | | Link Lore & Dialog = True | ||
| Link Notes = True | |||
| | }} | ||
| | == Quest Overview == | ||
* This is the last of six part [[Clutch of Kings]] quest series. | |||
* The quest consists mostly of [[Burun]], so frost weapons are recommended. | |||
* To access [[Xi Ru's Island]], speak to the [[Watcher of the Dead]] at 60.1S, 88.1W in [[Ayan Baqur]]. | |||
*: <font color="cornflowerblue">Watcher of the Dead teleports you with Access to Xi Ru's Font.</font> | |||
** '''Note:''' If the Watcher of the Dead is not there, this means the quest is in progress by another group, and you must wait until the 3 hour timer is up. | |||
** '''Note:''' If you cannot enter a font portal, the statue will not speak with you, or you cannot enter the portal that is summoned in the floating tower, you just need to speak to the [[Watcher of the Dead]] in Ayan again to refresh your flag. | |||
== | == Walk Through == | ||
=== Part 1: Xi Ru's Island (Preparation) === | |||
* To setup this quest, there are four [[Sealed Valve]]s that must be opened; each is located at the bottom of one of the four "Font Dungeons". This preparation can be completed ahead of time by 1 high level person with [[Lockpick]]. | |||
===== Steamy Font (North) ===== | |||
# Enter the [[Steamy Font]] at 91.1S, 89.6E | |||
# From the drop, go '''North''' and take your second '''Right''', and head up the ramp. | |||
# Work your way up the ramps until you reach a locked gate. Unlock it, and flip the lever inside. | |||
# Backtrack the drop and jump down, through the now open gate in the floor. | |||
# From here, Take the North ramp down and follow the ramps down to the bottom floor. | |||
# Pick the locks to the '''East''' and '''West''' doors, and flip the levers inside each. | |||
# Backtrack to the drop, and now take the West ramp down and follow the ramps down to the bottom floor. | |||
# Use the [[Sealed Valve]] on the West side of the room, then take the exit portal to the East: | |||
#: <font color="green">With a hiss, steam begins pouring forth from a fissure deep beneath the crust of the world. A column of heat rises to the pool above this area producing a massive amount of energy.</font> | |||
===== Balmy Font (South) ===== | |||
# Enter the [[Balmy Font]] at 91.5S, 89.7E. | |||
# From the drop, go '''South''' and take your second '''Left''', and head up the ramp. | |||
# Work your way up the ramps until you reach a locked gate. Unlock it, and flip the lever inside. | |||
# Backtrack the drop and jump down, through the now open gate in the floor. | |||
# From here, Take the North ramp down and follow the ramps down to the bottom floor. | |||
# Pick the locks to the '''North''' and '''South''' doors, and flip the levers inside each. | |||
# Backtrack to the drop, and now take the West ramp down and follow the ramps down to the bottom floor. | |||
# Use the [[Sealed Valve]] on the West side of the room, then take the exit portal to the East: | |||
#: <font color="green">With a hiss, steam begins pouring forth from a fissure deep beneath the crust of the world. A column of heat rises to the pool above this area producing a massive amount of energy.</font> | |||
===== Humid Font (East) ===== | |||
# Enter the [[Humid Font]] at 91.3S, 89.8E | |||
# From the drop, go '''South''' and take your second '''Right''', and head up the ramp. | |||
# Work your way up the ramps until you reach a locked gate. Unlock it, and flip the lever inside. | |||
# Backtrack the drop and jump down, through the now open gate in the floor. | |||
# From here, Take the North ramp down and follow the ramps down to the bottom floor. | |||
# Pick the locks to the '''North''' and '''West''' doors, and flip the levers inside each. | |||
# Backtrack to the drop, and now take the West ramp down and follow the ramps down to the bottom floor. | |||
# Use the [[Sealed Valve]] on the West side of the room, then take the exit portal to the East: | |||
#: <font color="green">With a hiss, steam begins pouring forth from a fissure deep beneath the crust of the world. A column of heat rises to the pool above this area producing a massive amount of energy.</font> | |||
== | ===== Muggy Font (West) ===== | ||
# Enter the [[Muggy Font]] at 91.5S, 89.4E | |||
# From the drop, go '''North''' and take your second '''Left''', and head up the ramp. | |||
# Work your way up the ramps until you reach a locked gate. Unlock it, and flip the lever inside. | |||
# Backtrack the drop and jump down, through the now open gate in the floor. | |||
# From here, Take the North ramp down and follow the ramps down to the bottom floor. | |||
# Pick the locks to the '''North''' and '''East''' doors, and flip the levers inside each. | |||
# Backtrack to the drop, and now take the West ramp down and follow the ramps down to the bottom floor. | |||
# Use the [[Sealed Valve]] on the West side of the room, then take the exit portal to the East: | |||
#: <font color="green">With a hiss, steam begins pouring forth from a fissure deep beneath the crust of the world. A column of heat rises to the pool above this area producing a massive amount of energy.</font> | |||
===== Font Guardian (Font Tower) ===== | |||
* At this point, all 4 [[Sealed Valve]]s should be open and the quest is now live. The rest of the group should join you at this point. | |||
# When the group is ready, everyone should run to the top of the [[Font Tower]] at 91.3S, 89.5E, and jump to the adjacent floating platform to the south where the [[Font Guardian]] is located. | |||
# After everyone has made the jump, one person should talk to the [[Font Guardian]], and everyone should use the portal to [[Qin Xikit's Hidden Crown]], that spawns down the stairs. | |||
#* The portal remains open for 20 minutes. | |||
---- | |||
=== | === Part 2: Qin Xikit's Hidden Crown === | ||
# | # From the drop, pull the lever on the south wall, and then head North into the room ahead. | ||
# | # '''ONE''' person should now use the [[Ensorcelled Dais]], which will give them [[Qin Xikit's Crown]] and spawn several [[Ancient Sentinel]]s and an [[Ancient Defender]] (Ghosts): | ||
#: <font color="green">As <Player Name> lifts the crown from the dais, a thin wisp of light is pulled forward. A great protector has been disturbed. The only way to open the door leading from this chamber is to defeat the defender. Only then could one use the crown to unseal the way to Qin Xikit's temple.</font> | |||
# | # Kill the Ancient Defender, and then head through the door that opens to the North, and down the ramp (either direction). | ||
# | # Use the lever on the south wall, and then enter the room to the North. | ||
# | # The person who has Qin Xikit's Crown must hand it to the [[Enchanted Dais]] in this room, which will spawn a portal to Qin Xikit's Island. Take it. | ||
=== | === Part 3A: Qin Xikit's Island === | ||
# | # From the drop, run Northwest until you reach a large temple. | ||
# | # Run to the top of the temple, go inside, and shift-jump down to the bottom. | ||
# | # To activate the Portal Device, all 4 eyes (north, south, east, west) must be used one time. Be careful, each time you use an eye, you will receive 5% vitae. | ||
# | #* '''Tip:''' Have 4 separate people each use one eye in order to spread the vitae around. | ||
# | # Once all 4 eyes are used, head back to the middle and use the Portal Device to be portaled to [[Qin Xikit's Antechamber]]: | ||
#: <font color="cornflowerblue">Portal Device teleports you with Qin Xikit's Antechamber.</font> | |||
See | === Part 3B: Qin Xikit's Antechamber === | ||
# From the drop, take the hallway on the North wall. Hug the right wall, and work your way through the dungeon until you come to another Portal Device. | |||
#* '''Note:''' There are two spots in the dungeon where you'll have to flip levers/floor plates in order to open doors. See the map for more info. | |||
# Use the [[Guardian]] statue that is located just to the right of the Portal Device ('''NOT''' the Portal Device itself) to be portaled into the [[Secrets of Qin Xikit's Temple]]. | |||
#: <font color="cornflowerblue">Guardian teleports you with Secrets of Qin Xikit's Temple</font> | |||
=== | === Part 4: Secrets of Qin Xikit's Temple === | ||
# | # From the drop, jump down into the pit in front of you and move into the next room. | ||
# | # All must pick up an [[Empty Water Skin]] from the floor, and fill it with 6 pints of blood by using it on the [[Pool of Blood]] 6 times. | ||
# | # Once your Water Skin has 6 pints, hand it to the West [[Sacrificial Statue]] to pass the trial: | ||
# | #: <font color="darkgoldenrod">Sacrificial Statue tells you, "Your sacrifice has been accepted, you may now proceed to the next room."</font> | ||
#* '''Note:''' You can also fill the Water Skin with 9 or 10 pints of blood and hand it to the East or South Statues, respectively. | |||
# You | # Once you've passed the trial, go to the South room, jump down into the pit, and use the Exit Portal to go to [[Qin Xikit's Temple]]. | ||
# | |||
=== | === Part 5: Qin Xikit's Temple === | ||
# | # From the portal drop, hug the left wall all the way to the end of the dungeon, where you'll find a [[Guardian]] statue. | ||
# '''Note:''' Once you pass through the octagonal type room, and go through a short narrow hallway, you'll need to descend a 2nd ramp. See the map for details. | |||
# Use the Guardian to be portaled into [[Qin Xikit's Tomb]]: | |||
#: <font color="cornflowerblue">Guardian teleports you with Qin Xikit's Tomb.</font> | |||
# | |||
# | |||
=== | === Part 6: Qin Xikit's Tomb === | ||
# | # From the drop, use the [[Sarcophagus of High Matriarch Qin Xikit]] on the North wall, which will give you the [[Ancient Armored Helm]], a piece of [[Ancient Armor]]. | ||
# | # Use the Portal Device on the West wall to be portaled into [[Qin Xikit's Receiving Chamber]], the last dungeon. | ||
#: <font color="cornflowerblue">Portal Device teleports you with Qin Xikit's Receiving Chamber.</font> | |||
#* '''Note:''' You will receive 5% vitae upon using the Portal Device. | |||
=== | === Part 7: Qin Xikit's Receiving Chamber === | ||
# | # Work your way North through the dungeon to the end, where you'll find the end boss, [[Browerk]], sitting in his throne room. | ||
# | #* '''Note:''' If you choose, you can work off vitae in the first part of the dungeon before reaching the boss. | ||
# | # There are several things to know before going into the fight with Browerk, review these tactics: | ||
# | #* Do not debuff him, he counters most debuffs. | ||
# | #* Disband your fellowship before going into battle. Browerk casts ''Fellowship Debuffs'', so you lessen the chance to be debuffed when not in a fellowship. | ||
# See [[ | #* If you are swallowed (portaled into Browerk's stomach), quickly switch to a [[Critical Strike]] weapon, and attack his [[Stomach Wall]] on full speed. You have only have a percent chance of escaping his stomach when you land a critical hit. | ||
#** '''Tip:''' If you're a mage, use wall spells for a greater chance to critical hit. | |||
# Once you kill Browerk, loot [[Browerk's Hide]] from the floor. | |||
# Speak to [[Guard Haigh]] at 25.7N, 48.9E in [[Cragstone]] for your XP and random reward. | |||
# '''<font color="green">[OPTIONAL]</font>''' Hand Browerk's Hide to Guard Haigh for the title of ''Browerk Killer''. | |||
#* '''Note:''' Hold on to the hide if you are trying to obtain the ''Kingslayer'' title. See the [[Clutch of Kings]] for more information. | |||
== Maps == | |||
{{Dungeon Table | |||
| Table Rows = | |||
{{Dungeon Maps | |||
| Dungeon = Steamy Font | |||
| Coordinates = 91.1S, 89.6E | |||
| Wiki Map File = | |||
| ACmaps ID = 0198 | |||
| Other Site Name = | |||
| Other Site Link = | |||
}} | |||
{{Dungeon Maps | |||
| Dungeon = Humid Font | |||
| Coordinates = 91.3S, 89.8E | |||
| Wiki Map File = | |||
| ACmaps ID = 0176 | |||
| Other Site Name = | |||
| Other Site Link = | |||
}} | |||
{{Dungeon Maps | |||
| Dungeon = Balmy Font | |||
| Coordinates = 91.5S, 89.7E | |||
| Wiki Map File = | |||
| ACmaps ID = 01D1 | |||
| Other Site Name = | |||
| Other Site Link = | |||
}} | |||
{{Dungeon Maps | |||
| Dungeon = Muggy Font | |||
| Coordinates = 91.5S, 89.4E | |||
| Wiki Map File = | |||
| ACmaps ID = 0175 | |||
| Other Site Name = | |||
| Other Site Link = | |||
}} | |||
{{Dungeon Maps | |||
| Dungeon = Qin Xikit's Hidden Crown | |||
| Coordinates = | |||
| Wiki Map File = | |||
| ACmaps ID = 00F2 | |||
| Other Site Name = | |||
| Other Site Link = | |||
}} | |||
{{Dungeon Maps | |||
| Dungeon = Qin Xikit's Antechamber | |||
| Coordinates = | |||
| Wiki Map File = | |||
| ACmaps ID = 00F9 | |||
| Other Site Name = | |||
| Other Site Link = | |||
}} | |||
{{Dungeon Maps | |||
| Dungeon = Secrets of Qin Xikit's Temple | |||
| Coordinates = | |||
| Wiki Map File = | |||
| ACmaps ID = 0160 | |||
| Other Site Name = | |||
| Other Site Link = | |||
}} | |||
{{Dungeon Maps | |||
| Dungeon = Qin Xikit's Temple | |||
| Coordinates = | |||
| Wiki Map File = | |||
| ACmaps ID = 02D8 | |||
| Other Site Name = | |||
| Other Site Link = | |||
}} | |||
{{Dungeon Maps | |||
| Dungeon = Qin Xikit's Receiving Chamber | |||
| Coordinates = | |||
| Wiki Map File = | |||
| ACmaps ID = 00F3 | |||
| Other Site Name = | |||
| Other Site Link = | |||
}} | |||
}} | |||
== Items == | == Items == | ||
== | {{Item Table Three|Caption=Quest Items | ||
| Empty Water Skin | |||
| Enchanted Dais | |||
| Pool of Blood | |||
| Qin Xikit's Crown | |||
| Sacrificial Statue | |||
| Sarcophagus of High Matriarch Qin Xikit | |||
}} | |||
{{Item Table Three|Caption=Rewards | |||
| Ancient Armored Helm | |||
| Browerk's Hide | |||
| Armsman's Robe | |||
| Dangerous Portal Device | |||
| Gem of Damage Addition | |||
| Gem of Damage Modification | |||
| Gem of Mana Management | |||
| Gem of Inner Brilliance | |||
| Mana Forge Key | |||
}} | |||
== Experience Rewards == | |||
{{Quest Experience Table | |||
| Repeat Differs = False | |||
| Table Rows = | |||
{{Quest Task | |||
| Description = Defeat [[Browerk]] and speak to [[Guard Haigh]] | |||
| Max XP = 56,184,660 | |||
| Percent of Level = 33 | |||
| Level Cap = 130 | |||
}} | |||
}} | |||
== Title Rewards == | |||
{{Title Rewards Table | |||
| Table Rows = | |||
{{Title | |||
| Title = Browerk Killer | |||
| Task = Hand [[Browerk's Hide]] to [[Guard Haigh]] | |||
}} | |||
}} | |||
== Images == | == Images == | ||
<gallery widths=200px heights=200px perrow=4> | |||
File:Dangerous Portal Device Live.jpg|Dangerous Portal Device | |||
File:Ancient Armored Helm (100+) Live.jpg|Ancient Armored Helm | |||
File:Armsman's Robe Live.jpg|Armsman's Robe | |||
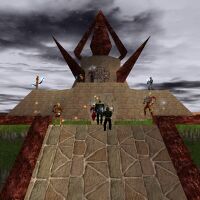
File:Clutch of Kings (Browerk) Image 1.jpg|Aerial Shot of Qin Xikit's Temple | |||
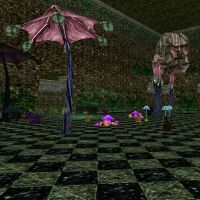
File:Clutch of Kings (Browerk) Image 2.jpg|Closeup of Qin Xikit's Temple | |||
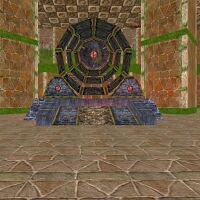
File:Clutch of Kings (Browerk) Image 3.jpg|Portal Device (Qin Xikit's Temple) | |||
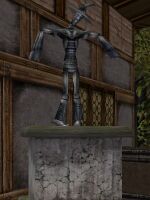
File:Clutch of Kings (Browerk) Image 4.jpg|Guardian of Qin Xikit's Temple | |||
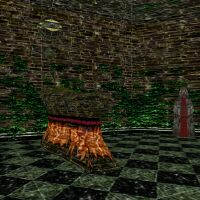
File:Clutch of Kings (Browerk) Image 5.jpg|Sarcophagus of High Matriarch Qin Xikit | |||
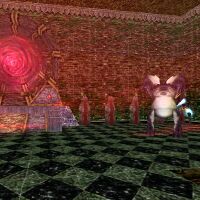
File:Clutch of Kings (Browerk) Image 6.jpg|Browerk's Throne Room | |||
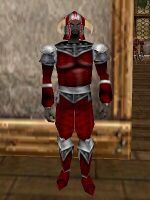
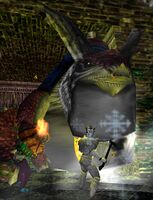
File:Browerk Live.jpg|King Browerk | |||
</gallery> | |||
== Lore & Dialog == | == Lore & Dialog == | ||
| Line 133: | Line 294: | ||
Watcher of the Dead tells you, "Seek her crown. Xi Ru consumed in madness, sealed Qin Xikit away. The crown must be found and the gateway to Qin Xikit's temple must be opened. At long last I can see Xi Ru's island, the magic that once locked it from sight has failed, a sister has succeeded at breaking the wards."<br> | Watcher of the Dead tells you, "Seek her crown. Xi Ru consumed in madness, sealed Qin Xikit away. The crown must be found and the gateway to Qin Xikit's temple must be opened. At long last I can see Xi Ru's island, the magic that once locked it from sight has failed, a sister has succeeded at breaking the wards."<br> | ||
Watcher of the Dead tells you, "Rejoice! Absolution is at hand."<br></font> | Watcher of the Dead tells you, "Rejoice! Absolution is at hand."<br></font> | ||
---- | ---- | ||
<font color=green>In the great Ziggurat of Qin Xikit, <Player Name> has struck a mortal blow against King Browerk. The bulbous leader of the Burun erupts in a violent spasm and collapses in a fit of explosive mana emissions. The leader will return in time, but the victory should be enjoyed for the moment. Huzzah, <Player Name>!<br></font> | <font color=green>In the great Ziggurat of Qin Xikit, <Player Name> has struck a mortal blow against King Browerk. The bulbous leader of the Burun erupts in a violent spasm and collapses in a fit of explosive mana emissions. The leader will return in time, but the victory should be enjoyed for the moment. Huzzah, <Player Name>!<br></font> | ||
---- | ---- | ||
<font color=green>Guard Haigh gives you Gem of Damage Addition.<br> | <font color=green>Guard Haigh gives you Gem of Damage Addition.<br> | ||
You've earned 56,184,660 experience.<br></font> | You've earned 56,184,660 experience.<br></font> | ||
<font color=darkgoldenrod>Guard Haigh tells you, "This is for your efforts against the Burun Kukuur, King Browerk. You will need to wait three weeks before returning to me for another reward. If you wish to change your title and you have a scrap of Browerk's hide I will accept the hide and name you Browerk Killer!"<br></font> | <font color=darkgoldenrod>Guard Haigh tells you, "This is for your efforts against the Burun Kukuur, King Browerk. You will need to wait three weeks before returning to me for another reward. If you wish to change your title and you have a scrap of Browerk's hide I will accept the hide and name you Browerk Killer!"<br></font> | ||
---- | |||
<font color=green>You give Guard Haigh Browerk's Hide.<br> | <font color=green>You give Guard Haigh Browerk's Hide.<br> | ||
Let it be known that <Player Name> has faced and defeated Browerk! Let it be known that from this day forth <Player Name> shall be known as Browerk Killer! Huzzah! Huzzah! Huzzah! | Let it be known that <Player Name> has faced and defeated Browerk! Let it be known that from this day forth <Player Name> shall be known as Browerk Killer! Huzzah! Huzzah! Huzzah! | ||
<br></font> | <br></font> | ||
== Notes == | |||
[[ | * This quest was updated in the [[Unfinished Business]] event to include a [[Mana Forge Key]] (only if you are level 125+). | ||
[[ | * Sometimes the font portals are not present and talking to the statue in the floating tower gives:<br><font color=darkgoldenrod>Font Guardian tells you, "You have no purpose at this place, be gone."</font><br>The reason for this is too much time has passed between speaking with the Ghost in Ayan and your attempt, returning to Ayan and talking to the Ghost again will resolve this issue. Similarly if you can't enter the portal once it opens in the floating tower you must talk to the ghost again. | ||
Latest revision as of 20:36, 30 August 2014
|
Clutch of Kings |
| Walk Through ___ Maps ___ Items ___ XP ___ Titles ___ Images ___ Lore & Dialog ___ Notes |
| |||||||||||||||||||||||||||||||||||||||
_Live.jpg) | |||||||||||||||||||||||||||||||||||||||
Quest Overview
- This is the last of six part Clutch of Kings quest series.
- The quest consists mostly of Burun, so frost weapons are recommended.
- To access Xi Ru's Island, speak to the Watcher of the Dead at 60.1S, 88.1W in Ayan Baqur.
- Watcher of the Dead teleports you with Access to Xi Ru's Font.
- Note: If the Watcher of the Dead is not there, this means the quest is in progress by another group, and you must wait until the 3 hour timer is up.
- Note: If you cannot enter a font portal, the statue will not speak with you, or you cannot enter the portal that is summoned in the floating tower, you just need to speak to the Watcher of the Dead in Ayan again to refresh your flag.
Walk Through
Part 1: Xi Ru's Island (Preparation)
- To setup this quest, there are four Sealed Valves that must be opened; each is located at the bottom of one of the four "Font Dungeons". This preparation can be completed ahead of time by 1 high level person with Lockpick.
Steamy Font (North)
- Enter the Steamy Font at 91.1S, 89.6E
- From the drop, go North and take your second Right, and head up the ramp.
- Work your way up the ramps until you reach a locked gate. Unlock it, and flip the lever inside.
- Backtrack the drop and jump down, through the now open gate in the floor.
- From here, Take the North ramp down and follow the ramps down to the bottom floor.
- Pick the locks to the East and West doors, and flip the levers inside each.
- Backtrack to the drop, and now take the West ramp down and follow the ramps down to the bottom floor.
- Use the Sealed Valve on the West side of the room, then take the exit portal to the East:
- With a hiss, steam begins pouring forth from a fissure deep beneath the crust of the world. A column of heat rises to the pool above this area producing a massive amount of energy.
Balmy Font (South)
- Enter the Balmy Font at 91.5S, 89.7E.
- From the drop, go South and take your second Left, and head up the ramp.
- Work your way up the ramps until you reach a locked gate. Unlock it, and flip the lever inside.
- Backtrack the drop and jump down, through the now open gate in the floor.
- From here, Take the North ramp down and follow the ramps down to the bottom floor.
- Pick the locks to the North and South doors, and flip the levers inside each.
- Backtrack to the drop, and now take the West ramp down and follow the ramps down to the bottom floor.
- Use the Sealed Valve on the West side of the room, then take the exit portal to the East:
- With a hiss, steam begins pouring forth from a fissure deep beneath the crust of the world. A column of heat rises to the pool above this area producing a massive amount of energy.
Humid Font (East)
- Enter the Humid Font at 91.3S, 89.8E
- From the drop, go South and take your second Right, and head up the ramp.
- Work your way up the ramps until you reach a locked gate. Unlock it, and flip the lever inside.
- Backtrack the drop and jump down, through the now open gate in the floor.
- From here, Take the North ramp down and follow the ramps down to the bottom floor.
- Pick the locks to the North and West doors, and flip the levers inside each.
- Backtrack to the drop, and now take the West ramp down and follow the ramps down to the bottom floor.
- Use the Sealed Valve on the West side of the room, then take the exit portal to the East:
- With a hiss, steam begins pouring forth from a fissure deep beneath the crust of the world. A column of heat rises to the pool above this area producing a massive amount of energy.
Muggy Font (West)
- Enter the Muggy Font at 91.5S, 89.4E
- From the drop, go North and take your second Left, and head up the ramp.
- Work your way up the ramps until you reach a locked gate. Unlock it, and flip the lever inside.
- Backtrack the drop and jump down, through the now open gate in the floor.
- From here, Take the North ramp down and follow the ramps down to the bottom floor.
- Pick the locks to the North and East doors, and flip the levers inside each.
- Backtrack to the drop, and now take the West ramp down and follow the ramps down to the bottom floor.
- Use the Sealed Valve on the West side of the room, then take the exit portal to the East:
- With a hiss, steam begins pouring forth from a fissure deep beneath the crust of the world. A column of heat rises to the pool above this area producing a massive amount of energy.
Font Guardian (Font Tower)
- At this point, all 4 Sealed Valves should be open and the quest is now live. The rest of the group should join you at this point.
- When the group is ready, everyone should run to the top of the Font Tower at 91.3S, 89.5E, and jump to the adjacent floating platform to the south where the Font Guardian is located.
- After everyone has made the jump, one person should talk to the Font Guardian, and everyone should use the portal to Qin Xikit's Hidden Crown, that spawns down the stairs.
- The portal remains open for 20 minutes.
Part 2: Qin Xikit's Hidden Crown
- From the drop, pull the lever on the south wall, and then head North into the room ahead.
- ONE person should now use the Ensorcelled Dais, which will give them Qin Xikit's Crown and spawn several Ancient Sentinels and an Ancient Defender (Ghosts):
- As <Player Name> lifts the crown from the dais, a thin wisp of light is pulled forward. A great protector has been disturbed. The only way to open the door leading from this chamber is to defeat the defender. Only then could one use the crown to unseal the way to Qin Xikit's temple.
- Kill the Ancient Defender, and then head through the door that opens to the North, and down the ramp (either direction).
- Use the lever on the south wall, and then enter the room to the North.
- The person who has Qin Xikit's Crown must hand it to the Enchanted Dais in this room, which will spawn a portal to Qin Xikit's Island. Take it.
Part 3A: Qin Xikit's Island
- From the drop, run Northwest until you reach a large temple.
- Run to the top of the temple, go inside, and shift-jump down to the bottom.
- To activate the Portal Device, all 4 eyes (north, south, east, west) must be used one time. Be careful, each time you use an eye, you will receive 5% vitae.
- Tip: Have 4 separate people each use one eye in order to spread the vitae around.
- Once all 4 eyes are used, head back to the middle and use the Portal Device to be portaled to Qin Xikit's Antechamber:
- Portal Device teleports you with Qin Xikit's Antechamber.
Part 3B: Qin Xikit's Antechamber
- From the drop, take the hallway on the North wall. Hug the right wall, and work your way through the dungeon until you come to another Portal Device.
- Note: There are two spots in the dungeon where you'll have to flip levers/floor plates in order to open doors. See the map for more info.
- Use the Guardian statue that is located just to the right of the Portal Device (NOT the Portal Device itself) to be portaled into the Secrets of Qin Xikit's Temple.
- Guardian teleports you with Secrets of Qin Xikit's Temple
Part 4: Secrets of Qin Xikit's Temple
- From the drop, jump down into the pit in front of you and move into the next room.
- All must pick up an Empty Water Skin from the floor, and fill it with 6 pints of blood by using it on the Pool of Blood 6 times.
- Once your Water Skin has 6 pints, hand it to the West Sacrificial Statue to pass the trial:
- Sacrificial Statue tells you, "Your sacrifice has been accepted, you may now proceed to the next room."
- Note: You can also fill the Water Skin with 9 or 10 pints of blood and hand it to the East or South Statues, respectively.
- Once you've passed the trial, go to the South room, jump down into the pit, and use the Exit Portal to go to Qin Xikit's Temple.
Part 5: Qin Xikit's Temple
- From the portal drop, hug the left wall all the way to the end of the dungeon, where you'll find a Guardian statue.
- Note: Once you pass through the octagonal type room, and go through a short narrow hallway, you'll need to descend a 2nd ramp. See the map for details.
- Use the Guardian to be portaled into Qin Xikit's Tomb:
- Guardian teleports you with Qin Xikit's Tomb.
Part 6: Qin Xikit's Tomb
- From the drop, use the Sarcophagus of High Matriarch Qin Xikit on the North wall, which will give you the Ancient Armored Helm, a piece of Ancient Armor.
- Use the Portal Device on the West wall to be portaled into Qin Xikit's Receiving Chamber, the last dungeon.
- Portal Device teleports you with Qin Xikit's Receiving Chamber.
- Note: You will receive 5% vitae upon using the Portal Device.
Part 7: Qin Xikit's Receiving Chamber
- Work your way North through the dungeon to the end, where you'll find the end boss, Browerk, sitting in his throne room.
- Note: If you choose, you can work off vitae in the first part of the dungeon before reaching the boss.
- There are several things to know before going into the fight with Browerk, review these tactics:
- Do not debuff him, he counters most debuffs.
- Disband your fellowship before going into battle. Browerk casts Fellowship Debuffs, so you lessen the chance to be debuffed when not in a fellowship.
- If you are swallowed (portaled into Browerk's stomach), quickly switch to a Critical Strike weapon, and attack his Stomach Wall on full speed. You have only have a percent chance of escaping his stomach when you land a critical hit.
- Tip: If you're a mage, use wall spells for a greater chance to critical hit.
- Once you kill Browerk, loot Browerk's Hide from the floor.
- Speak to Guard Haigh at 25.7N, 48.9E in Cragstone for your XP and random reward.
- [OPTIONAL] Hand Browerk's Hide to Guard Haigh for the title of Browerk Killer.
- Note: Hold on to the hide if you are trying to obtain the Kingslayer title. See the Clutch of Kings for more information.
Maps
| Dungeon | Coordinates | Wiki Map | ACmaps | Other | Quests |
| Steamy Font | 91.1S, 89.6E | -- | 0198 | -- | -- |
| Humid Font | 91.3S, 89.8E | -- | 0176 | -- | -- |
| Balmy Font | 91.5S, 89.7E | -- | 01D1 | -- | -- |
| Muggy Font | 91.5S, 89.4E | -- | 0175 | -- | -- |
| Qin Xikit's Hidden Crown | -- | -- | 00F2 | -- | -- |
| Qin Xikit's Antechamber | -- | -- | 00F9 | -- | -- |
| Secrets of Qin Xikit's Temple | -- | -- | 0160 | -- | -- |
| Qin Xikit's Temple | -- | -- | 02D8 | -- | -- |
| Qin Xikit's Receiving Chamber | -- | -- | 00F3 | -- | -- |
Items
| Quest Items | ||||||||
|
|
Empty Water Skin |
|
Enchanted Dais |
|
Pool of Blood | |||
|
|
Qin Xikit's Crown |
|
Sacrificial Statue |
|
Sarcophagus of High Matriarch Qin Xikit | |||
| Rewards | ||||||||
|
|
Ancient Armored Helm |
|
Browerk's Hide |
|
Armsman's Robe | |||
|
|
Dangerous Portal Device |
|
Gem of Damage Addition |
|
Gem of Damage Modification | |||
|
|
Gem of Mana Management |
|
Gem of Inner Brilliance |
|
Mana Forge Key | |||
Experience Rewards
| Task Required | Max Experience | Percentage & Level Cap | |||
| Defeat Browerk and speak to Guard Haigh | 56,184,660xp |
33% up to level 130 | |||
|
| |||||
| See Level Costs for per level information. | |||||
Title Rewards
| Task Required | Title Reward |
| Hand Browerk's Hide to Guard Haigh | Browerk Killer |
|
| |
| See Titles for a list of all available titles. | |
Images
-
 Dangerous Portal Device
 -
 Ancient Armored Helm
 -
 Armsman's Robe
 -
 Aerial Shot of Qin Xikit's Temple
 -
 Closeup of Qin Xikit's Temple
 -
 Portal Device (Qin Xikit's Temple)
 -
 Guardian of Qin Xikit's Temple
 -
 Sarcophagus of High Matriarch Qin Xikit
 -
 Browerk's Throne Room
 -
 King Browerk

_Live.jpg)

_Image_1.jpg)
_Image_2.jpg)
_Image_3.jpg)
_Image_4.jpg)
_Image_5.jpg)
_Image_6.jpg)

Lore & Dialog
Watcher of the Dead tells you, "Qin Xikit, Mistress of the Golden Shore, Keeper of the Kilika Vale in Ualannan's absence, lays beneath over thirty thousands years of weight. She has been silent these years imprisoned beneath her temple, bound by those who called her sister."
Watcher of the Dead tells you, "Once she walked amongst children of other suns and ushered them along a quickened path. Heresy! Cried our sisters and a great hunt began within our sect. A schism grew and swallowed our sisters in madness. They drew chains of mana about our immortal forms and locked our eternal bodies away."
Watcher of the Dead tells you, "Qin Xikit was the first to feel the sting of her sister's barbs, locked into a temple of her crafting, sealed away with the power of her crown."
Watcher of the Dead tells you, "Eternal silence is shattered and Qin Xikit stirs in her tomb. A gateway has opened and through it comes consumption. Sealed in her tomb the matron can do nothing and the spirits therein are all but gone. I am the last to hold vigil."
Watcher of the Dead tells you, "Seek her crown. Xi Ru consumed in madness, sealed Qin Xikit away. The crown must be found and the gateway to Qin Xikit's temple must be opened. At long last I can see Xi Ru's island, the magic that once locked it from sight has failed, a sister has succeeded at breaking the wards."
Watcher of the Dead tells you, "Rejoice! Absolution is at hand."
In the great Ziggurat of Qin Xikit, <Player Name> has struck a mortal blow against King Browerk. The bulbous leader of the Burun erupts in a violent spasm and collapses in a fit of explosive mana emissions. The leader will return in time, but the victory should be enjoyed for the moment. Huzzah, <Player Name>!
Guard Haigh gives you Gem of Damage Addition.
You've earned 56,184,660 experience.
Guard Haigh tells you, "This is for your efforts against the Burun Kukuur, King Browerk. You will need to wait three weeks before returning to me for another reward. If you wish to change your title and you have a scrap of Browerk's hide I will accept the hide and name you Browerk Killer!"
You give Guard Haigh Browerk's Hide.
Let it be known that <Player Name> has faced and defeated Browerk! Let it be known that from this day forth <Player Name> shall be known as Browerk Killer! Huzzah! Huzzah! Huzzah!
Notes
- This quest was updated in the Unfinished Business event to include a Mana Forge Key (only if you are level 125+).
- Sometimes the font portals are not present and talking to the statue in the floating tower gives:
Font Guardian tells you, "You have no purpose at this place, be gone."
The reason for this is too much time has passed between speaking with the Ghost in Ayan and your attempt, returning to Ayan and talking to the Ghost again will resolve this issue. Similarly if you can't enter the portal once it opens in the floating tower you must talk to the ghost again.