Fiun Healing Machine Quest: Difference between revisions
imported>An Adventurer m →Notes |
imported>Darkmurkrow No edit summary |
||
| (33 intermediate revisions by 8 users not shown) | |||
| Line 1: | Line 1: | ||
{{Quest Summary | {{Quest Summary | ||
| Patch Introduced = [[Throne of Destiny]] | | Patch Introduced = [[Throne of Destiny]] | ||
| Updated = | | Updated = [[Secrets of the Apostates]],<br>[[Learning From Experience]] | ||
| Related Quests = | | Related Quests = [[50-100 Contracts Quest]] | ||
| Live Image = | | Live Image = K'nath Lair Portal Live.jpg | ||
| Live Image Caption = | | Live Image Caption = K'nath Lair Portal | ||
| Quest Type = Solo/Group | | Quest Type = Solo/Group | ||
| Kill Task = False | | Kill Task = False | ||
| Start Location = [[Silyun]] | | Start Location = [[Silyun]] | ||
| Timer = | | Timer = 13 Days | ||
| Level Restrictions = 70+ | | Level Restrictions = 70+ | ||
| Level Suggestions = | | Level Suggestions = | ||
| Item Rewards = [[Helm of Gratitude]] | | Contracts = [[Contract for Fiun Healing Machine]] | ||
| Max XP Reward = | | Item Rewards = [[Helm of Gratitude]]<br>[[K'nath Lair Portal]] | ||
| Luminance Reward = None | |||
| MMD Reward = 3 | |||
| Max XP Reward = 20,700,000 | |||
| Titles = | | Titles = | ||
| | | | ||
| Line 20: | Line 23: | ||
| Link XP Rewards = True | | Link XP Rewards = True | ||
| Link Title Rewards = False | | Link Title Rewards = False | ||
| Link Images = | | Link Images = True | ||
| Link Lore & Dialog = True | | Link Lore & Dialog = True | ||
| Link Notes = | | Link Notes = True | ||
}} | }} | ||
== Quest Overview == | == Quest Overview == | ||
| Line 32: | Line 35: | ||
# Travel to [[Small Empyrean Vault]] at 80.4N, 74.0W | # Travel to [[Small Empyrean Vault]] at 80.4N, 74.0W | ||
## '''Route:''' Run from [[Silyun]] | ## '''Route:''' Run from [[Silyun]] | ||
## Hang left and retrieve the [[Small Empyrean Key]] (see | ## Hang left and retrieve the [[Small Empyrean Key]] (see {{ACMaps Link|01FE|AC Maps - Small Empyrean Vault}}), and portal recall | ||
## Hang right, and use the Key on an Iron Door | ## Hang right, and use the Key on an Iron Door | ||
## Go to the room North, and use either Lockpick or a [[Sturdy Iron Key]] to open the [[Old Chest]] to retrieve the [[Lavus]] | ## Go to the room North, and use either Lockpick or a [[Sturdy Iron Key]] to open the [[Old Chest]] to retrieve the [[Lavus]] | ||
# Travel to the [[Remote Empyrean Vault]] at 81.7N, 71.2W | # Travel to the [[Remote Empyrean Vault]] at 81.7N, 71.2W | ||
## '''Route:''' Run from [[Silyun]] | ## '''Route:''' Run from [[Silyun]] | ||
## Make your way to the [[Old Chest]] (See | ## Make your way to the [[Old Chest]] (See {{ACMaps Link|0001|AC Maps - Remote Empyrean Vault}}) | ||
## Use lockpick or a [[Sturdy Iron Key]] to retrieve the [[Tihn]] | ## Use lockpick or a [[Sturdy Iron Key]] to retrieve the [[Tihn]] | ||
# Travel to the [[Hidden City]] at 94.4N, 70.0W | # Travel to the [[Hidden City]] at 94.4N, 70.0W | ||
## '''Route:''' Run from [[Silyun]] | ## '''Route:''' Run from [[Silyun]] | ||
## Make your way to the [[Old Chest]] (See | ## Make your way to the [[Old Chest]] (See {{ACMaps Link|02D6|AC Maps - Hidden City}}) | ||
## Use lockpick or a [[Sturdy Iron Key]] to retrieve the [[Healing Machine Pedestal]] | ## Use lockpick or a [[Sturdy Iron Key]] to retrieve the [[Healing Machine Pedestal]] | ||
# Travel to the [[Frozen Library]] at 90.7N, 56.4W | # Travel to the [[Frozen Library]] at 90.7N, 56.4W | ||
## '''Route:''' | ## '''Route:''' Travel southeast from [[Fiun Outpost]], head up the cliff at 93.6N, 54.5W. | ||
## Retrieve the [[Ruschk Iceberg Key]] (See | ## Retrieve the [[Ruschk Iceberg Key]] (See {{ACMaps Link|02FE|AC Maps - Frozen Library}}) | ||
# Travel to the [[Ruschk Iceberg]] at 96.3N, 60.0W | # Travel to the [[Ruschk Iceberg]] at 96.3N, 60.0W | ||
## '''Route:''' | ## '''Route:''' Run from Fiun Outpost. | ||
## Make your way through the dungeon (See | ## Make your way through the dungeon (See {{ACMaps Link|02DE|AC Maps - Ruschk Iceberg}}) to the door and unlock it with the [[Ruschk Iceberg Key]]. | ||
## Jump down the pit, and travel further through the dungeon until you see another Chest | ## Jump down the pit, and travel further through the dungeon until you see another Old Chest. | ||
## | ## Use lockpick or [[Sturdy Iron Key]] to unlock the Old Chest to retrieve the [[Healing Machine Hook]] | ||
# Travel to the [[K'nath Lair]] at 49.7S, 56.3W | # Travel to the [[K'nath Lair]] at 49.7S, 56.3W | ||
## '''Route:''' Take the [[East | ## '''Route:''' Take the [[East Direlands Swamp]] near [[Dryreach]] at 8.1S, 74.5E | ||
## Make your way to the bottom (See: | ## Make your way to the bottom (See: {{ACMaps Link|0193|ACMaps - K'nath Lair}}) and use the portal to the [[Greater K'nath Lair]] | ||
## Pick the door to your left, keep hanging left, and retrieve the [[Runic Skull]] | ## Pick the door to your left, keep hanging left, and retrieve the [[Runic Skull]] | ||
# Travel to the [[Undead Temple]] at 90.9N, 43.2W | # Travel to the [[Undead Temple]] at 90.9N, 43.2W | ||
## '''Route:''' | ## '''Route:''' Go to [[Eastwatch]] | ||
## Make your way to the [[Runic Door Guardian]] (See | ## Make your way to the [[Runic Door Guardian]] (See {{ACMaps Link|03A5|AC Maps - Undead Temple}}) | ||
## Hand him your [[Runic Skull]] and go into the larger room | ## Hand him your [[Runic Skull]] and go into the larger room | ||
## Retrieve the [[Healing Machine Orb]] from the [[Old Chest]] | ## Retrieve the [[Healing Machine Orb]] from the [[Old Chest]] | ||
# Travel back to [[Scorus]], and assemble the parts as mentioned in the [[Healing Machine Recipe]] | # Travel back to [[Scorus]], and assemble the parts as mentioned in the [[Healing Machine Recipe]] | ||
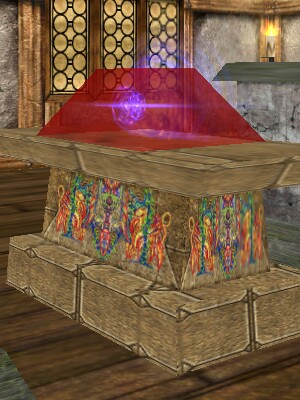
# Hand him the [[Fiun Healing Machine]] for | # Hand him the [[Fiun Healing Machine]] for 20,700,000 xp, the [[Helm of Gratitude]] and the [[K'nath Lair Portal]]. | ||
== Maps == | == Maps == | ||
| Line 69: | Line 71: | ||
{{Dungeon Maps | {{Dungeon Maps | ||
| Dungeon = Small Empyrean Vault | | Dungeon = Small Empyrean Vault | ||
| Coordinates = 80.4N, 74.0W | |||
| Wiki Map File = | | Wiki Map File = | ||
| ACmaps ID = 01FE | | ACmaps ID = 01FE | ||
| Line 76: | Line 79: | ||
{{Dungeon Maps | {{Dungeon Maps | ||
| Dungeon = Remote Empyrean Vault | | Dungeon = Remote Empyrean Vault | ||
| Coordinates = 81.7N, 71.2W | |||
| Wiki Map File = | | Wiki Map File = | ||
| ACmaps ID = 0001 | | ACmaps ID = 0001 | ||
| Line 83: | Line 87: | ||
{{Dungeon Maps | {{Dungeon Maps | ||
| Dungeon = Hidden City | | Dungeon = Hidden City | ||
| Coordinates = 94.4N, 70.0W | |||
| Wiki Map File = | | Wiki Map File = | ||
| ACmaps ID = 02D6 | | ACmaps ID = 02D6 | ||
| Line 90: | Line 95: | ||
{{Dungeon Maps | {{Dungeon Maps | ||
| Dungeon = Frozen Library | | Dungeon = Frozen Library | ||
| Coordinates = 90.7N, 56.4W | |||
| Wiki Map File = | | Wiki Map File = | ||
| ACmaps ID = 02FE | | ACmaps ID = 02FE | ||
| Line 97: | Line 103: | ||
{{Dungeon Maps | {{Dungeon Maps | ||
| Dungeon = Ruschk Iceberg | | Dungeon = Ruschk Iceberg | ||
| Coordinates = 96.3N, 60.0W | |||
| Wiki Map File = | | Wiki Map File = | ||
| ACmaps ID = 02DE | | ACmaps ID = 02DE | ||
| Line 104: | Line 111: | ||
{{Dungeon Maps | {{Dungeon Maps | ||
| Dungeon = K'nath Lair | | Dungeon = K'nath Lair | ||
| Coordinates = 49.7S, 56.3W | |||
| Wiki Map File = | | Wiki Map File = | ||
| ACmaps ID = 0193 | | ACmaps ID = 0193 | ||
| Line 111: | Line 119: | ||
{{Dungeon Maps | {{Dungeon Maps | ||
| Dungeon = Greater K'nath Lair | | Dungeon = Greater K'nath Lair | ||
| Coordinates = 49.7S, 56.3W | |||
| Wiki Map File = | | Wiki Map File = | ||
| ACmaps ID = 0193 | | ACmaps ID = 0193 | ||
| Line 118: | Line 127: | ||
{{Dungeon Maps | {{Dungeon Maps | ||
| Dungeon = Undead Temple | | Dungeon = Undead Temple | ||
| Coordinates = 90.9N, 43.2W | |||
| Wiki Map File = | | Wiki Map File = | ||
| ACmaps ID = 03A5 | | ACmaps ID = 03A5 | ||
| Line 126: | Line 136: | ||
== Items == | == Items == | ||
{{Item Table|Caption=Quest Items|Healing Machine Recipe|A Message from Scorus|Small Empyrean Key|Ruschk Iceberg Key|Runic Skull}} | {{Item Table Three|Caption=Quest Items | ||
| Healing Machine Recipe | |||
| A Message from Scorus | |||
| Small Empyrean Key | |||
| Ruschk Iceberg Key | |||
| Runic Skull | |||
}} | |||
{{Item Table|Caption=Healing Machine Parts|Lavus|Tihn|Healing Machine Pedestal|Healing Machine Hook|Healing Machine Orb|Lavuhn|Healing Machine Base|Healing Machine Hooked Base|Fiun Healing Machine}} | {{Item Table Three|Caption=Healing Machine Parts | ||
| Lavus | |||
| Tihn | |||
| Healing Machine Pedestal | |||
| Healing Machine Hook | |||
| Healing Machine Orb | |||
| Lavuhn | |||
| Healing Machine Base | |||
| Healing Machine Hooked Base | |||
| Fiun Healing Machine | |||
}} | |||
{{Item Table|Caption=Rewards|Helm of Gratitude|K'nath Lair Portal}} | {{Item Table Three|Caption=Rewards|Helm of Gratitude|K'nath Lair Portal}} | ||
== Experience Rewards == | == Experience Rewards == | ||
| Line 138: | Line 164: | ||
{{Quest Task | {{Quest Task | ||
| Description = Hand [[Scorus]] the assembled parts | | Description = Hand [[Scorus]] the assembled parts | ||
| Max XP = | | Max XP = 20,700,000 | ||
| Percent of Level = | | Percent of Level = 30 | ||
| Level Cap = 100 | | Level Cap = 100 | ||
}} | }} | ||
}} | }} | ||
== Images == | == Images == | ||
<gallery widths=200px heights=200px perrow=3> | <gallery widths=200px heights=200px perrow=3> | ||
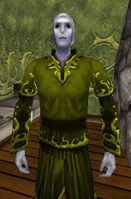
File:Scorus Live.jpg|Scorus | |||
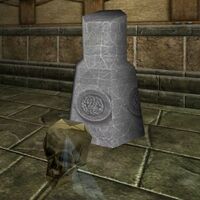
File:Greater K'nath Lair Live 4.jpg|Runic Skull | |||
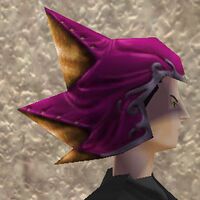
File:Helm of Gratitude Live.jpg|Helm of Gratitude | |||
</gallery> | </gallery> | ||
| Line 186: | Line 211: | ||
<font color=green>You give Scorus Fiun Healing Machine.<br> | <font color=green>You give Scorus Fiun Healing Machine.<br> | ||
<font color=darkgoldenrod>Scorus tells you, "You have assembled the machine! This day is great for us. Perhaps maddened kin will be maddened no more. We owe you much, Isparian."<br></font> | <font color=darkgoldenrod>Scorus tells you, "You have assembled the machine! This day is great for us. Perhaps maddened kin will be maddened no more. We owe you much, Isparian."<br></font> | ||
You've earned | You've earned 20,700,000 experience.<br> | ||
Scorus gives you K'nath Lair Portal.<br> | Scorus gives you K'nath Lair Portal.<br> | ||
Scorus gives you Helm of Gratitude.<br></font> | Scorus gives you Helm of Gratitude.<br></font> | ||
== Notes == | == Notes == | ||
* | * During the [[Secrets of the Apostates]] event, the maximum experience reward was updated from 2,000,000 to 13,765,337. The armor level on the helmet increased from 300 to 350. | ||
* During the [[Learning From Experience]] event, the xp reward was increased from 13,765,337 (20% up to 100) to 20,700,000 (30% up to 100). | |||
[[ | * Was made a part of the [[Monthly Explorer Society Quests]] during the [[Cloak of Darkness]] event for October 2011. | ||
Latest revision as of 21:46, 4 January 2014
| Walk Through ___ Maps ___ Items ___ XP ___ Images ___ Lore & Dialog ___ Notes |
| |||||||||||||||||||||||||||||||||||||||
 | |||||||||||||||||||||||||||||||||||||||
Quest Overview
This quest takes you all over the Halaetan Islands, with a little trip to K'nath Lair. It involves retrieving different items from different dungeons, and keys to unlock doors in the next dungeon. You need lockpick, and/or Sturdy Iron Keys for this quest
Walk Through
- Speak to Scorus at 87.5N, 70.3W in Silyun. He'll hand you the Healing Machine Recipe and A Message from Scorus;
- Travel to Small Empyrean Vault at 80.4N, 74.0W
- Route: Run from Silyun
- Hang left and retrieve the Small Empyrean Key (see AC Maps - Small Empyrean Vault), and portal recall
- Hang right, and use the Key on an Iron Door
- Go to the room North, and use either Lockpick or a Sturdy Iron Key to open the Old Chest to retrieve the Lavus
- Travel to the Remote Empyrean Vault at 81.7N, 71.2W
- Route: Run from Silyun
- Make your way to the Old Chest (See AC Maps - Remote Empyrean Vault)
- Use lockpick or a Sturdy Iron Key to retrieve the Tihn
- Travel to the Hidden City at 94.4N, 70.0W
- Route: Run from Silyun
- Make your way to the Old Chest (See AC Maps - Hidden City)
- Use lockpick or a Sturdy Iron Key to retrieve the Healing Machine Pedestal
- Travel to the Frozen Library at 90.7N, 56.4W
- Route: Travel southeast from Fiun Outpost, head up the cliff at 93.6N, 54.5W.
- Retrieve the Ruschk Iceberg Key (See AC Maps - Frozen Library)
- Travel to the Ruschk Iceberg at 96.3N, 60.0W
- Route: Run from Fiun Outpost.
- Make your way through the dungeon (See AC Maps - Ruschk Iceberg) to the door and unlock it with the Ruschk Iceberg Key.
- Jump down the pit, and travel further through the dungeon until you see another Old Chest.
- Use lockpick or Sturdy Iron Key to unlock the Old Chest to retrieve the Healing Machine Hook
- Travel to the K'nath Lair at 49.7S, 56.3W
- Route: Take the East Direlands Swamp near Dryreach at 8.1S, 74.5E
- Make your way to the bottom (See: ACMaps - K'nath Lair) and use the portal to the Greater K'nath Lair
- Pick the door to your left, keep hanging left, and retrieve the Runic Skull
- Travel to the Undead Temple at 90.9N, 43.2W
- Route: Go to Eastwatch
- Make your way to the Runic Door Guardian (See AC Maps - Undead Temple)
- Hand him your Runic Skull and go into the larger room
- Retrieve the Healing Machine Orb from the Old Chest
- Travel back to Scorus, and assemble the parts as mentioned in the Healing Machine Recipe
- Hand him the Fiun Healing Machine for 20,700,000 xp, the Helm of Gratitude and the K'nath Lair Portal.
Maps
| Dungeon | Coordinates | Wiki Map | ACmaps | Other | Quests |
| Small Empyrean Vault | 80.4N, 74.0W | -- | 01FE | -- | -- |
| Remote Empyrean Vault | 81.7N, 71.2W | -- | 0001 | -- | -- |
| Hidden City | 94.4N, 70.0W | -- | 02D6 | -- | -- |
| Frozen Library | 90.7N, 56.4W | -- | 02FE | -- | -- |
| Ruschk Iceberg | 96.3N, 60.0W | -- | 02DE | -- | -- |
| K'nath Lair | 49.7S, 56.3W | -- | 0193 | -- | -- |
| Greater K'nath Lair | 49.7S, 56.3W | -- | 0193 | -- | -- |
| Undead Temple | 90.9N, 43.2W | -- | 03A5 | -- | -- |
Items
| Quest Items | ||||||||
| Healing Machine Recipe | A Message from Scorus | Small Empyrean Key | ||||||
| Ruschk Iceberg Key | Runic Skull | |||||||
| Healing Machine Parts | ||||||||
| Lavus | Tihn | Healing Machine Pedestal | ||||||
| Healing Machine Hook | Healing Machine Orb | Lavuhn | ||||||
| Healing Machine Base | Healing Machine Hooked Base | Fiun Healing Machine | ||||||
| Rewards | ||||||||
| Helm of Gratitude | K'nath Lair Portal | |||||||
Experience Rewards
| Task Required | Max Experience | Percentage & Level Cap | |||
| Hand Scorus the assembled parts | 20,700,000xp |
30% up to level 100 | |||
|
| |||||
| See Level Costs for per level information. | |||||
Images
-
Scorus
-
Runic Skull
-
Helm of Gratitude
Lore & Dialog
Scorus tells you, "You come to Silyun, Isparian? Are you no friend of the Slayer?"
Scorus tells you, "The Slayer has unleashed the Eaters upon us. They hunt us as they did in the land before. Those they do not kill, they madden instead."
Scorus tells you, "But there may be a cure. The mages who graced this land prior crafted marvelous artifacts - items of great power. Find these items. Create the machine. Perhaps we may cure our maddened kin."
Scorus gives you Healing Machine Recipe.
Scorus gives you A Message from Scorus.
Scorus tells you, "Luck to you and your mission friend."
You allow Scorus to examine your <Healing Machine Piece>.
Scorus tells you, "Did I give you the recipe prior? Make the machine whole and return to me."
You allow Scorus to examine your Small Empyrean Key.
Scorus tells you, "Perhaps this key may help to find an element of the machine? The Small Empyrean Vault may be a good place to look. This vault may be found at 80.4N 74.0W."
You allow Scorus to examine your Ruschk Iceberg Key.
Scorus tells you, "Perhaps this key may help to find an element of the machine? Ruschk Iceberg may be a good place to look. You may find the iceberg at 96.3N 60.0W."
You allow Scorus to examine your Runic Skull.
Scorus tells you, "An odd artifact."
Scorus tells you, "Look. These runes can be translated to "Undead Temple". Perhaps this object will be useful there."
You allow Runic Door Guardian to examine your Runic Skull.
A voice from everywhere and yet nowhere bids you enter.
You attach the Lavus to the Tihn and create a Lavuhn.
You attach the Lavuhn to the Pedestal and create a Healing Machine Base.
You attach the Healing Machine Base to the Hook and create a Hooked Base.
You attach the Hooked Base to the Orb and create the Fiun Healing Machine.
You give Scorus Fiun Healing Machine.
Scorus tells you, "You have assembled the machine! This day is great for us. Perhaps maddened kin will be maddened no more. We owe you much, Isparian."
You've earned 20,700,000 experience.
Scorus gives you K'nath Lair Portal.
Scorus gives you Helm of Gratitude.
Notes
- During the Secrets of the Apostates event, the maximum experience reward was updated from 2,000,000 to 13,765,337. The armor level on the helmet increased from 300 to 350.
- During the Learning From Experience event, the xp reward was increased from 13,765,337 (20% up to 100) to 20,700,000 (30% up to 100).
- Was made a part of the Monthly Explorer Society Quests during the Cloak of Darkness event for October 2011.


