Glenden Wood Dungeon Quest: Difference between revisions
imported>Arkalor No edit summary |
imported>Dr Doom |
||
| (28 intermediate revisions by 5 users not shown) | |||
| Line 1: | Line 1: | ||
{{Quest Summary | {{Quest Summary | ||
| Patch Introduced = [[Release]] | | Patch Introduced = [[Release]] | ||
| Updated = [[Reign of Terror]] | | Updated = [[Reign of Terror]],<br>[[Reforging the Past]],<br>[[Filling in the Blanks]] | ||
| Related Quests = | | Related Quests = [[Facility Hub Quests]] | ||
| Live Image = Live.jpg | | Live Image = Oversized Banderling Ogre Live.jpg | ||
| Live Image Caption = | | Live Image Caption = Oversized Banderling Ogre | ||
| Quest Type = Solo/Group | | Quest Type = Solo/Group | ||
| Kill Task = False | | Kill Task = False | ||
| Line 10: | Line 10: | ||
| Timer = None | | Timer = None | ||
| Level Restrictions = None | | Level Restrictions = None | ||
| Level Suggestions = | | Level Suggestions = 20+ | ||
| Item Rewards = [[Platemail Hauberk]] | | Contracts = | ||
| Item Rewards = [[Platemail Hauberk of the Ogre]] | |||
| Luminance Reward = | |||
| Max XP Reward = None | | Max XP Reward = None | ||
| Titles = None | | Titles = None | ||
| Hub Quest = {{Hub Quest|Items={{Icon Link|Platemail Hauberk of the Ogre}}|NPC=[[Warden (Glenden Wood)]]|XP=100,000xp|Level=10+}} | |||
| | | | ||
| Link Walk Through = True | | Link Walk Through = True | ||
| Line 25: | Line 28: | ||
}} | }} | ||
== Quest Overview == | == Quest Overview == | ||
This quest involves collecting a series of keys which will | This quest involves collecting a series of keys which will unlock the way to the [[Oversized Banderling Ogre]] and his [[Platemail Hauberk of the Ogre|Platemail Hauberk]]. | ||
== Walk Through == | == Walk Through == | ||
#<font color=green>'''Optional'''</font> The rumor [[Glenden Dungeon Directions]] can be purchased from [[Ystig Marson the Barkeeper]] at The Overlook Tavern in [[Glenden Wood]] (29.4N, 27.2E). | |||
# Glenden Wood Dungeon is on the outskirts of town at 30.0N, 26.4E. | # [[Glenden Wood Dungeon]] is on the outskirts of town at 30.0N, 26.4E but is easily accessible via the [[Facility Hub]]. | ||
# From the drop go northwest | # If you have the lockpick skill you do not need any of the keys - highest lock is 162 resistance. | ||
# From the drop go northwest and head through the large room, you should see two passages, take the passage on your right heading north. | |||
=== Plain-Looking Key === | |||
#From the dining area, take the west exit at the opposite end of the room. | # From the dining area, take the west exit at the opposite end of the room. | ||
#Continue | # Continue west through a room with benches and a desk into a smaller room with a wooden door to your right. | ||
# | # Behind the door should be three Drudges, one of which is a [[Drudge Hoarder]], kill it for the [[Plain-Looking Key]] (Key 1). | ||
=== Rusty Key === | |||
#Head back | # Head back into the room with the benches and unlock the door (res.100) to the north with your key. | ||
# Go up the stairs to a small room overlooking an area with two [[Lich]]s and a [[Banderling Bloodblade]] locked inside a room directly beneath you. | |||
# | # Jump down whilst taking care as the Lichs cast spells that could kill a lower level character. | ||
# Dispatch the Lichs and unlock the door (res.100) to the Bloodblade, kill it and loot the [[Rusty Key]] (Key 2). | |||
=== Antique Key === | |||
# | # Exit this area through the south door and go left heading east into the prison cells section of the dungeon. | ||
# Continue on and turn right just before the lone [[Banderling Ogre]] that is guarding a chest. | |||
# The second cell to your right has a strangely [[Large Silver Rat]]. Unlock the doors (res.82) with the rusty key and kill it for the [[Antique Key]] (Key 3). | |||
=== | === The Platemail Hauberk === | ||
#Return to the | # Return to the Banderling that you saw before: | ||
# | #* If you have the lockpick skill, head north up the corridor and go through the second to last cell. This leads directly to a room with a chest, then go down ramp 6 on the map. | ||
#* If you do not have the lockpick skill, head south down the corridor to the last room and open it with Key 3 (it's not marked on map - just south and across from the Rat cell). Then go down ramp 1 on the map (gather the [[Alloy Tool]] if you wish, Granite Golems although may be difficult) and back up ramp 3 - then you can proceed down ramp 6. | |||
# You'll find yourself in a very long corridor. Once you meet some rooms at the end, go north and then west into the room with the [[Oversized Banderling Ogre]]. | |||
# | # Kill the Ogre and loot the [[Platemail Hauberk of the Ogre]], and optionally the [[250 Fire Arrows]] and an [[Oddly-Shaped Key]]. | ||
#* Return to the [[Facility Hub]] and show the hauberk to the correct Warden for your reward. | |||
# | # If you wish to use the key the Banderling dropped, return to the room at the top of ramp 6 on the map - the key is for the chest in this room. | ||
== Maps == | == Maps == | ||
| Line 77: | Line 81: | ||
== Items == | == Items == | ||
{{Item Table | {{Item Table Two|Caption=Quest Items | ||
|Caption=Quest Items | | Glenden Dungeon Directions | ||
|Glenden Dungeon Directions | | Key (Plain-Looking) | ||
|Plain-Looking | | Key (Rusty Key) | ||
|Rusty Key | | Key (Antique Key) | ||
|Antique Key | | Key (Oddly-Shaped) | ||
|Oddly-Shaped | |||
}} | }} | ||
{{Item Table | {{Item Table Two|Caption=Rewards | ||
|Caption=Rewards | | Platemail Hauberk of the Ogre | ||
|Platemail Hauberk | | 250 Fire Arrows | ||
|250 Fire Arrows | |||
}} | }} | ||
== Images == | == Images == | ||
<gallery | <gallery heights=200px widths=200px perrow=3> | ||
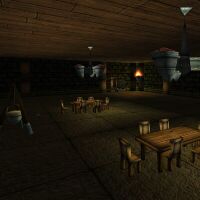
File:Glenden Wood Dungeon Live 2.jpg|Dining area | |||
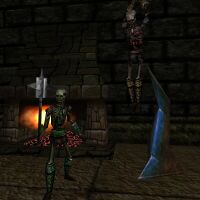
File:Glenden Wood Dungeon Live 3.jpg|Lich | |||
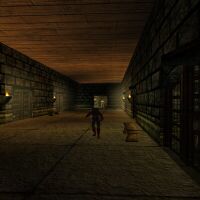
File:Glenden Wood Dungeon Live 4.jpg|The dungeon cells | |||
</gallery> | </gallery> | ||
== Lore & Dialog == | |||
<font color=darkgoldenrod>Warden tells you, "There's a long standing dungeon near the town of Glendon Wood. This dungeon is overrun by creatures that were once contained in its cells."</font><br> | |||
<font color=darkgoldenrod>Warden tells you, "This will be the greatest dungeoneering challange you've faced yet. You'll need to find creatures that hold the keys or lockpick the doors yourself."</font><br> | |||
<font color=darkgoldenrod>Warden tells you, "Fight your way through the dungeon and find the Oversized Banderling Ogre. Kill it and recover its Platemail Hauberk."</font><br> | |||
<font color=darkgoldenrod>Warden tells you, "The portal behind me will take you to Glendon Wood outside the dungeon. Find the Hauberk in the dungeon and return to me with it."</font><br> | |||
---- | |||
<font color=green>You allow Warden to examine your Platemail Hauberk of the Ogre.</font><br> | |||
<font color=green>You've earned 100,000 experience.</font><br> | |||
<font color=darkgoldenrod>Warden tells you, "Ha! I as I thought you were very capable and I'm sure you completed this task with ease. This is a very nice piece of armor, keep it if you can make use of it."</font><br> | |||
<font color=darkgoldenrod>Warden tells you, "If you have no use for it I'm sure a shopkeep would be willing to offer you a small stack of pyreals in exchange for it."</font><br> | |||
== Notes == | == Notes == | ||
* In the [[Reign of Terror]] event the [[Platemail Hauberk]]'s color was changed from silver into a deep purple. | * In the [[Reign of Terror]] event the [[Platemail Hauberk]]'s color was changed from silver into a deep purple. | ||
* The dungeon also holds the [[Alloy Tool]] used for the [[Undead Mechanic Quest]].It can be found by taking the east passage from Granite Golem/Prison portal area. | |||
* This quest became part of the [[Facility Hub]] during the [[Reforging the Past]] event and received many changes including updates to the creatures that drop the keys. | |||
* During the [[Filling in the Blanks]] event, the respawn timer of the Oversized Banderling Ogre was reduced to 3 minutes. | |||
[[Category:Quest]] | [[Category:Quest]] | ||
Latest revision as of 19:45, 29 July 2015
| Walk Through ___ Maps ___ Items ___ Images ___ Lore & Dialog ___ Notes |
| |||||||||||||||||||||||||||||||||||||||
|
 | ||||||||||||||||||||||||||||||||||||||
Quest Overview
This quest involves collecting a series of keys which will unlock the way to the Oversized Banderling Ogre and his Platemail Hauberk.
Walk Through
- Optional The rumor Glenden Dungeon Directions can be purchased from Ystig Marson the Barkeeper at The Overlook Tavern in Glenden Wood (29.4N, 27.2E).
- Glenden Wood Dungeon is on the outskirts of town at 30.0N, 26.4E but is easily accessible via the Facility Hub.
- If you have the lockpick skill you do not need any of the keys - highest lock is 162 resistance.
- From the drop go northwest and head through the large room, you should see two passages, take the passage on your right heading north.
Plain-Looking Key
- From the dining area, take the west exit at the opposite end of the room.
- Continue west through a room with benches and a desk into a smaller room with a wooden door to your right.
- Behind the door should be three Drudges, one of which is a Drudge Hoarder, kill it for the Plain-Looking Key (Key 1).
Rusty Key
- Head back into the room with the benches and unlock the door (res.100) to the north with your key.
- Go up the stairs to a small room overlooking an area with two Lichs and a Banderling Bloodblade locked inside a room directly beneath you.
- Jump down whilst taking care as the Lichs cast spells that could kill a lower level character.
- Dispatch the Lichs and unlock the door (res.100) to the Bloodblade, kill it and loot the Rusty Key (Key 2).
Antique Key
- Exit this area through the south door and go left heading east into the prison cells section of the dungeon.
- Continue on and turn right just before the lone Banderling Ogre that is guarding a chest.
- The second cell to your right has a strangely Large Silver Rat. Unlock the doors (res.82) with the rusty key and kill it for the Antique Key (Key 3).
The Platemail Hauberk
- Return to the Banderling that you saw before:
- If you have the lockpick skill, head north up the corridor and go through the second to last cell. This leads directly to a room with a chest, then go down ramp 6 on the map.
- If you do not have the lockpick skill, head south down the corridor to the last room and open it with Key 3 (it's not marked on map - just south and across from the Rat cell). Then go down ramp 1 on the map (gather the Alloy Tool if you wish, Granite Golems although may be difficult) and back up ramp 3 - then you can proceed down ramp 6.
- You'll find yourself in a very long corridor. Once you meet some rooms at the end, go north and then west into the room with the Oversized Banderling Ogre.
- Kill the Ogre and loot the Platemail Hauberk of the Ogre, and optionally the 250 Fire Arrows and an Oddly-Shaped Key.
- Return to the Facility Hub and show the hauberk to the correct Warden for your reward.
- If you wish to use the key the Banderling dropped, return to the room at the top of ramp 6 on the map - the key is for the chest in this room.
Maps
| Dungeon | Coordinates | Wiki Map | ACmaps | Other | Quests |
| Glenden Wood Dungeon | 30.0N, 26.4E | -- | 01E3 | -- | -- |
Items
| Quest Items | ||||||||
| Glenden Dungeon Directions | Key (Plain-Looking) | |||||||
| Key (Rusty Key) | Key (Antique Key) | |||||||
| Key (Oddly-Shaped) | ||||||||
| Rewards | ||||||||
| Platemail Hauberk of the Ogre | 250 Fire Arrows | |||||||
Images
-
Dining area
-
Lich
-
The dungeon cells
Lore & Dialog
Warden tells you, "There's a long standing dungeon near the town of Glendon Wood. This dungeon is overrun by creatures that were once contained in its cells."
Warden tells you, "This will be the greatest dungeoneering challange you've faced yet. You'll need to find creatures that hold the keys or lockpick the doors yourself."
Warden tells you, "Fight your way through the dungeon and find the Oversized Banderling Ogre. Kill it and recover its Platemail Hauberk."
Warden tells you, "The portal behind me will take you to Glendon Wood outside the dungeon. Find the Hauberk in the dungeon and return to me with it."
You allow Warden to examine your Platemail Hauberk of the Ogre.
You've earned 100,000 experience.
Warden tells you, "Ha! I as I thought you were very capable and I'm sure you completed this task with ease. This is a very nice piece of armor, keep it if you can make use of it."
Warden tells you, "If you have no use for it I'm sure a shopkeep would be willing to offer you a small stack of pyreals in exchange for it."
Notes
- In the Reign of Terror event the Platemail Hauberk's color was changed from silver into a deep purple.
- The dungeon also holds the Alloy Tool used for the Undead Mechanic Quest.It can be found by taking the east passage from Granite Golem/Prison portal area.
- This quest became part of the Facility Hub during the Reforging the Past event and received many changes including updates to the creatures that drop the keys.
- During the Filling in the Blanks event, the respawn timer of the Oversized Banderling Ogre was reduced to 3 minutes.


