Hoshino Fortress Infiltration: Difference between revisions
imported>Sucamarto No edit summary |
imported>Sucamarto No edit summary |
||
| (36 intermediate revisions by 3 users not shown) | |||
| Line 2: | Line 2: | ||
| Patch Introduced = [[The Risen Princess]] | | Patch Introduced = [[The Risen Princess]] | ||
| Related Quests = [[Hoshino Must Die]],<br>[[Purified Mouryou Weapons]] | | Related Quests = [[Hoshino Must Die]],<br>[[Purified Mouryou Weapons]] | ||
| Updated = [[Lessons from the Past]],<br>[[Balance of Power]],<br>[[Curating Corruption]] | | Updated = [[Lessons from the Past]],<br>[[Balance of Power]],<br>[[Curating Corruption]],<br>[[Shattered Masks]] | ||
| | | | ||
| Live Image = Hoshino Fortress Infiltration Live.jpg | | Live Image = Hoshino Fortress Infiltration Live.jpg | ||
| Line 9: | Line 9: | ||
| Kill Task = False | | Kill Task = False | ||
| Start Location = [[Royal Tent]] at 80.7N 43.0W | | Start Location = [[Royal Tent]] at 80.7N 43.0W | ||
| Timer = | | Timer = 20 hours | ||
| Level Restrictions = 200+ | | Level Restrictions = 200+ | ||
| Level Suggestions = 200+ | | Level Suggestions = 200+ | ||
| Contracts = [[Contract for Hoshino Fortress]] | | Contracts = [[Contract for Hoshino Fortress]] | ||
| Item Rewards = 4 [[Legendary Key]]s <br>[[O-Yoroi Armor]]<br>[[Reinforced Shou-jen Armor]] | | Item Rewards = 4 [[Legendary Key]]s <br>[[O-Yoroi Armor]]<br>[[Reinforced Shou-jen Armor]] | ||
| Luminance Reward = | | MMD Reward = 35 | ||
| Luminance Reward = 55,000 | |||
| Max XP Reward = 900,000,000 | | Max XP Reward = 900,000,000 | ||
| Titles = | | Titles = [[Vanquisher of the Titan]]<br>[[Heretic]]<br>[[Captain]] | ||
| | | | ||
| Link Walk Through = True | | Link Walk Through = True | ||
| Line 28: | Line 29: | ||
}} | }} | ||
== Quest Overview == | == Quest Overview == | ||
Multi stage quest to infiltrate Hoshino's fortress and tower. Advance warning: The creatures in the | Multi stage quest to infiltrate Hoshino's fortress and tower. Advance warning: The creatures on this quest are highly dangerous. Only very well equipped characters are recommended for this quest. It is very difficult to get back to the group on this quest if you die. | ||
It is strongly recommended that each character bring an [[Evader's Crystal]] to use for the 2nd courtyard portion of this quest. | |||
On subsequent runs of this quest, it is possible to skip the first 2 dungeons if players have keys to the 2nd and final gates from previous runs. These keys do not expire. This would require only clearing the 2nd courtyard in order to open the 3rd gate before proceeding to the final dungeon. However, the rewards for this quest are given in phases, so doing so will miss out on the first 2 (smaller) rewards. | |||
*'''Note:''' The ability to skip the first or second dungeon has either changed, or there are ''some'' flagging requirements. Even after completing the first dungeon, the Hoshino Tower portal can be unusable, requiring the player to complete the second dungeon to be flagged for the tower. | |||
== Walk Through == | == Walk Through == | ||
| Line 36: | Line 42: | ||
#* '''Route:''' From [[Stonehold]], take the [[Desolation Beach]] portal at 69.6N, 20.2W and run to 80.7N, 43.0W. | #* '''Route:''' From [[Stonehold]], take the [[Desolation Beach]] portal at 69.6N, 20.2W and run to 80.7N, 43.0W. | ||
# Collect three broken key pieces from the three Gatekeepers that spawn ''inside'' one of the clusters of buildings at the base of the fortress: | # Collect three broken key pieces from the three Gatekeepers that spawn ''inside'' one of the clusters of buildings at the base of the fortress: | ||
#* [[Broken Key ( | #* [[Broken Key (Upper)]] - From the [[Claw Master Gatekeeper]] in [[Hoshino Town 1]] (the one with portal for [[Save Karul]] quest) | ||
#* [[Broken Key ( | #* [[Broken Key (Lower)]] - From the [[Bushi Gatekeeper]] in [[Hoshino Town 2]]. | ||
#* [[Broken Key ( | #* [[Broken Key (Middle)]] - From the [[Samurai Gatekeeper]] in [[Hoshino Town 3]] (the furthest one from the tent). | ||
#* '''Note 1:''' The particular building in each cluster that the Gatekeepers spawn appears to be random. | #* '''Note 1:''' The particular building in each cluster that the Gatekeepers spawn appears to be random. | ||
#* '''Note 2:''' Each piece of the key has a one hour timer before it disintegrates. Combining the pieces resets the timer. | #* '''Note 2:''' Each piece of the key has a one hour timer before it disintegrates. Combining the pieces resets the timer. | ||
# Combine the 3 Broken Key pieces into a [[Main Gate Key]], which has a two hour timer before it disintegrates. | # Combine the 3 Broken Key pieces into a [[Main Gate Key]], which has a two hour timer before it disintegrates. | ||
#: [[File:Broken Key (Middle) Icon.png]] + [[File:Broken Key (Lower) Icon.png]] + [[File:Broken Key (Upper) Icon.png]] = [[File:Main Gate Key Icon.png]] | #: [[File:Broken Key (Middle) Icon.png]] + [[File:Broken Key (Lower) Icon.png]] + [[File:Broken Key (Upper) Icon.png]] = [[File:Main Gate Key Icon.png]] | ||
# Go to the entrance to [[Hoshino's Fortress]] at 79.1N 41.5W and | # Go to the entrance to [[Hoshino's Fortress]] at 79.1N 41.5W and give the Main Gate Key to the [[Lock (Main Gate)|Lock]], located next to the gate. | ||
# Once inside the fortress enter the [[Venerable Mausoleum]] portal in the courtyard. | # Once inside the fortress enter the [[Venerable Mausoleum]] portal on the left in the courtyard. | ||
=== Part 2: Venerable Mausoleum === | === Part 2: Venerable Mausoleum === | ||
# From the drop, take the ramp down and work your way to a room with three pits (north, east, and west). | # From the drop, take the ramp down and work your way to a room with three pits (north, east, and west). | ||
# Jump down into each pit, and work your way to the end until you find the boss (see below). | # Jump down into each pit, and work your way to the end until you find the boss (see below). | ||
# Kill the bosses, and loot a bone from their corpses (drops 9). Everyone in the group needs one of each bone | # Kill the bosses, and loot a bone from their corpses (each drops 9). Everyone in the group needs one of each bone. Then take the portal nearby to return to the drop. | ||
#* ''' | #* In the '''north''' pit you will find [[Swarm]] enemies and [[Mu-miyah]]. The boss at the end is [[Ronin Hirachi]] who looks like a very tall [[Spectral Void Mage]] and drops the [[Ancient Skull]]. Directions to [[Ronin Hirachi]]: | ||
#* ''' | ## After jumping down, follow the linear path to the first intersection and go right. | ||
#* ''' | ## Continue following the linear path through rooms until a room with a left and right exit, take the left exit into a larger room. | ||
## Exit this large room to the right into a short hallway leading into the room with [[Ronin Hirachi]]. | |||
#* '''Lockpick Bonus:''' There is a [[Chorizite Chest]] in the | ##* '''Note:''' Standing to the right of the hallway leading to [[Ronin Hirachi]]'s room will allow him to reach you if he aggros. The further to left of this hallway you stand, the less likely he will be able to reach you if he aggros. | ||
#* In the '''east''' pit you will find void casting grubs. The boss at the end is [[Ronin Ginmura]] who drops a [[Shaped Arm Bone]]. Directions to [[Ronin Ginmura]]: | |||
## After jumping down, follow the linear path to the first intersection and go right. | |||
## Take the next two lefts which are close together and leave you at a door. | |||
## Go through the doors and then take your next two rights which are also close together. | |||
## The room you're now in only has one other exit. This exit leads to a short hallway leading to a room with [[Ronin Ginmura]]. | |||
##* '''Note:''' In the room prior to [[Ronin Ginmura]], standing in the corner nearest to the exit hallway should allow you to debuff the mini-boss before entering the room. | |||
#* In the '''west''' pit you will find rats and ghost enemies. The boss at the end is [[Ronin Shimakawa]] who drops an [[Ancient Arm Bone]]. Beware of the [[Departed Spirit | Departed Spirits]], which cast [[Blade Lure (Spell) | Blade Lure]] and [[Asphyiaxtion]]. These spells can leave you a very easy target for [[Ronin Shimakawa]], who hits very hard! Directions to [[Ronin Shimakawa]]: | |||
## After jumping down, follow the linear path to the first intersection and go right and through two doors. | |||
## At the next intersection, go left which will take you down a ramp. | |||
## Continue without taking any of the remaining turns to reach the room with [[Ronin Shimakawa]]. | |||
#* '''Lockpick Bonus:''' There is a [[Chorizite Chest]] in the eastern pit section. | |||
# After you have both bones and a skull combine them into [[Ancient Skull and Bones]]. | # After you have both bones and a skull combine them into [[Ancient Skull and Bones]]. | ||
#: [[File:Ancient Skull Icon.png]] + [[File:Ancient Arm Bone Icon.png]] = [[File:Ancient Skull and Bone Icon.png]] + [[File:Shaped Arm Bone Icon.png]] = [[File:Ancient Skull and Bones Icon.png]] | #: [[File:Ancient Skull Icon.png]] + [[File:Ancient Arm Bone Icon.png]] = [[File:Ancient Skull and Bone Icon.png]] + [[File:Shaped Arm Bone Icon.png]] = [[File:Ancient Skull and Bones Icon.png]] | ||
#: <font color="green">You carefully place the arm bone inside of the skull. You feel a gentle click as the bone attaches to a groove inside of the skull.</font> | #: <font color="green">You carefully place the arm bone inside of the skull. You feel a gentle click as the bone attaches to a groove inside of the skull.</font> | ||
#: <font color="green">You carefully place the arm bone inside of the skull. You feel a gentle click as the bone attaches to the second groove inside of the skull.</font> | #: <font color="green">You carefully place the arm bone inside of the skull. You feel a gentle click as the bone attaches to the second groove inside of the skull.</font> | ||
# Hand the completed Ancient Skull and Bones to the [[Ancient Altar | # From the drop head north again and follow the path without jumping down around the pit. You will soon come to a room with an altar and a [[Samurai Titan]]. Keep your distance from him so he does not attack! | ||
# Hand the completed Ancient Skull and Bones to the [[Ancient Altar]]. After the first person does their turn in, a [[Crypt Eidolon]] will spawn, smite the Samurai Titan, and subsequently disappear. | |||
#* '''Note:''' If you wish to see this animation again, wait for the Samurai Titan to respawn before handing in your skull and bones. Each person can turn in for rewards without needing to see the animation. | |||
#* '''Note | # Turning in grants you the ''Vanquisher of the Titan'' title, 300 million [[Xp]], 8,000 [[Luminance]], a [[Legendary Key]], and a [[Middle Gate Key]] (used in the next part). | ||
# | # After everyone has turned in their Ancient Skull and Bones, ensure that everyone knows what to do for the upcoming courtyard fight, then take the nearby surface portal, which takes you back to the first courtyard (very hot drop). | ||
# After everyone has turned in their Ancient Skull and Bones, take the nearby surface portal, which takes you back to the courtyard (very hot drop). | |||
#* '''Note:''' The surface portal will expire within a few minutes of the last person's turn-in (it can be re-spawned via a turn in). | #* '''Note:''' The surface portal will expire within a few minutes of the last person's turn-in (it can be re-spawned via a turn in). | ||
=== Part 3: Falatacot Temple === | === Part 3: 2nd Courtyard === | ||
# Inside this dungeon, your group must kill creatures, and collect the upper, middle, and lower pieces of a lever from their corpses. | # Have someone give their [[Middle Gate Key]] to the [[Lock (Middle Gate)|lock]] on the first courtyard door. The lock is located on the right side of the door. | ||
#* '''Note:''' They key does not expire, so a key from a past run can be used to skip part 2 of the quest if desired. | |||
#* '''Important:''' This section is typically the most dangerous of the entire quest. An [[Evader's Crystal]] is commonly used to help ensure survival. | |||
# When the gate opens, proceed into the 2nd courtyard and all the way to the far north end. This helps to keep the enemy archers out of range. | |||
# Clear the entire spawn inside the 2nd courtyard. Once the last creature dies, the next courtyard door will open. | |||
# Run through the door and proceed to the [[Falatacot Temple]] portal. It is located inside one of the larger buildings in the middle of the courtyard. | |||
#* '''Note:''' If someone in your group has a final gate key already, you can skip the dungeon and proceed to open the final gate (part 5). | |||
=== Part 4: Falatacot Temple === | |||
# Do not move upon entering the dungeon! If you do you will aggro the nearby enemies! | |||
# Inside this dungeon, your group must kill creatures, and collect the upper, middle, and lower pieces of a lever from their corpses. Each piece spawns randomly on 3 enemies in the dungeon. Only 1 lever is needed, so it is recommended to designate one person to collect the pieces. | |||
#* '''Note:''' The disintegration timer on these pieces all begin when you enter the dungeon, and not when you pick them up. | #* '''Note:''' The disintegration timer on these pieces all begin when you enter the dungeon, and not when you pick them up. | ||
#* '''Lockpick Bonus:''' There is another [[Chorizite Chest]] in this dungeon, in the room south of the last door. | |||
# Once you have all three pieces, combine them to create a [[Lever Handle]]. | # Once you have all three pieces, combine them to create a [[Lever Handle]]. | ||
#: [[File:Broken Lever (Lower) Icon.png]] + [[File:Broken Lever (Middle) Icon.png]] = [[File:Broken Lever (Lower and Middle) Icon.png]] + [[File:Broken Lever (Upper) Icon.png]] = [[File:Lever Handle Icon.png]] | #: [[File:Broken Lever (Lower) Icon.png]] + [[File:Broken Lever (Middle) Icon.png]] = [[File:Broken Lever (Lower and Middle) Icon.png]] + [[File:Broken Lever (Upper) Icon.png]] = [[File:Lever Handle Icon.png]] | ||
# Head to the north end of the dungeon and hand the [[Lever Handle]] to the [[Lever Box]] (located to the right of the door) to open it. | # Head to the north end of the dungeon and hand the [[Lever Handle]] to the [[Lever Box]] (located to the right of the door) to open it. | ||
# Proceed past the door, and you will be portaled into the next part of this dungeon. | # Proceed past the door, and you will be auto-portaled into the next part of this dungeon. | ||
#* '''Note:''' Once you portal in, don't move forward, or you will draw | #* '''Note:''' Once you portal in, don't move forward, or you will draw aggro! | ||
# | # In the next dungeon, you must kill everything to trigger the opening of the door (located in front of you at the drop). There are creatures at the drop and down each of the 6 nearby hallways that must be killed. Your group can split up if you feel confident that everyone will be safe. | ||
# | # Once the door opens, head up the stairs and down the hallway until you reach a room containing several creatures, including an [[Exarch Nanjou Shou-jen]]. | ||
# Kill the Exarch Nanjou Shou-jen, and a [[Freed Temple Exarch]] NPC will spawn. | # Kill the Exarch Nanjou Shou-jen, and a [[Freed Temple Exarch]] NPC will spawn. | ||
# Speak with the Exarch NPC, to receive your second set of rewards | # Speak with the Exarch NPC, to receive your second set of rewards: the ''Heretic'' title, 300 million xp, 12,000 luminance, a [[Legendary Key]], and a [[Final Gate Key]] (used in the next part). | ||
=== Part | === Part 5: Hoshino Tower === | ||
# When your group is ready, use the surface portal in this room to return to the courtyard (very hot drop). | # When your group is ready, use the surface portal in this room to return to the 3rd courtyard (very hot drop). | ||
# | # Head '''north''' and have someone give the [[Final Gate Key]] to the lock on the right side of the final door. This leads to an overlook, containing the spectral towers. | ||
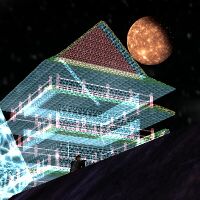
# Admire the spectral towers | # Beyond the door, be very careful you do not accidentally run into the portal straight ahead! It is hard to see in the bright light of the towers. You can run around the outside of the tower to help escape from any trailing enemies. | ||
# Inside, | # Admire the spectral towers and make sure everyone is ready for the final boss fight. Then, everyone should enter the [[Hoshino Tower]] portal '''together'''. | ||
#*'''Note:''' | # Inside is a small room with a [[First Lieutenant]]. Everyone should focus on the him and ignore the other spawns as much as possible. The longer the battle lasts, the more spawns will appear! Use fire weapons (preferably armor rending with an imperil and fire vuln in place). | ||
#*'''Note:''' Flame waves will shoot out along the edges of the room - everyone should stay away from the walls. | |||
# After | # Kill the [[First Lieutenant]] and loot the [[First Lieutenant's Insignia]] from his corpse (drops 9). The respawn time is fairly long (10 minutes?). | ||
# You may loot one piece of armor from either set | #* '''Note:''' If anyone dies during the fight, they can get back by using the [[Hoshino Tower]] portal near the large pagoda building to the east of the fortress (coords?). | ||
# | # After looting, take the ramp up until you reach a room containing tables with [[O-Yoroi Armor]], [[Reinforced Shou-jen Armor]] and 2-use [[Legendary Key]]s on them. | ||
# | # You may loot one piece of armor from either set and one key. The next room contains the legendary chests and an exit portal. | ||
#* '''Note:''' The dungeon is a "no log" dungeon, so you cannot camp out for more rewards. | |||
# Return the [[First Lieutenant's Insignia]] to [[Mareeno Donn]] at the [[Royal Tent]] tent for the ''Captain'' title, 300 million xp, 31,000 luminance, and 35 MMDs. | |||
== Maps == | == Maps == | ||
| Line 170: | Line 194: | ||
| Reinforced Shou-jen Jika Tabi | | Reinforced Shou-jen Jika Tabi | ||
}} | }} | ||
{{Item Table|Caption=Objects|Chorizite Chest}} | |||
== Title Rewards == | == Title Rewards == | ||
| Line 175: | Line 201: | ||
| Table Rows = | | Table Rows = | ||
{{Title | {{Title | ||
| Title = Vanquisher of the Titan | | Title = [[Vanquisher of the Titan]] | ||
| Task = Hand [[Ancient Skull and Bones]] to the [[Ancient Altar]] | | Task = Hand [[Ancient Skull and Bones]] to the [[Ancient Altar]] | ||
}} | }} | ||
{{Title | {{Title | ||
| Title = Heretic | | Title = [[Heretic]] | ||
| Task = Speak to the [[Freed Temple Exarch]] | | Task = Speak to the [[Freed Temple Exarch]] | ||
}} | }} | ||
{{Title | {{Title | ||
| Title = Captain | | Title = [[Captain]] | ||
| Task = Hand the [[First Lieutenant's Insignia]] to [[Mareeno Donn]] | | Task = Hand the [[First Lieutenant's Insignia]] to [[Mareeno Donn]] | ||
}} | }} | ||
| Line 223: | Line 249: | ||
== Images == | == Images == | ||
<gallery widths=200px heights=200px perrow= | <gallery widths=200px heights=200px perrow=4> | ||
File:Hoshino Fortress Infiltration Image 1.jpg|Entrance to Hoshino Tower | File:Hoshino Fortress Infiltration Image 1.jpg|Entrance to Hoshino Tower | ||
File:Hoshino Fortress Infiltration Image 2.jpg|Bird's Eye View of Hoshino Tower | File:Hoshino Fortress Infiltration Image 2.jpg|Bird's Eye View of Hoshino Tower | ||
| Line 229: | Line 255: | ||
File:Hoshino's Fortress 4 Live.jpg|Bird's eye showing the courtyards | File:Hoshino's Fortress 4 Live.jpg|Bird's eye showing the courtyards | ||
File:Ancient Altar 2_Live.jpg|"active" Ancient Altar | File:Ancient Altar 2_Live.jpg|"active" Ancient Altar | ||
File:Crypt_Eidolon_Live.jpg|Crypt Eidolon | File:Ronin Hirachi_Live.jpg|[[Ronin Hirachi]] | ||
File:Ronin Shimakawa_Live.jpg|[[Ronin Shimakawa]] | |||
File:Ronin Ginmura_Live.jpg|[[Ronin Ginmura]] | |||
File:Samurai Titan_Live.jpg|[[Samurai Titan]] | |||
File:Crypt_Eidolon_Live.jpg|[[Crypt Eidolon]] | |||
File:Freed Temple Exarch Live.jpg|Freed Temple Exarch | File:Freed Temple Exarch Live.jpg|Freed Temple Exarch | ||
File:Hoshino Fortress Infiltration 4 Live.jpg|Entering Hoshino's Tower | File:Hoshino Fortress Infiltration 4 Live.jpg|Entering Hoshino's Tower | ||
| Line 238: | Line 268: | ||
* During the [[Balance of Power]] event, the [[Mana Forge Key]]s were replaced by [[Legendary Key]]s, and a 2-use [[Legendary Key]] was added to the rewards in the final room. The fight with the First Lieutenant was also made more difficult. | * During the [[Balance of Power]] event, the [[Mana Forge Key]]s were replaced by [[Legendary Key]]s, and a 2-use [[Legendary Key]] was added to the rewards in the final room. The fight with the First Lieutenant was also made more difficult. | ||
* During the [[Curating Corruption]] event the [[Luminance]] reward was increased from 8,000 to ??,??? and from 12,000 to ??,???. | * During the [[Curating Corruption]] event the [[Luminance]] reward was increased from 8,000 to ??,??? and from 12,000 to ??,???. | ||
* During the [[Shattered Masks]] event Hoshino [[Luminance]] creatures can now drop legendary keyrings. | |||
Latest revision as of 21:46, 10 May 2014
| Walk Through ___ Maps ___ Items ___ Titles ___ Images ___ Lore & Dialog ___ Notes |
| |||||||||||||||||||||||||||||||||||||||
 | |||||||||||||||||||||||||||||||||||||||
Quest Overview
Multi stage quest to infiltrate Hoshino's fortress and tower. Advance warning: The creatures on this quest are highly dangerous. Only very well equipped characters are recommended for this quest. It is very difficult to get back to the group on this quest if you die.
It is strongly recommended that each character bring an Evader's Crystal to use for the 2nd courtyard portion of this quest.
On subsequent runs of this quest, it is possible to skip the first 2 dungeons if players have keys to the 2nd and final gates from previous runs. These keys do not expire. This would require only clearing the 2nd courtyard in order to open the 3rd gate before proceeding to the final dungeon. However, the rewards for this quest are given in phases, so doing so will miss out on the first 2 (smaller) rewards.
- Note: The ability to skip the first or second dungeon has either changed, or there are some flagging requirements. Even after completing the first dungeon, the Hoshino Tower portal can be unusable, requiring the player to complete the second dungeon to be flagged for the tower.
Walk Through
Part 1: Main Gate Key
- Talk Mareeno Donn outside the Royal Tent, located at 80.7N 43.0W.
- Route: From Stonehold, take the Desolation Beach portal at 69.6N, 20.2W and run to 80.7N, 43.0W.
- Collect three broken key pieces from the three Gatekeepers that spawn inside one of the clusters of buildings at the base of the fortress:
- Broken Key (Upper) - From the Claw Master Gatekeeper in Hoshino Town 1 (the one with portal for Save Karul quest)
- Broken Key (Lower) - From the Bushi Gatekeeper in Hoshino Town 2.
- Broken Key (Middle) - From the Samurai Gatekeeper in Hoshino Town 3 (the furthest one from the tent).
- Note 1: The particular building in each cluster that the Gatekeepers spawn appears to be random.
- Note 2: Each piece of the key has a one hour timer before it disintegrates. Combining the pieces resets the timer.
- Combine the 3 Broken Key pieces into a Main Gate Key, which has a two hour timer before it disintegrates.
- Go to the entrance to Hoshino's Fortress at 79.1N 41.5W and give the Main Gate Key to the Lock, located next to the gate.
- Once inside the fortress enter the Venerable Mausoleum portal on the left in the courtyard.
Part 2: Venerable Mausoleum
- From the drop, take the ramp down and work your way to a room with three pits (north, east, and west).
- Jump down into each pit, and work your way to the end until you find the boss (see below).
- Kill the bosses, and loot a bone from their corpses (each drops 9). Everyone in the group needs one of each bone. Then take the portal nearby to return to the drop.
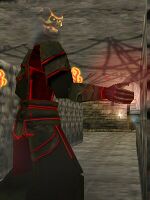
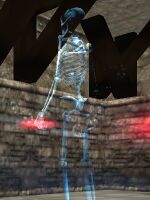
- In the north pit you will find Swarm enemies and Mu-miyah. The boss at the end is Ronin Hirachi who looks like a very tall Spectral Void Mage and drops the Ancient Skull. Directions to Ronin Hirachi:
- After jumping down, follow the linear path to the first intersection and go right.
- Continue following the linear path through rooms until a room with a left and right exit, take the left exit into a larger room.
- Exit this large room to the right into a short hallway leading into the room with Ronin Hirachi.
- Note: Standing to the right of the hallway leading to Ronin Hirachi's room will allow him to reach you if he aggros. The further to left of this hallway you stand, the less likely he will be able to reach you if he aggros.
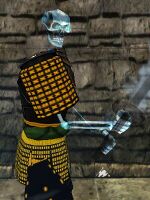
- In the east pit you will find void casting grubs. The boss at the end is Ronin Ginmura who drops a Shaped Arm Bone. Directions to Ronin Ginmura:
- After jumping down, follow the linear path to the first intersection and go right.
- Take the next two lefts which are close together and leave you at a door.
- Go through the doors and then take your next two rights which are also close together.
- The room you're now in only has one other exit. This exit leads to a short hallway leading to a room with Ronin Ginmura.
- Note: In the room prior to Ronin Ginmura, standing in the corner nearest to the exit hallway should allow you to debuff the mini-boss before entering the room.
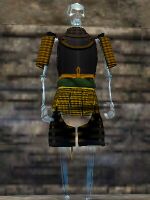
- In the west pit you will find rats and ghost enemies. The boss at the end is Ronin Shimakawa who drops an Ancient Arm Bone. Beware of the Departed Spirits, which cast Blade Lure and Asphyiaxtion. These spells can leave you a very easy target for Ronin Shimakawa, who hits very hard! Directions to Ronin Shimakawa:
- After jumping down, follow the linear path to the first intersection and go right and through two doors.
- At the next intersection, go left which will take you down a ramp.
- Continue without taking any of the remaining turns to reach the room with Ronin Shimakawa.
- Lockpick Bonus: There is a Chorizite Chest in the eastern pit section.
- After you have both bones and a skull combine them into Ancient Skull and Bones.
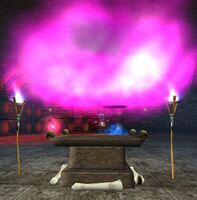
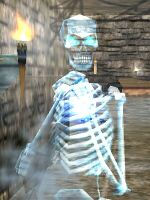
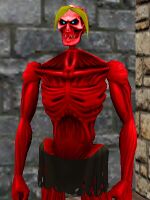
- From the drop head north again and follow the path without jumping down around the pit. You will soon come to a room with an altar and a Samurai Titan. Keep your distance from him so he does not attack!
- Hand the completed Ancient Skull and Bones to the Ancient Altar. After the first person does their turn in, a Crypt Eidolon will spawn, smite the Samurai Titan, and subsequently disappear.
- Note: If you wish to see this animation again, wait for the Samurai Titan to respawn before handing in your skull and bones. Each person can turn in for rewards without needing to see the animation.
- Turning in grants you the Vanquisher of the Titan title, 300 million Xp, 8,000 Luminance, a Legendary Key, and a Middle Gate Key (used in the next part).
- After everyone has turned in their Ancient Skull and Bones, ensure that everyone knows what to do for the upcoming courtyard fight, then take the nearby surface portal, which takes you back to the first courtyard (very hot drop).
- Note: The surface portal will expire within a few minutes of the last person's turn-in (it can be re-spawned via a turn in).
Part 3: 2nd Courtyard
- Have someone give their Middle Gate Key to the lock on the first courtyard door. The lock is located on the right side of the door.
- Note: They key does not expire, so a key from a past run can be used to skip part 2 of the quest if desired.
- Important: This section is typically the most dangerous of the entire quest. An Evader's Crystal is commonly used to help ensure survival.
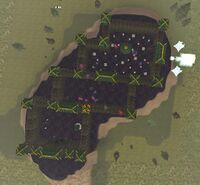
- When the gate opens, proceed into the 2nd courtyard and all the way to the far north end. This helps to keep the enemy archers out of range.
- Clear the entire spawn inside the 2nd courtyard. Once the last creature dies, the next courtyard door will open.
- Run through the door and proceed to the Falatacot Temple portal. It is located inside one of the larger buildings in the middle of the courtyard.
- Note: If someone in your group has a final gate key already, you can skip the dungeon and proceed to open the final gate (part 5).
Part 4: Falatacot Temple
- Do not move upon entering the dungeon! If you do you will aggro the nearby enemies!
- Inside this dungeon, your group must kill creatures, and collect the upper, middle, and lower pieces of a lever from their corpses. Each piece spawns randomly on 3 enemies in the dungeon. Only 1 lever is needed, so it is recommended to designate one person to collect the pieces.
- Note: The disintegration timer on these pieces all begin when you enter the dungeon, and not when you pick them up.
- Lockpick Bonus: There is another Chorizite Chest in this dungeon, in the room south of the last door.
- Once you have all three pieces, combine them to create a Lever Handle.
- Head to the north end of the dungeon and hand the Lever Handle to the Lever Box (located to the right of the door) to open it.
- Proceed past the door, and you will be auto-portaled into the next part of this dungeon.
- Note: Once you portal in, don't move forward, or you will draw aggro!
- In the next dungeon, you must kill everything to trigger the opening of the door (located in front of you at the drop). There are creatures at the drop and down each of the 6 nearby hallways that must be killed. Your group can split up if you feel confident that everyone will be safe.
- Once the door opens, head up the stairs and down the hallway until you reach a room containing several creatures, including an Exarch Nanjou Shou-jen.
- Kill the Exarch Nanjou Shou-jen, and a Freed Temple Exarch NPC will spawn.
- Speak with the Exarch NPC, to receive your second set of rewards: the Heretic title, 300 million xp, 12,000 luminance, a Legendary Key, and a Final Gate Key (used in the next part).
Part 5: Hoshino Tower
- When your group is ready, use the surface portal in this room to return to the 3rd courtyard (very hot drop).
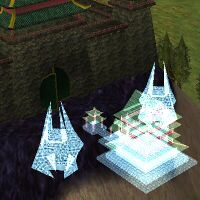
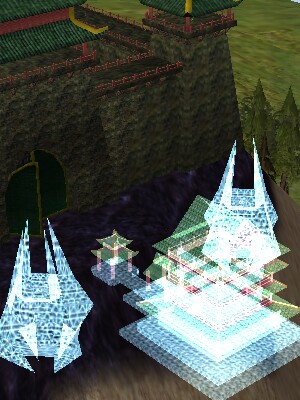
- Head north and have someone give the Final Gate Key to the lock on the right side of the final door. This leads to an overlook, containing the spectral towers.
- Beyond the door, be very careful you do not accidentally run into the portal straight ahead! It is hard to see in the bright light of the towers. You can run around the outside of the tower to help escape from any trailing enemies.
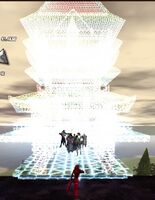
- Admire the spectral towers and make sure everyone is ready for the final boss fight. Then, everyone should enter the Hoshino Tower portal together.
- Inside is a small room with a First Lieutenant. Everyone should focus on the him and ignore the other spawns as much as possible. The longer the battle lasts, the more spawns will appear! Use fire weapons (preferably armor rending with an imperil and fire vuln in place).
- Note: Flame waves will shoot out along the edges of the room - everyone should stay away from the walls.
- Kill the First Lieutenant and loot the First Lieutenant's Insignia from his corpse (drops 9). The respawn time is fairly long (10 minutes?).
- Note: If anyone dies during the fight, they can get back by using the Hoshino Tower portal near the large pagoda building to the east of the fortress (coords?).
- After looting, take the ramp up until you reach a room containing tables with O-Yoroi Armor, Reinforced Shou-jen Armor and 2-use Legendary Keys on them.
- You may loot one piece of armor from either set and one key. The next room contains the legendary chests and an exit portal.
- Note: The dungeon is a "no log" dungeon, so you cannot camp out for more rewards.
- Return the First Lieutenant's Insignia to Mareeno Donn at the Royal Tent tent for the Captain title, 300 million xp, 31,000 luminance, and 35 MMDs.
Maps
| Dungeon | Coordinates | Wiki Map | ACmaps | Other | Quests |
| Venerable Mausoleum | 78.1N 48.2W | -- | -- | -- | -- |
| Falatacot Temple | 78.1N 48.2W | -- | -- | -- | -- |
| Hoshino Tower | 78.1N 48.2W | -- | -- | -- | -- |
Items
| Rewards (General) | ||||||||
| Legendary Key | ||||||||
| Rewards (O-Yoroi Armor) | ||||||||
| O-Yoroi Helm | O-Yoroi Coat | O-Yoroi Gauntlets | O-Yoroi Leggings | |||||
| O-Yoroi Sandals | ||||||||
| Objects | ||||||||
| Chorizite Chest | ||||||||
Title Rewards
| Task Required | Title Reward |
| Hand Ancient Skull and Bones to the Ancient Altar | Vanquisher of the Titan |
|
| |
| Speak to the Freed Temple Exarch | Heretic |
|
| |
| Hand the First Lieutenant's Insignia to Mareeno Donn | Captain |
|
| |
| See Titles for a list of all available titles. | |
Lore & Dialog
- You allow Ancient Altar to examine your Ancient Skull and Bones.
- You hand over 1 of your Ancient Skull and Boness.
- Ancient Altar gives you Middle Gate Key.
- As you place the bones onto the altar, the ground starts to tremble. You feel the room begin to charge with energy.
- A huge skeleton suddenly appears. It seems to be focused intently on the Samurai Titan.
- Ancient Altar tells you, "You have earned the title of "Vanquisher of the Titan"."
- You've earned 315,069,990 experience.
- You've earned 5,299 Luminance.
- Ancient Altar gives you Legendary Key.
- Crypt Eidolon says, "Abomination! The souls within these walls will not be enslaved to Hoshino Kei. Leave this place!"
- The Samurai Titan falls to the ground in defeat at the hands of the Crypt Eidolon. A portal to the surface appears in the northwest corner.
- Crypt Eidolon says, "Back to the abyss dark Titan. Do not return to this sacred place."
- Freed Temple Exarch tells you, "Thank you for freeing me from the infinite torture I have been enslaved to."
- Freed Temple Exarch tells you, "Being the guardian of this temple was never my choice, but instead was a duty thrust upon me and labeled as an honor."
- Freed Temple Exarch tells you, "I hope the little I can give helps to repay my debt to you."
- Freed Temple Exarch gives you Final Gate Key.
- You have been awarded the title of "Heretic"
- You've earned 297,235,856 experience.
- You've earned ??,??? Luminance.
- Freed Temple Exarch gives you Legendary Key.
- You allow Mareeno Donn to examine your First Lieutenant's Insignia..
- You hand over 1 of your First Lieutenant's Insignia.s.
- Mareeno Donn tells you, "Those are disturbing reports. Hoshino Kei has amassed great power and her army is growing."
- Mareeno Donn tells you, "If her influence continues to spread this could mean a war will be upon us, and I can't say that we would be able to stop her."
- Mareeno Donn tells you, "It was important for you to explore her fortress. You have earned this."
- You have been awarded the title of "Captain"
- You've earned 297,235,856 experience.
- You've earned ??,??? Luminance.
Images
-
Entrance to Hoshino Tower
-
Bird's Eye View of Hoshino Tower
-
Overview over all the courtyards
-
Bird's eye showing the courtyards
-
"active" Ancient Altar
-
Freed Temple Exarch
-
Entering Hoshino's Tower
Notes
- During the Lessons from the Past event there was an increase in the number of quest trophy bones that drop from the three bosses in the Venerable Mausoleum.
- During the Balance of Power event, the Mana Forge Keys were replaced by Legendary Keys, and a 2-use Legendary Key was added to the rewards in the final room. The fight with the First Lieutenant was also made more difficult.
- During the Curating Corruption event the Luminance reward was increased from 8,000 to ??,??? and from 12,000 to ??,???.
- During the Shattered Masks event Hoshino Luminance creatures can now drop legendary keyrings.
