Messenger's Collar Quest: Difference between revisions
imported>An Adventurer mNo edit summary |
imported>Arkalor |
||
| (44 intermediate revisions by 7 users not shown) | |||
| Line 1: | Line 1: | ||
{{Quest Summary | |||
| Patch Introduced = [[Remembering the Past]] | |||
| Related Quests = | |||
| | | Updated = | ||
| | |||
| Live Image = Live.jpg | |||
| | | Live Image Caption = | ||
| Quest Type = Solo/Small Group | |||
| ' | | Kill Task = False | ||
| | | Start Location = [[Portal to Kivik Lir's Temple|Mansion]] | ||
| Timer = 13 days | |||
| | | Level Restrictions = 90+ | ||
| | | Level Suggestions = 90+ | ||
| Contracts = | |||
| Item Rewards = [[Messenger's Collar]] | |||
| | | Luminance Reward = | ||
| Max XP Reward = 60,000,000 | |||
| | | Titles = | ||
| | | | ||
| Link Walk Through = True | |||
| | | Link Maps = True | ||
| | | Link Items = True | ||
| Link XP Rewards = True | |||
| | | Link Title Rewards = False | ||
| | | Link Images = True | ||
| Link Lore & Dialog = True | |||
| | | Link Notes = False | ||
| | }} | ||
== Quest Overview == | |||
| | The quest is divided into two parts. In the first part you obtain a [[Messenger's Collar]] from the [[Strange Swamp Temple]]. In the second part you travel to a Falatacot dungeon near Stonehold and obtain the [[Falatacot Tome (Messenger's Collar)|Falatacot Tome]]. To enter the 2nd dungeon you must have the collar equipped, which means once you have a collar you only need to go to the 2nd dungeon to complete the quest. The collars are givable, so you can take any character directly to the 2nd part as long as they have a collar on. | ||
| | <br><br>While the quest can first be completed at level 90, the experience does not cap until level 125. It is possible to run the quest repeatedly and stockpile all your tomes until 125, and turn them all in then. If you have the pack space available to do this it is highly advisable. As an example I ([[User:An Adventurer|An Adventurer]]) recently saved 13 tomes. Upon reaching 125, I turned them all in and advanced to 129. | ||
| | |||
== | |||
The quest is divided into two parts. In the first part you obtain a [[Messenger's Collar]] from the [[Strange Swamp Temple]]. In the second part you travel to a Falatacot dungeon near Stonehold and obtain the [[ | |||
== Walk Through == | == Walk Through == | ||
# Go to 41.7S 49.2W and enter the [[Strange Swamp Temple]].<br>'''Route 1:''' [[Portal to Kivik Lir's Temple]] at mansion, drop at 37.6S, 46.6W<br>'''Route 2:''' [[ | # Go to 41.7S 49.2W and enter the [[Strange Swamp Temple]].<br>'''Route 1:''' [[Portal to Kivik Lir's Temple]] at mansion, drop at 37.6S, 46.6W<br>'''Route 2:''' [[Dryreach]] to [[East Direlands Swamp]] (8.1S, 74.5E), drop at 39.7S, 54.1W | ||
# Go to the bottom of this dungeon. Step near the strange portal device to spawn the [[Burun Messenger]]. | # Go to the bottom of this dungeon. Step near the strange portal device to spawn the [[Burun Messenger]]. | ||
# Kill the Burun Messenger and loot the [[Messenger's Collar]]. | # Kill the Burun Messenger and loot the [[Messenger's Collar]]. He has 100,000 health and drops five collars each time. NOTE: Unless you can imp/vuln as a melee/ranged AND have a crushing blow-type weapon (preferably frost), expect it to take a while to kill him. | ||
# Go to [[Stonehold]]. | # Go to [[Stonehold]]. | ||
# Go east to 70.6N, 14.5W and [[Ikzisik Tika Ri Zikma]]. You must have the Messenger's Collar equipped to enter. | # Go east to 70.6N, 14.5W and [[Ikzisik Tika Ri Zikma]]. You must have the Messenger's Collar equipped to enter. | ||
# Go the the end of the dungeon and grab the [[ | # Go the the end of the dungeon and grab the [[Falatacot Tome (Messenger's Collar)|Falatacot Tome]]. From the entrance, stay to the left. Go down a ramp and stay to the left. You'll pass 2 dead ends shaped like a cross, guarded by a Sclavus. At the third, stay to the left and run past a Burun. Go up a ramp, then enter a large room (dangerous, don't linger); run through it across a bridge. Stay to the right and run through a hall that shoots fire spells on both sides. At the end of the hall, go left. Stop and kill the Falatacot Patrician and Falatacot Matrician, or run past to grab the tome. | ||
# Bring the tome to [[Fanzen San the Translator]] for your reward. | # Bring the tome to [[Fanzen San the Translator]] in [[Hebian-To]] for your reward. | ||
== Maps == | |||
{{Dungeon Table | |||
| Table Rows = | |||
{{Dungeon Maps | |||
| Dungeon = Strange Swamp Temple | |||
| Coordinates = 41.7S 49.2W | |||
| Wiki Map File = | |||
| ACmaps ID = | |||
| Other Site Name = | |||
| Other Site Link = | |||
}} | |||
{{Dungeon Maps | |||
| Dungeon = Ikzisik Tika Ri Zikma | |||
| Coordinates = 70.6N, 14.5W | |||
| Wiki Map File = | |||
| ACmaps ID = | |||
| Other Site Name = | |||
| Other Site Link = | |||
}} | |||
}} | |||
== Items == | |||
{{Item Table|Caption=Quest Items | |||
| A Strange Swamp Temple | |||
| Explorer's Journal | |||
| Words of the High Matriarch | |||
}} | |||
= | {{Item Table|Caption=Rewards | ||
| Messenger's Collar | |||
| Falatacot Tome (Messenger's Collar) | |||
}} | |||
== Experience Rewards == | |||
{{Quest Experience Table | |||
| Repeat Differs = True | |||
| Table Rows = | |||
{{Quest Task | |||
| Description = Hand the [[Falatacot Tome (Messenger's Collar)|Falatacot Tome]] to [[Fanzen San the Translator]] | |||
| Max XP = 60,000,000 | |||
| Percent of Level = 37.5 | |||
| Level Cap = 125 | |||
| Repeat Max XP = 45,000,000 | |||
| Repeat Percent of Level = 28 | |||
| Repeat Level Cap = 125 | |||
}} | |||
}} | |||
== Images == | == Images == | ||
<gallery widths=200px heights=200px perrow=4> | |||
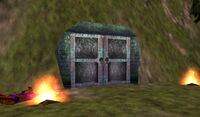
File:A Strange Swamp Temple Exterior.jpg|Outside the Strange Swamp Temple | |||
File:Corpse of Ainea Bes Live.jpg|Corpse of Ainea Besu | |||
File:A Strange Swamp Temple Portal Device Live.jpg|Falatacot Portal Device | |||
File:Ikzisik Tika Ri Zikma Entrance.jpg|Ikzisik Tika Ri Zikma Entrance | |||
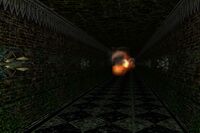
File:Ikzisik Tika Ri Zikma Dagger Traps.jpg|Dagger Traps | |||
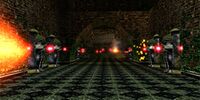
File:Ikzisik Tika Ri Zikma Fire Traps.jpg|Fire Traps | |||
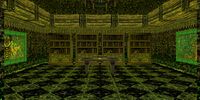
File:Ikzisik Tika Ri Zikma Final Room.jpg|Final Room | |||
</gallery> | |||
== Lore & Dialog == | == Lore & Dialog == | ||
| Line 102: | Line 133: | ||
:You've earned 45,000,000 experience.<br> | :You've earned 45,000,000 experience.<br> | ||
:Fanzen San the Translator gives you Words of the High Matriarch.</font> | :Fanzen San the Translator gives you Words of the High Matriarch.</font> | ||
Latest revision as of 00:53, 3 June 2012
| Walk Through ___ Maps ___ Items ___ XP ___ Images ___ Lore & Dialog ___ |
| |||||||||||||||||||||||||||||||||||||||
Quest Overview
The quest is divided into two parts. In the first part you obtain a Messenger's Collar from the Strange Swamp Temple. In the second part you travel to a Falatacot dungeon near Stonehold and obtain the Falatacot Tome. To enter the 2nd dungeon you must have the collar equipped, which means once you have a collar you only need to go to the 2nd dungeon to complete the quest. The collars are givable, so you can take any character directly to the 2nd part as long as they have a collar on.
While the quest can first be completed at level 90, the experience does not cap until level 125. It is possible to run the quest repeatedly and stockpile all your tomes until 125, and turn them all in then. If you have the pack space available to do this it is highly advisable. As an example I (An Adventurer) recently saved 13 tomes. Upon reaching 125, I turned them all in and advanced to 129.
Walk Through
- Go to 41.7S 49.2W and enter the Strange Swamp Temple.
Route 1: Portal to Kivik Lir's Temple at mansion, drop at 37.6S, 46.6W
Route 2: Dryreach to East Direlands Swamp (8.1S, 74.5E), drop at 39.7S, 54.1W - Go to the bottom of this dungeon. Step near the strange portal device to spawn the Burun Messenger.
- Kill the Burun Messenger and loot the Messenger's Collar. He has 100,000 health and drops five collars each time. NOTE: Unless you can imp/vuln as a melee/ranged AND have a crushing blow-type weapon (preferably frost), expect it to take a while to kill him.
- Go to Stonehold.
- Go east to 70.6N, 14.5W and Ikzisik Tika Ri Zikma. You must have the Messenger's Collar equipped to enter.
- Go the the end of the dungeon and grab the Falatacot Tome. From the entrance, stay to the left. Go down a ramp and stay to the left. You'll pass 2 dead ends shaped like a cross, guarded by a Sclavus. At the third, stay to the left and run past a Burun. Go up a ramp, then enter a large room (dangerous, don't linger); run through it across a bridge. Stay to the right and run through a hall that shoots fire spells on both sides. At the end of the hall, go left. Stop and kill the Falatacot Patrician and Falatacot Matrician, or run past to grab the tome.
- Bring the tome to Fanzen San the Translator in Hebian-To for your reward.
Maps
| Dungeon | Coordinates | Wiki Map | ACmaps | Other | Quests |
| Strange Swamp Temple | 41.7S 49.2W | -- | -- | -- | -- |
| Ikzisik Tika Ri Zikma | 70.6N, 14.5W | -- | -- | -- | -- |
Items
| Quest Items | ||||||||
| A Strange Swamp Temple | Explorer's Journal | Words of the High Matriarch | ||||||
| Rewards | ||||||||
| Messenger's Collar | Falatacot Tome (Messenger's Collar) | |||||||
Experience Rewards
| Task Required | First Run Max Experience | Percentage & Level Cap | Repeated Run Max XP | Repeated Run Percentage & Level Cap | |
| Hand the Falatacot Tome to Fanzen San the Translator | 60,000,000xp |
37.5% up to level 125 |
45,000,000xp | 28% up to level 125 | |
|
| |||||
| See Level Costs for per level information. | |||||
Images
-
Outside the Strange Swamp Temple
-
Corpse of Ainea Besu
-
Falatacot Portal Device
-
Ikzisik Tika Ri Zikma Entrance
-
Dagger Traps
-
Fire Traps
-
Final Room
Lore & Dialog
Showing collar to Fanzen:
You allow Fanzen San the Translator to examine your Messenger's Collar.
Fanzen San examines the collar in fascination.
Fanzen San the Translator tells you, "This looks like Falatacot workmanship. This could be a pet's collar or something similar."
Fanzen San the Translator tells you, "Yes, this symbol on the collar is definitely Falatacot. I believe it means "Unity". No actually this marking on the triangle represents a single person or a name. This translates better as "One of Three". Very interesting..."
Fanzen San the Translator tells you, "My my, look here, there is some writing on the inside too. Hehe, sortof a "If found please return to..." It gives a set of coordinates. Let me see..."
Fanzen San opens a map of Dereth and drags his fingers along its length to rest in the Osteth Mountain range.
Fanzen San the Translator tells you, "Yes, here it is in the Osteth Mountains. There's nothing marked there on the map, but that doesn't mean there isn't something there. The coordinates are 70.6N, 14.5W."
Burun Messneger:
The Falatacot portal device hums ominously and disgorges an agitated looking Burun.
Burun Messenger says, "Run! Run! I mustn't stop for anything!"
The Burun Messenger squeals in pain. His cries echo through the temple.
Burun Messenger says, "No! I must not fail my Mistress!"
Book Turn In:
First turn in:
- You give Fanzen San the Translator Falatacot Tome.
- Fanzen San the Translator tells you, "This High Matriarch, this "One of Three", must have sent the burun messenger you intercepted."
- Fanzen San the Translator tells you, "She may have something to do with the other recent Falatacot activities I've heard about. I may send a message to the Royal Guard concerning this. Thank you for your help friend."
- You've earned 60,000,000 experience.
- Fanzen San the Translator gives you Words of the High Matriarch.
Subsequent turn ins:
- You give Fanzen San the Translator Falatacot Tome.
- Fanzen San the Translator tells you, "Ah, another copy of the book you found in the Faltacot's Meeting Place. Thank you, I may be able to find more clues :about the High Matriarch in this."
- You've earned 45,000,000 experience.
- Fanzen San the Translator gives you Words of the High Matriarch.


