Muggy Guruk Caverns: Difference between revisions
Jump to navigation
Jump to search
imported>Sanddh m New page: Introduced in Bridging the Vast Divide {|border=1 width=300 cellpadding=3 !colspan=2| Dungeon Summary |- !Location | From Kor-Gursha |- !Restrictions | none, but under 15+ is not ... |
imported>Arkalor No edit summary |
||
| (15 intermediate revisions by 4 users not shown) | |||
| Line 1: | Line 1: | ||
Introduced | {{Dungeon Summary | ||
| Patch Introduced = [[Bridging the Vast Divide]] | |||
| Related Quests = [[Falatacot Medallion]] | |||
| Updated = | |||
| | |||
| Wiki Map File = | |||
| Wiki Map Two = | |||
| ACmaps.com ID = | |||
| Other Map = http://cdn.themis-media.com/media/sites/ac/images/maps/Muggy%20Guruk%20Caverns.jpg AC Warcry | |||
| | |||
| Coordinates = 67.4N 30.5E from [[Kor-Gursha]] | |||
| Landblock = | |||
| Dereth Map = {{Map Point|67.4|N|30.5|E|Marker=Dungeon}} | |||
| Nearest Town = [[Kor-Gursha]] | |||
| Nearest LS = | |||
| Route = [[Rithwic]] to [[Glystaene Cottages]] settlement portal (8.8N 60.9E). Run uphill from 64.1N 29.6E and enter [[Bur]] (be flagged) at 67.4N 30.5E >> Run down through the dungeon to the [[Kor-Gursha]] portal. The portal to the dungeon is down the southeast corridor from the room with all kill task NPCs. | |||
| | |||
| Level Restrictions = 1-40 | |||
| Tieable = False | |||
| Recallable = False | |||
| Summonable = False | |||
| Lifestone if Log = False | |||
| Quest Flag = See below | |||
| | |||
| Live Image = Live.jpg | |||
| Live Image Caption = | |||
}} | |||
== General == | == General == | ||
* You must do [[Asheron's Departure Lower]] Quest to access Bur where this dungeon is found. | |||
* The lowest level dungeon on Bur. Rather than being split into two dungeons like the higher level dungeon this just has one dungeon. At the end you will find [[Abbess Kivit]], who drops a medallion you can turn in for xp. | |||
*Navigating the Caverns and killing the Falatacot<br> | |||
**From drop, head east and follow the corridor. <br> | |||
**At the first intersection, go left (N) into a big room with two ramps. Go East down the ramp and keep going east till you can go into a corridor to the east. | |||
**Follow this corridor with more ramps down, into another bigger room. <br> | |||
**Go N, and at the end, go right into the corridor to the East. Hug the right wall, and another bigger room. | |||
**Go down, and take the corridor to the east, and keep going east (the corridor will circle), you will get another curve, and are facing westward into another big room. | |||
**This is were it can get nasty. Best is to try to try to lure the other creatures one by one to your corridor, until you get the boss lady herself for your group. | |||
== Maps == | |||
[http://cdn.themis-media.com/media/sites/ac/images/maps/Muggy%20Guruk%20Caverns.jpg Warcry's Map] | |||
* Wiki Map: | |||
:[[File:Name.png]] | |||
== NPCs == | |||
* None | |||
== Creatures == | |||
{{Creature Class|Burun | |||
| Location = Dungeon | |||
| Guruk Hatchling | |||
| Guruk Marauder | |||
| Guruk Pug | |||
}} | |||
{{Creature Class|Thrungus | |||
| Location = Dungeon | |||
| Deathcap Thrungus | |||
| Portobello Thrungus | |||
}} | |||
{{Creature Class|Undead | |||
| Location = Dungeon | |||
| Abbess Kivit | |||
| Tormented Servant | |||
}} | |||
== Items and Objects == | |||
* {{Icon Link|Decorated Falatacot Medallion}} - on corpse of [[Abbess Kivit]] | |||
== | == Portals == | ||
* [[Kor-Gursha]] - near drop, see map | |||
== Images == | |||
Click image for full size version. | |||
<gallery heights=200px widths=200px perrow=3> | |||
File:Abbess Kivit Live.jpg|Abbess Kivit | |||
File:Image.jpg|Caption | |||
</gallery> | |||
[[Category:Unmapped]] | |||
Latest revision as of 20:04, 7 May 2012
| Maps NPCs Creatures Items and Objects Portals Images Update History |
|
| ||||||||||||||||||||||||||||||||||


General
- You must do Asheron's Departure Lower Quest to access Bur where this dungeon is found.
- The lowest level dungeon on Bur. Rather than being split into two dungeons like the higher level dungeon this just has one dungeon. At the end you will find Abbess Kivit, who drops a medallion you can turn in for xp.
- Navigating the Caverns and killing the Falatacot
- From drop, head east and follow the corridor.
- At the first intersection, go left (N) into a big room with two ramps. Go East down the ramp and keep going east till you can go into a corridor to the east.
- Follow this corridor with more ramps down, into another bigger room.
- Go N, and at the end, go right into the corridor to the East. Hug the right wall, and another bigger room.
- Go down, and take the corridor to the east, and keep going east (the corridor will circle), you will get another curve, and are facing westward into another big room.
- This is were it can get nasty. Best is to try to try to lure the other creatures one by one to your corridor, until you get the boss lady herself for your group.
- From drop, head east and follow the corridor.
Maps
- Wiki Map:
NPCs
- None
Creatures
Items and Objects
 Decorated Falatacot Medallion - on corpse of Abbess Kivit
Portals
- Kor-Gursha - near drop, see map
Images
Click image for full size version.
-
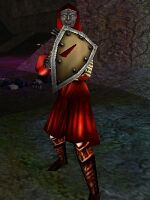 Abbess Kivit
 -
 Caption

