Shade Iron Mine: Difference between revisions
Jump to navigation
Jump to search
imported>Tlosk |
imported>Widgeon No edit summary |
||
| (16 intermediate revisions by 4 users not shown) | |||
| Line 1: | Line 1: | ||
{{Dungeon Summary | |||
| Patch Introduced = [[A Change in Tactics]] | |||
| Updated = | |||
| Related Quests = [[Shade Iron]] | |||
| Wiki Map File = | |||
| Wiki Map Two = | |||
| ACmaps.com ID = 0053 | |||
| Other Map = | |||
| | |||
| Coordinates = 65.0S 87.6W | |||
| Landblock = 0053 | |||
| Dereth Map = {{Map Point|65.0|S|87.6|W|Marker=Dungeon}} | |||
| Nearest Town = [[Ayan Baqur]] | |||
| Nearest LS = | |||
| Route = Short run south of [[Ayan Baqur]]. | |||
| | |||
| Level Restrictions = 80+ | |||
| Tieable = False | |||
| Recallable = False | |||
| Summonable = False | |||
| Lifestone if Log = False | |||
| Quest Flag = Finish the first 3 quests of the [[Whispering Blade]] Faction; Speak to [[Mekhmet]] at 59.7S 88.2W in [[Ayan Baqur]] | |||
| | |||
| Live Image = Live.jpg | |||
| Live Image Caption = | |||
}} | |||
== General == | |||
Near the end of the dungeon there are three similar branches, each has a group of [[Viamontian Ore Collector]]s that drop the [[Shade Iron Ore Hammer]], so if you have a large group of people you can split up to avoid waiting. At the end of each branch is a pillar of [[Shade Iron Ore Deposit]]. Use the hammer to obtain a [[Shade Iron Ore Sample]] to return to [[Mekhmet]] in [[Ayan Baqur]]. Note that there is a surface portal at the start that can be tied and summoned. | |||
== Maps == | |||
* {{ACMaps.com|0053}} | |||
* Wiki Map: | |||
:[[File:Name.png]] | |||
== | == NPCs == | ||
* None | |||
== Creatures == | == Creatures == | ||
{{Creature Class|Viamontian Knight | |||
| Location = Dungeon | |||
| Viamontian Commander | |||
| Viamontian Counselor | |||
| Viamontian Knight | |||
| Viamontian Ore Collector | |||
| Viamontian War Wizard | |||
}} | |||
== Items and Objects == | |||
* {{Icon Link|Shade Iron Ore Deposit}} - several, see map. | |||
* {{Icon Link|Shade Iron Ore Hammer}} - on corpse of [[Viamontian Ore Collector]]s | |||
* {{Icon Link|Shade Iron Ore Sample}} - by using the [[Shade Iron Ore Hammer]] on a pillar of [[Shade Iron Ore Deposit | |||
== Portals == | |||
* | * Surface - near drop | ||
== Images == | |||
Click image for full size version. | |||
<gallery heights=200px widths=200px perrow=3> | |||
Image:Shade Iron Mine Live.jpg|Heavily guarded entrance to Shade Iron Mine | |||
Image:Shade Iron Ore Deposit Live.jpg|Pillar of Shade Iron | |||
</gallery> | |||
Latest revision as of 12:19, 25 May 2012
| Maps NPCs Creatures Items and Objects Portals Images Update History |
|
|||||||||||||||||||||||||||||||||||
General
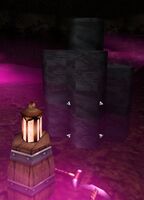
Near the end of the dungeon there are three similar branches, each has a group of Viamontian Ore Collectors that drop the Shade Iron Ore Hammer, so if you have a large group of people you can split up to avoid waiting. At the end of each branch is a pillar of Shade Iron Ore Deposit. Use the hammer to obtain a Shade Iron Ore Sample to return to Mekhmet in Ayan Baqur. Note that there is a surface portal at the start that can be tied and summoned.
Maps
- Map available at ACMaps.com
- Wiki Map:
NPCs
- None
Creatures
Items and Objects
 Shade Iron Ore Deposit - several, see map.
 Shade Iron Ore Hammer - on corpse of Viamontian Ore Collectors
 Shade Iron Ore Sample - by using the Shade Iron Ore Hammer on a pillar of [[Shade Iron Ore Deposit
Portals
- Surface - near drop
Images
Click image for full size version.
-
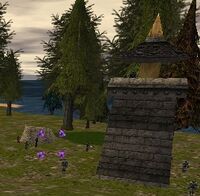
Heavily guarded entrance to Shade Iron Mine
-
Pillar of Shade Iron


