Singularity Recall: Difference between revisions
Jump to navigation
Jump to search
imported>Widgeon m →General |
imported>Andybear13 |
||
| (97 intermediate revisions by 12 users not shown) | |||
| Line 1: | Line 1: | ||
{{Quest Summary | |||
| Patch Introduced = [[The Slumbering Giant]] | |||
| Related Quests = | |||
| | | Updated = [[Mirror, Mirror]] | ||
| | |||
| Group | | Live Image = Caul Asylum Live.jpg | ||
| | | Live Image Caption = Caul Asylum | ||
| Quest Type = Group | |||
| | | Kill Task = False | ||
| | | Start Location = [[Singularity Caul]] | ||
| Timer = 20 Hours | |||
| | | Level Restrictions = 90+ | ||
| | | Level Suggestions = 90+ | ||
| Contracts = | |||
| Item Rewards = [[Recall to the Singularity Caul]]<br>[[Dark Amber Ring]]<br>[[Dark Ruby Ring]]<br>[[Dark Sapphire Ring]] | |||
| | | Luminance Reward = | ||
| Max XP Reward = None | |||
| | | Titles = | ||
| | | | ||
| Link Walk Through = True | |||
| | | Link Maps = True | ||
| | | Link Items = True | ||
| Link XP Rewards = False | |||
| | | Link Title Rewards = False | ||
| | | Link Images = True | ||
| Link Lore & Dialog = True | |||
| | | Link Notes = True | ||
| | }} | ||
== Quest Overview == | |||
* <font color=red>'''Note'''</font> Everyone ''must'' be flagged for [[Singularity Caul]] to complete this quest (see below for details). | |||
* Someone in your group must have [[Lockpick]]. | |||
* The three dark ring rewards share the same timer and cannot all be picked up. Make sure it's the ring you want before you loot it (see items below). | |||
== | === Singularity Caul Flagging === | ||
# Go to the [[Singularity Bore]] at 64.1S 63.8W, in the center of the [[Obsidian Plains]]. | |||
#* '''Tip:''' Use the [[Dangerous Portal Device]] at your mansion for a quick ride to the center of the [[Obsidian Plains]]. | |||
# From the drop, head South and jump down into the pit. | |||
# Take the West ramp up and then go left. From here, its linear until you reach a large room at the end with a [[Guardian of the Singularity]] (2 of them). | |||
# You must get the kill on the [[Guardian of the Singularity]] in order to be flagged to access the [[Singularity Caul]]. | |||
# Portal recall to the [[Singularity Bore]] and run North to the [[Singularity Caul]] portal. | |||
Lockpick is required | == Walk Through == | ||
'''Note:''' [[Lockpick]]ing is required throughout the quest to complete it. | |||
=== Part 1: Caul Asylum === | |||
# From the Caul drop, head to the [[Caul Asylum]] at 94.8S 91.0W. | |||
# From the drop, [[Lockpick]] the door to the North and run through the linear dungeon (always going down) until you get to a large room behind a locked gate. | |||
# Unlock the gate to the large room, and head to the South exit. Unlock it and head down the ramp. | |||
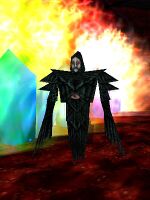
# From the split, take the West hallway until you get to a room with [[The Gatekeeper]]. Kill him and loot an [[Asylum Chest Key]] (one per group needed). | |||
# Backtrack to the split. One person (with lockpick) should now head back through the large room, and up the first ramp. Take all lefts until you reach a room with a locked door and a [[Asylum Chest]] inside. Use the [[Asylum Chest Key]] on the [[Asylum Chest]] and loot the [[Asylum Key]], then rejoin the group. | |||
# The group should now take the east hallway to a large room with a locked door. Use the [[Asylum Key]] on the locked door and enter the portal to the [[Caul Athenaeum]]. | |||
=== Part 2: Caul Anthenauem === | |||
# From the drop, take the Northeast ramp up. Take the first ramp up on your left, and continue until you reach a 3-way split. | |||
# You must now access the portal to the [[Caul Sanitorium]], which is located behind a locked gate in the first hallway after taking a right at the 3-way split. | |||
#* '''Long Way:''' You must find [[The Sage]], who always spawns in the southeast corner room on this level. He drops an [[Athenaeum Key]], which is used to unlock the gate to the [[Caul Sanitorium]] portal. | |||
#* '''Short Way:''' You can use the [[PKLite]] exploit to bypass the locked gate. | |||
# Once the gate is open, jump accross the portal walkway and use the [[Caul Sanitorium]] portal. | |||
=== Part 3: Caul Sanitorium === | |||
'''Note:''' Only 1 portal in this dungeon is real, the rest bring you back to the [[Caul Sanitorium]] drop. | |||
# From the drop, run down the portal staircase, and jump across to the Southeast platform | |||
#* '''Tip:''' Its easiest to jump from the portal staircase to the Southwest platform, back to the center pillar, and then to the Southeast platform. | |||
# From here, take the ramps down, take your first right, and then the first cutback to your left. | |||
# Now hug the left wall, take the ramp up, and follow the long straight hallway until you dead-end into a split. | |||
# Take the hallway on the left (Southeast), and use this portal to enter [[Aerbax's Antechamber]]. NOTE: All portals are labeled with Caul Sanitorium name, there isn't a uniquely named "Aerbax's Antechamber". Take the Caul Sanitorium portal that is the second one on the left. | |||
=== Part 4: Aerbax's Antechamber === | |||
# From the drop, you'll need to use a series of levers ''(see map)'' to open the South gate. | |||
#* '''Tip:''' You can use the [[PKLite]] exploit here to bypass the levers and save time. | |||
# Head down the ramp and take a right at the split. Follow the linear dungeon. | |||
#* '''Note:''' 2 doors along the way will require you to use a lever, which are behind locked doors just around the corner. | |||
# Once you open the last gate, jump down and take a right, where you'll find a group of [[Shadow]]s. Kill them and then hit the lever on the South wall. | |||
# Enter the room to the North and kill the [[The Auditor]]. Loot the green [[Asylum Chest Key]]. | |||
# One person also needs to get the blue [[Key]] from the [[The Auditor]] to open the final door. | |||
# Once everyone has their [[Asylum Chest Key (Auditor)]], take the Northeast exit and work your way back to the portal drop. A lever on the way opens the North door. | |||
# From the drop zone, take the North ramp down, but be sure to jump over the base of the ramp (at the intersection) to avoid the '''dispell trap'''. | |||
#* '''Note:''' If you forgot to hit the lever on the way, you can also use the [[PKLite]] exploit to open the North door. | |||
# From the intersection, your first left, and then your first right will take you to the final room. | |||
#* '''Note:''' You must use a lever to open the locked gate here. The locked door to the Northeast provides access to the lever in the room to the Northwest, which subsequently opens the door to the North. | |||
# Use the [[Key (Auditor)]] (from the [[The Auditor]]) to open the final room, which contains a number of [[Sanatorium Chest]]s. | |||
# Use your [[Asylum Chest Key]] on any of the [[Sanatorium Chest]]s to obtain the [[Recall to the Singularity Caul]]. | |||
== | == Maps == | ||
{{Dungeon Table | |||
| Table Rows = | |||
{{Dungeon Maps | |||
| Dungeon = Caul Asylum | |||
| Coordinates = 94.8S 91.0W | |||
| ACmaps ID = 6045 | |||
}} | |||
{{Dungeon Maps | |||
| Dungeon = Caul Sanitorium | |||
| ACmaps ID = 6047 | |||
}} | |||
{{Dungeon Maps | |||
| Dungeon = Caul Athenaeum | |||
| ACmaps ID = 6046 | |||
}} | |||
{{Dungeon Maps | |||
| Dungeon = Aerbax's Antechamber | |||
| ACmaps ID = 6048 | |||
}} | |||
}} | |||
== Items == | |||
{{Item Table|Caption=Quest Items | |||
| Aerbax's Message Shard | |||
| Energy Source | |||
| Corroding Message Shard | |||
| Failure | |||
| Pristine Message Shard | |||
| Destructions and Beginnings | |||
| Chipped Message Shard | |||
| Personal Research Notes: Tuskers | |||
| Misty Message Shard | |||
| Research Notes: "Children of Darkness" | |||
| Shimmering Message Shard | |||
| Parallax Auguries | |||
| Twisted Message Shard | |||
| Research Notes: Mosswart | |||
| Warped Message Shard | |||
| Research Notes: Mattekar | |||
| Asylum Chest Key | |||
| Asylum Key | |||
| Athenaeum Key | |||
| Asylum Chest Key (Auditor) | |||
| Key (Auditor) | |||
| Asylum Chest | |||
| Sanatorium Chest | |||
}} | |||
= | {{Item Table|Caption=Rewards | ||
| Recall to the Singularity Caul | |||
| Dark Amber Ring | |||
| Dark Ruby Ring | |||
| Dark Sapphire Ring | |||
}} | |||
== Images == | == Images == | ||
Click image for full size version. | |||
<gallery heights=200px widths=200px perrow=3> | |||
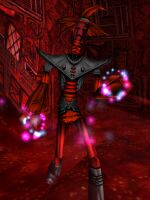
File:The Gatekeeper Live.jpg|The Gatekeeper | |||
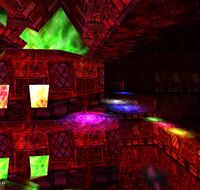
File:Caul Sanatorium Steps 2 Live.jpg|Caul Sanatorium portal steps | |||
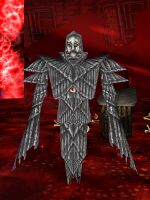
File:The Sage Live.jpg|The Sage | |||
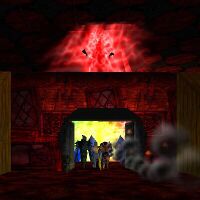
File:Aerbax's Antechamber Auditor Room Live.jpg|Aerbax's Antechamber, Auditor Room | |||
File:The Auditor Live.jpg|The Auditor | |||
File:Aerbax's Antechamber Final Room Live.jpg|Aerbax's Antechamber, Final Room | |||
File:Aerbax's Antechamber Statue Final Live.jpg|Statue in final room of Aerbax's Antechamber | |||
</gallery> | |||
== Lore & Dialog == | == Lore & Dialog == | ||
'''After killing the Gatekeeper'''<br> | |||
<font color=green>The master must be warned the consciousness must flow</font> | |||
---- | |||
'''When entering the Caul Sanitorium portal'''<br> | |||
<font color=green> | |||
A voice sounds in your mind as you enter the flux of portal space, "Inconsistencies and anomalies within the construct have alerted me of meat bodies not assigned to the Athenaeum structure. Fabric of portal has been torn. A new destination is now at hand. Laboratory compromised. I must inform my mirror of these parasitic incursions."</font> | |||
[[ | == Notes == | ||
* During the [[Mirror, Mirror]] event, the [[Caul Asylum]] portal and the drop point for the [[Recall to the Singularity Caul|Caul Recall]] spell were both moved. | |||
* The three ring rewards were also added during this event. | |||
Latest revision as of 14:56, 28 June 2014
| Walk Through ___ Maps ___ Items ___ Images ___ Lore & Dialog ___ Notes |
| |||||||||||||||||||||||||||||||||||||||
 | |||||||||||||||||||||||||||||||||||||||
Quest Overview
- Note Everyone must be flagged for Singularity Caul to complete this quest (see below for details).
- Someone in your group must have Lockpick.
- The three dark ring rewards share the same timer and cannot all be picked up. Make sure it's the ring you want before you loot it (see items below).
Singularity Caul Flagging
- Go to the Singularity Bore at 64.1S 63.8W, in the center of the Obsidian Plains.
- Tip: Use the Dangerous Portal Device at your mansion for a quick ride to the center of the Obsidian Plains.
- From the drop, head South and jump down into the pit.
- Take the West ramp up and then go left. From here, its linear until you reach a large room at the end with a Guardian of the Singularity (2 of them).
- You must get the kill on the Guardian of the Singularity in order to be flagged to access the Singularity Caul.
- Portal recall to the Singularity Bore and run North to the Singularity Caul portal.
Walk Through
Note: Lockpicking is required throughout the quest to complete it.
Part 1: Caul Asylum
- From the Caul drop, head to the Caul Asylum at 94.8S 91.0W.
- From the drop, Lockpick the door to the North and run through the linear dungeon (always going down) until you get to a large room behind a locked gate.
- Unlock the gate to the large room, and head to the South exit. Unlock it and head down the ramp.
- From the split, take the West hallway until you get to a room with The Gatekeeper. Kill him and loot an Asylum Chest Key (one per group needed).
- Backtrack to the split. One person (with lockpick) should now head back through the large room, and up the first ramp. Take all lefts until you reach a room with a locked door and a Asylum Chest inside. Use the Asylum Chest Key on the Asylum Chest and loot the Asylum Key, then rejoin the group.
- The group should now take the east hallway to a large room with a locked door. Use the Asylum Key on the locked door and enter the portal to the Caul Athenaeum.
Part 2: Caul Anthenauem
- From the drop, take the Northeast ramp up. Take the first ramp up on your left, and continue until you reach a 3-way split.
- You must now access the portal to the Caul Sanitorium, which is located behind a locked gate in the first hallway after taking a right at the 3-way split.
- Long Way: You must find The Sage, who always spawns in the southeast corner room on this level. He drops an Athenaeum Key, which is used to unlock the gate to the Caul Sanitorium portal.
- Short Way: You can use the PKLite exploit to bypass the locked gate.
- Once the gate is open, jump accross the portal walkway and use the Caul Sanitorium portal.
Part 3: Caul Sanitorium
Note: Only 1 portal in this dungeon is real, the rest bring you back to the Caul Sanitorium drop.
- From the drop, run down the portal staircase, and jump across to the Southeast platform
- Tip: Its easiest to jump from the portal staircase to the Southwest platform, back to the center pillar, and then to the Southeast platform.
- From here, take the ramps down, take your first right, and then the first cutback to your left.
- Now hug the left wall, take the ramp up, and follow the long straight hallway until you dead-end into a split.
- Take the hallway on the left (Southeast), and use this portal to enter Aerbax's Antechamber. NOTE: All portals are labeled with Caul Sanitorium name, there isn't a uniquely named "Aerbax's Antechamber". Take the Caul Sanitorium portal that is the second one on the left.
Part 4: Aerbax's Antechamber
- From the drop, you'll need to use a series of levers (see map) to open the South gate.
- Tip: You can use the PKLite exploit here to bypass the levers and save time.
- Head down the ramp and take a right at the split. Follow the linear dungeon.
- Note: 2 doors along the way will require you to use a lever, which are behind locked doors just around the corner.
- Once you open the last gate, jump down and take a right, where you'll find a group of Shadows. Kill them and then hit the lever on the South wall.
- Enter the room to the North and kill the The Auditor. Loot the green Asylum Chest Key.
- One person also needs to get the blue Key from the The Auditor to open the final door.
- Once everyone has their Asylum Chest Key (Auditor), take the Northeast exit and work your way back to the portal drop. A lever on the way opens the North door.
- From the drop zone, take the North ramp down, but be sure to jump over the base of the ramp (at the intersection) to avoid the dispell trap.
- Note: If you forgot to hit the lever on the way, you can also use the PKLite exploit to open the North door.
- From the intersection, your first left, and then your first right will take you to the final room.
- Note: You must use a lever to open the locked gate here. The locked door to the Northeast provides access to the lever in the room to the Northwest, which subsequently opens the door to the North.
- Use the Key (Auditor) (from the The Auditor) to open the final room, which contains a number of Sanatorium Chests.
- Use your Asylum Chest Key on any of the Sanatorium Chests to obtain the Recall to the Singularity Caul.
Maps
| Dungeon | Coordinates | Wiki Map | ACmaps | Other | Quests |
| Caul Asylum | 94.8S 91.0W | -- | 6045 | -- | -- |
| Caul Sanitorium | -- | -- | 6047 | -- | -- |
| Caul Athenaeum | -- | -- | 6046 | -- | -- |
| Aerbax's Antechamber | -- | -- | 6048 | -- | -- |
Items
| Rewards | ||||||||
| Recall to the Singularity Caul | Dark Amber Ring | Dark Ruby Ring | Dark Sapphire Ring | |||||
Images
Click image for full size version.
-
The Gatekeeper
-
Caul Sanatorium portal steps
-
The Sage
-
Aerbax's Antechamber, Auditor Room
-
The Auditor
-
Aerbax's Antechamber, Final Room
-
Statue in final room of Aerbax's Antechamber
Lore & Dialog
After killing the Gatekeeper
The master must be warned the consciousness must flow
When entering the Caul Sanitorium portal
A voice sounds in your mind as you enter the flux of portal space, "Inconsistencies and anomalies within the construct have alerted me of meat bodies not assigned to the Athenaeum structure. Fabric of portal has been torn. A new destination is now at hand. Laboratory compromised. I must inform my mirror of these parasitic incursions."
Notes
- During the Mirror, Mirror event, the Caul Asylum portal and the drop point for the Caul Recall spell were both moved.
- The three ring rewards were also added during this event.
