Purging the Corruption: Difference between revisions
imported>Sucamarto Created page with "{{Quest Summary | Patch Introduced = Dreams of Torment | Related Quests = | Updated = | | Live Image = Live.jpg | Live Image Captio..." |
imported>Drthunder2 |
||
| (46 intermediate revisions by 5 users not shown) | |||
| Line 8: | Line 8: | ||
| Quest Type = Solo/Group | | Quest Type = Solo/Group | ||
| Kill Task = False | | Kill Task = False | ||
| Start Location = | | Start Location = South Direlands | ||
| Timer = | | Timer = 20 hours | ||
| Time to Complete = | | Time to Complete = 30 minutes | ||
| Level Restrictions = 180+ | | Level Restrictions = 180+ | ||
| Level Suggestions = 180+ | | Level Suggestions = 180+ | ||
| Contracts = | | Contracts = | ||
| Item Rewards = [[Legendary Key]]<br>[[Virindi Cage]] | | Item Rewards = [[Legendary Key]]<br>[[Virindi Cage]] | ||
| MMD Reward = 8 | |||
| Luminance Reward = 20,000 | | Luminance Reward = 20,000 | ||
| Max XP Reward = 329,000,000 | | Max XP Reward = 329,000,000 | ||
| Line 30: | Line 31: | ||
}} | }} | ||
== Quest Overview == | == Quest Overview == | ||
Invade the [[Curator of Torment]]'s study and discover the experiments being done on [[Gearknight]]s, [[Lugian]]s, and [[Tumerok]]s. This quest was the lore precursor for the [[Rynthid Foundry]], [[Lugian Assault]], and [[End of Days]] quests. | |||
== Walk Through == | == Walk Through == | ||
# Head to the [[Curator of Torment's Study]] | # Head to the [[Curator of Torment's Study]] at 79.0S, 39.2W. | ||
#* '''Route: Take the Southern Dires portal in the temple outside Candeth Keep''' | #* '''Route: Take the Southern Dires portal in the temple outside Candeth Keep at 88.5S 66.8W.''' | ||
#* WARNING!! THE DROP IS <font color=red>HOT</font> | #* WARNING!! THE DROP IS <font color=red>HOT</font>! | ||
# | # The dungeon has 4 symmetrical wings to the northwest, northeast, southwest, and southeast which all lead to the same place. If you are interested in a [[Chorizite Chest]], be sure to take the northwest wing. | ||
# | # No matter what direction you go, you will come to a room with 2 closed doors and 3 bookcases. 2 of the bookcases (the ones near the doors) open the doors. The other bookcase contains several [[Dulled Message Shard]]s (lore item only). | ||
# Proceed through either door and continue on the linear path until you reach a room with a large hole in the floor. Jump down the hole into a room with large eggs. | |||
# | # Continue onward and you will come to another room with a closed door and 2 bookcases. One bookcase opens the door and one contains several [[Faded Message Shard]]s (lore item only). | ||
# Past the door, you will come to a longer room with lightning clouds in it. Take the door at the end of the room, past the lightning clouds. | |||
# | # Ahead is a large room with a [[Hollow Servitor]] in it. Kill him and loot the [[Private Chamber Key]]. | ||
# | # Once you have the key, take the west exit. Use the key to open the “Private Chamber” door, and jump across the gap to the portal. The drop is safe. | ||
# Once you have the key, | # At the drop are 3 NPCs: [[Aun Siminua]] (lvl 205 Tumerok), [[Kul Bronzegear]] (lvl 210 Gear Knight), and [[Oggma]] (lvl 200 Lugian). Beware of the floor which does lightning damage near the back of this room! | ||
# | # Talk to [[Kul Bronzegear]] to begin the fight. You will have to click on his dot on the radar to be able to select him. | ||
# Talk to [[Kul Bronzegear]] to begin the fight. All 3 become attackable. [[Oggma]] the Lugian has hollow rocks, [[Aun Siminua]] the Tumerok uses lightning vulns/spells, and [[Kul Bronzegear]] the Gear Knight has a 2 handed sword. | # All 3 NPCs then become attackable. [[Oggma]] the Lugian has hollow rocks, [[Aun Siminua]] the Tumerok uses lightning vulns/spells, and [[Kul Bronzegear]] the Gear Knight has a 2 handed sword. | ||
#* WARNING:: Be careful where you stand | #* WARNING:: Be careful of moving near the back of the room where you will take lightning damage! | ||
# Kill | #* Note: The recommended kill order is Gearknight, Lugian, Tumerok. If you are soloing, you can stand on the far right near the Lugian and the Tumerok will likely ignore you since you are out of range. | ||
# Kill all 3, and loot the appropriate items from each. [[Kul Bronzegear]] will drop 9 [[Legendary Key]]s, and [[Aun Siminua]] and [[Oggma]] will drop the [[Crimson Key]] & [[Azure Key]] needed to open the portal doors to the rewards room to the south. | |||
#* Note: each NPC has a table in the room with shards on it. These are lore only and are NOT required to collect the rewards from the quest! | #* Note: each NPC has a table in the room with shards on it. These are lore only and are NOT required to collect the rewards from the quest! | ||
# After looting the chests in the south room, head | # After looting the chests in the south room, head to the [[Virindi Delegate (Candeth Keep)|Virindi Delegate]] (in [[Candeth Keep]]) for experience, luminance, and [[Virindi Cage]] item rewards. | ||
#* Note: The [[Virindi Cage]] can be hooked on a house, and casts "[[Ride the Lightning]]" when used (70% lightning protection). It requires spec [[Life Magic]] to use | #* Note: The [[Virindi Cage]] can be hooked on a house, and casts "[[Ride the Lightning]]" when used (70% lightning protection). It requires spec [[Life Magic]] to use and the player must have completed the quest. | ||
== Maps == | == Maps == | ||
| Line 57: | Line 62: | ||
| Dungeon = Curator of Torment's Study | | Dungeon = Curator of Torment's Study | ||
| Coordinates = 79.0S, 39.2W | | Coordinates = 79.0S, 39.2W | ||
| Wiki Map File = | | Wiki Map File = 5870.png | ||
| ACmaps ID = | | ACmaps ID = | ||
| Other Site Name = | | Other Site Name = | ||
| Line 65: | Line 70: | ||
== Items == | == Items == | ||
{{Item Table|Caption=Quest Items| | {{Item Table|Caption=Quest Items|Bookcase (Curator of Torment's Study)|Private Chamber Key|Azure Key|Crimson Key}} | ||
{{Item Table|Caption=Lore Only Items|Dulled Message Shard|Translated Dulled Message Shard|Faded Message Shard|Translated Faded Message Shard|Chipped Message Shard (Lugian)|Translated Chipped Message Shard|Fractured Message Shard|Translated Fractured Message Shard|Cracked Message Shard|Translated Cracked Message Shard}} | |||
{{Item Table|Caption=Rewards| | {{Item Table|Caption=Rewards||Legendary Key|Virindi Cage}} | ||
== Experience Rewards == | == Experience Rewards == | ||
{{Quest Experience Table | {{Quest Experience Table | ||
| Repeat Differs = | | Repeat Differs = False | ||
| Table Rows = | | Table Rows = | ||
{{Quest Task | {{Quest Task | ||
| Description = Talk to the [[Vision of Horror (Candeth Keep)]] after completing the quest | | Description = Talk to the [[Vision of Horror (Candeth Keep)]] after completing the quest. | ||
| Max XP = 329,000,000 | | Max XP = 329,000,000 | ||
| Percent of Level = | | Percent of Level = | ||
| Line 81: | Line 88: | ||
| Repeat Percent of Level = | | Repeat Percent of Level = | ||
| Repeat Level Cap = | | Repeat Level Cap = | ||
}} | }} | ||
}} | }} | ||
| Line 98: | Line 94: | ||
Click image for full size version. | Click image for full size version. | ||
<gallery widths=200px heights=200px perrow=3> | <gallery widths=200px heights=200px perrow=3> | ||
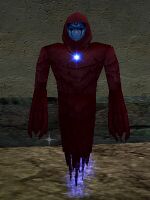
File: | File:Virindi Delegate (Candeth Keep) Live.jpg|[[Virindi Delegate (Candeth Keep)]] | ||
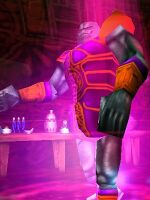
File:Oggma Live.jpg|[[Oggma]] the Lugian. | |||
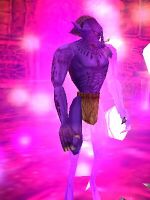
File:Aun Siminua Live.jpg|[[Aun Siminua]] the Tumerok. | |||
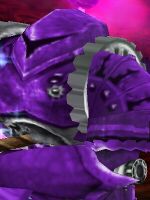
File:Kul Bronzegear Live.jpg|[[Kul Bronzegear]] the Gear Knight. | |||
File:Virindi Cage Live.jpg|[[Virindi Cage]] | File:Virindi Cage Live.jpg|[[Virindi Cage]] | ||
</gallery> | </gallery> | ||
| Line 116: | Line 115: | ||
---- | ---- | ||
<font color=green>Virindi Cage cast Ride The Lightning on you.</font> | <font color=green>Virindi Cage cast Ride The Lightning on you.</font> | ||
== Notes == | == Notes == | ||
* | * The respawn timer for the bosses is a longer one (5+ minutes). Also, when activating the boss fight for the 2nd and subsequent times, there is a long delay before the non-NPC version of the bosses spawn. | ||
Latest revision as of 19:02, 29 August 2014
| Walk Through ___ Maps ___ Items ___ XP ___ Images ___ Lore & Dialog ___ |
| |||||||||||||||||||||||||||||||||||||||
Quest Overview
Invade the Curator of Torment's study and discover the experiments being done on Gearknights, Lugians, and Tumeroks. This quest was the lore precursor for the Rynthid Foundry, Lugian Assault, and End of Days quests.
Walk Through
- Head to the Curator of Torment's Study at 79.0S, 39.2W.
- Route: Take the Southern Dires portal in the temple outside Candeth Keep at 88.5S 66.8W.
- WARNING!! THE DROP IS HOT!
- The dungeon has 4 symmetrical wings to the northwest, northeast, southwest, and southeast which all lead to the same place. If you are interested in a Chorizite Chest, be sure to take the northwest wing.
- No matter what direction you go, you will come to a room with 2 closed doors and 3 bookcases. 2 of the bookcases (the ones near the doors) open the doors. The other bookcase contains several Dulled Message Shards (lore item only).
- Proceed through either door and continue on the linear path until you reach a room with a large hole in the floor. Jump down the hole into a room with large eggs.
- Continue onward and you will come to another room with a closed door and 2 bookcases. One bookcase opens the door and one contains several Faded Message Shards (lore item only).
- Past the door, you will come to a longer room with lightning clouds in it. Take the door at the end of the room, past the lightning clouds.
- Ahead is a large room with a Hollow Servitor in it. Kill him and loot the Private Chamber Key.
- Once you have the key, take the west exit. Use the key to open the “Private Chamber” door, and jump across the gap to the portal. The drop is safe.
- At the drop are 3 NPCs: Aun Siminua (lvl 205 Tumerok), Kul Bronzegear (lvl 210 Gear Knight), and Oggma (lvl 200 Lugian). Beware of the floor which does lightning damage near the back of this room!
- Talk to Kul Bronzegear to begin the fight. You will have to click on his dot on the radar to be able to select him.
- All 3 NPCs then become attackable. Oggma the Lugian has hollow rocks, Aun Siminua the Tumerok uses lightning vulns/spells, and Kul Bronzegear the Gear Knight has a 2 handed sword.
- WARNING:: Be careful of moving near the back of the room where you will take lightning damage!
- Note: The recommended kill order is Gearknight, Lugian, Tumerok. If you are soloing, you can stand on the far right near the Lugian and the Tumerok will likely ignore you since you are out of range.
- Kill all 3, and loot the appropriate items from each. Kul Bronzegear will drop 9 Legendary Keys, and Aun Siminua and Oggma will drop the Crimson Key & Azure Key needed to open the portal doors to the rewards room to the south.
- Note: each NPC has a table in the room with shards on it. These are lore only and are NOT required to collect the rewards from the quest!
- After looting the chests in the south room, head to the Virindi Delegate (in Candeth Keep) for experience, luminance, and Virindi Cage item rewards.
- Note: The Virindi Cage can be hooked on a house, and casts "Ride the Lightning" when used (70% lightning protection). It requires spec Life Magic to use and the player must have completed the quest.
Maps
| Dungeon | Coordinates | Wiki Map | ACmaps | Other | Quests |
| Curator of Torment's Study | 79.0S, 39.2W | -- | -- | -- |
Items
| Quest Items | ||||||||
| Bookcase (Curator of Torment's Study) | Private Chamber Key | Azure Key | Crimson Key | |||||
| Rewards | ||||||||
| Legendary Key | Virindi Cage | |||||||
Experience Rewards
| Task Required | Max Experience | Percentage & Level Cap | |||
| Talk to the Vision of Horror (Candeth Keep) after completing the quest. | 329,000,000xp |
??% up to level ?? | |||
|
| |||||
| See Level Costs for per level information. | |||||
Images
Click image for full size version.
-
Oggma the Lugian.
-
Aun Siminua the Tumerok.
-
Kul Bronzegear the Gear Knight.
Lore & Dialog
Kul Bronzegear says, "Purge the flawed. They must be exterminated."
Vision of Horror tells you, "Though the Curator of Torment is gone, the corruption continued to linger. Destroying the Curator's final abominations is precisely what the Council had hoped you would be able to accomplish. These things must not be left to fester."
Vision of Horror tells you, "Please take these rewards. You have earned them."
The Vision of Horror gazes at you and whispers softly. A chill quickly shoots up your spine.
Vision of Horror tells you, "A gift from the Council for your assistance. Combine the enchantment I have bestowed onto your spirit with a mastery of the School of the Heart and you will be able to use the Curator's tools of imprisonment to improve your survival skills. It seems poetic justice to alter the Curator's magical contraptions that were intended to torment its victims into beneficial boons."
Vision of Horror tells you, "Place this Virindi Cage at your home. If you possess the proper expertise the magics within it will grant you greater power."
You've earned 349,799,981 experience.
You've earned 21,199 Luminance.
Vision of Horror gives you Virindi Cage.
Virindi Cage cast Ride The Lightning on you.
Notes
- The respawn timer for the bosses is a longer one (5+ minutes). Also, when activating the boss fight for the 2nd and subsequent times, there is a long delay before the non-NPC version of the bosses spawn.
