Putiputipuh's Onga: Difference between revisions
imported>Immortalbob mNo edit summary |
imported>Darkmurkrow No edit summary |
||
| (34 intermediate revisions by 6 users not shown) | |||
| Line 4: | Line 4: | ||
| Updated = | | Updated = | ||
| | | | ||
| Live Image = | | Live Image = Putiputipuh's Onga Live.jpg | ||
| Live Image Caption = | | Live Image Caption = [[Tekapuapuh]] and [[Putiputipuh]] | ||
| Quest Type = Solo/Group | | Quest Type = Solo/Group | ||
| Kill Task = False | | Kill Task = False | ||
| Start Location = [[Ahurenga]] | | Start Location = [[Ahurenga]] | ||
| Timer = | | Timer = 20 hours | ||
| Level Restrictions = | | Level Restrictions = 20+ | ||
| Level Suggestions = | | Level Suggestions = | ||
| Contracts = | |||
| Item Rewards = [[Panaq]] | | Item Rewards = [[Panaq]] | ||
| Luminance Reward = None | |||
| MMD Reward = None | |||
| Max XP Reward = 25,000 | | Max XP Reward = 25,000 | ||
| Titles = | | Titles = | ||
| Line 21: | Line 24: | ||
| Link XP Rewards = True | | Link XP Rewards = True | ||
| Link Title Rewards = False | | Link Title Rewards = False | ||
| Link Images = | | Link Images = True | ||
| Link Lore & Dialog = True | | Link Lore & Dialog = True | ||
| Link Notes = False | | Link Notes = False | ||
}} | }} | ||
== Quest Overview == | == Quest Overview == | ||
Help [[Tekapuapuh]]'s pet olthoi [[Putiputipuh]]. The dungeon for this quest is densely populated with low level olthoi. | |||
== Walk Through == | == Walk Through == | ||
# Head to [[Ahurenga]] on [[Marae Lassel]] and speak to [[Hea Mutuona]] at 47.1N, 90.3W. Get him to talk by giving him some [[Ale]] from the local barkeep. | # Head to [[Ahurenga]] on [[Marae Lassel]] and speak to [[Hea Mutuona]] at 47.1N, 90.3W. Get him to talk by giving him some [[Ale]] from the local barkeep. | ||
#* Route: Ahurenga is in the Annex of the [[Town Network]]. | |||
# He sends you to see [[Tekapuapuh]] located at 46.4N, 91.5W. | |||
# [[Tekapuapuh]] sends to you the [[Secret Putiputi Place]] located at 46.3N, 82.1W to get the "Onga" for [[Putiputipuh]]. | |||
# Inside the first 3 levels of the dungeon, you must first find the [[Olthoi Cistern]]s, one of these will contain a [[Mysterious Tumerok Artifact 1|Mysterious Tumerok Artifact]] some will contain nothing, and others will trigger spawns. See the maps below to find out which one to use (you can also examine them until you find the 'unlocked' cistern). | |||
# When you have your artifact, find the room with the [[Glowing Pustule]]s, by killing one of these it will open a portal to the next area. Again, only one specific one will open the portal, see the map for clarification. | |||
# Do the same thing for the next two dungeons. You will then have 3 mysterious artifacts, and be in the fourth and final dungeon. | |||
# In this dungeon when you use the correct pustule, you will not get anything other then this special message: <font color=green>As you reach into the cistern, your hand begins to itch. The sensation dies down after a moment.</font> Note that the map seems to be slightly off as to which cistern is the correct one. | |||
#* This message means you're now flagged to feed [[Putiputipuh]] later on. | |||
# From here you can go south to the room with the apples on the floor and pick one up. | |||
# Once you have the apple take the "Way Back to Tekapuapuh's" portal in the east room. | |||
# Turn in the apple to [[Putiputipuh]] the olthoi larva, and then the three artifacts to [[Tekapuapuh]] for your rewards. You must give the artifacts in the order you found them or Tekapuapuh won't take them. | |||
== Maps == | == Maps == | ||
| Line 36: | Line 49: | ||
| Table Rows = | | Table Rows = | ||
{{Dungeon Maps | {{Dungeon Maps | ||
| Dungeon = Secret Putiputi Place (Part 1 & 2) | | Dungeon = Secret Putiputi Place{{!}}Secret Putiputi Place (Part 1 & 2) | ||
| Coordinates = | | Coordinates = 46.3N, 82.1W | ||
| ACmaps ID = 5774 | | ACmaps ID = 5774 | ||
}} | }} | ||
{{Dungeon Maps | {{Dungeon Maps | ||
| Dungeon = Secret Putiputi Place (Part | | Dungeon = Secret Putiputi Place{{!}}Secret Putiputi Place (Part 3) | ||
| Coordinates = | | Coordinates = 46.3N, 82.1W | ||
| ACmaps ID = 5775 | | ACmaps ID = 5775 | ||
}} | }} | ||
{{Dungeon Maps | {{Dungeon Maps | ||
| Dungeon = Secret Putiputi Place (Part | | Dungeon = Secret Putiputi Place{{!}}Secret Putiputi Place (Part 4) | ||
| Coordinates = | | Coordinates = 46.3N, 82.1W | ||
| ACmaps ID = 5776 | | ACmaps ID = 5776 | ||
}} | }} | ||
}} | }} | ||
| Line 63: | Line 67: | ||
== Items == | == Items == | ||
{{Item Table|Caption=Quest Items | {{Item Table|Caption=Quest Items | ||
|Tekapuapuh's Note | | Tekapuapuh's Note | ||
|Dead Olthoi | | Dead Olthoi | ||
|Mysterious Tumerok Artifact 1 | | Mysterious Tumerok Artifact 1 | ||
|Mysterious Tumerok Artifact 2 | | Mysterious Tumerok Artifact 2 | ||
|Mysterious Tumerok Artifact 3 | | Mysterious Tumerok Artifact 3 | ||
|Olthoi Cistern | | Olthoi Cistern | ||
|Glowing | | Glowing Pustule | ||
}} | }} | ||
{{Item Table|Caption=Rewards | {{Item Table|Caption=Rewards | ||
|Panaq | | Panaq | ||
}} | }} | ||
== Images == | == Images == | ||
<gallery | Click image for full size version. | ||
<gallery heights=200px widths=200px perrow=3> | |||
File:Secret Putiputi Place Live 2.jpg|Dead Olthoi | |||
File:Secret Putiputi Place Live 3.jpg|Glowing Pustule (part 1) | |||
File:Secret Putiputi Place Live 4.jpg|Entrance to Cisterns (part 2) | |||
File:Secret Putiputi Place Live 5.jpg|Olthoi Cisterns (part 2) | |||
File:Secret Putiputi Place Live 6.jpg|Olthoi Cisterns (part 4) | |||
File:Secret Putiputi Place Live 7.jpg|Tekapuapuh's Onga (Apples for Putiputipuh) | |||
</gallery> | </gallery> | ||
| Line 128: | Line 126: | ||
<font color=darkgoldenrod>Tekapuapuh tells you, "Oh, my poor Putiputipuh! Nothing else matters!"</font><br> | <font color=darkgoldenrod>Tekapuapuh tells you, "Oh, my poor Putiputipuh! Nothing else matters!"</font><br> | ||
<font color=green>Tekapuapuh gives you Mysterious Tumerok Artifact.</font><br> | <font color=green>Tekapuapuh gives you Mysterious Tumerok Artifact.</font><br> | ||
---- | |||
'''Not flagged with Cistern in part 4'''<br> | |||
<font color=green>You give Putiputipuh Apple.<br> | |||
The grub seems to sniff the air, but doesn't eat.</font><br> | |||
<font color=darkgoldenrod>Tekapuapuh sighs. "Hmm. I remember washing my hands in those splashy-bubble-pots, before feeding her an onga. Maybe your hands are dirty."</font> | |||
---- | ---- | ||
<font color=green>You give Putiputipuh Apple.<br> | <font color=green>You give Putiputipuh Apple.<br> | ||
| Line 136: | Line 139: | ||
---- | ---- | ||
<font color=green>The grub doesn't seem hungry at the moment.</font><br> | <font color=green>The grub doesn't seem hungry at the moment.</font><br> | ||
---- | |||
<font color=green>You give Tekapuapuh Apple.</font><br> | |||
<font color=darkgoldenrod>Tekapuapuh tells you, "Putiputipuh's all full now. But thanks anyway!"</font><br> | |||
<font color=green>Tekapuapuh gives you Apple.</font><br> | |||
---- | ---- | ||
<font color=darkgoldenrod>Tekapuapuh tells you, "If you find the pieces I left behind, I'll put my old Panaq together for you!"</font><br> | <font color=darkgoldenrod>Tekapuapuh tells you, "If you find the pieces I left behind, I'll put my old Panaq together for you!"</font><br> | ||
| Line 150: | Line 157: | ||
---- | ---- | ||
<font color=darkgoldenrod>Tekapuapuh tells you, "Thanks again, buhdi, and enjoy the Panaq!"</font><br> | <font color=darkgoldenrod>Tekapuapuh tells you, "Thanks again, buhdi, and enjoy the Panaq!"</font><br> | ||
---- | |||
<font color=green>You give Tekapuapuh Panaq.</font><br> | |||
<font color=darkgoldenrod>Tekapuapuh tells you, "Nooooooooooo. Uh uh. No takebacks. You keep it!"</font><br> | |||
<font color=green>Tekapuapuh gives you Panaq.</font><br> | |||
---- | |||
'''Allowing Putiputipuh to examine your items'''<br> | |||
<font color=green>You allow Putiputipuh to examine your Mysterious Tumerok Artifact. | |||
Putiputipuh stares (if you can call it that) at the artifact for a moment. | |||
Then stops. | |||
You allow Putiputipuh to examine your Mysterious Tumerok Artifact. | |||
Putiputipuh rubs up against the artifact, then ignores it. | |||
You allow Putiputipuh to examine your Mysterious Tumerok Artifact. | |||
Putiputipuh idly nibbles at the artifact. | |||
You allow Putiputipuh to examine your Panaq. | |||
Putiputipuh happily gnaws on the end of the bow for a moment, but does nothing more.</font><br> | |||
Latest revision as of 15:57, 6 December 2013
| Walk Through ___ Maps ___ Items ___ XP ___ Images ___ Lore & Dialog ___ |
| |||||||||||||||||||||||||||||||||||||||
 | |||||||||||||||||||||||||||||||||||||||
Quest Overview
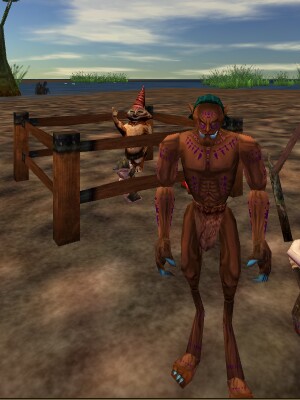
Help Tekapuapuh's pet olthoi Putiputipuh. The dungeon for this quest is densely populated with low level olthoi.
Walk Through
- Head to Ahurenga on Marae Lassel and speak to Hea Mutuona at 47.1N, 90.3W. Get him to talk by giving him some Ale from the local barkeep.
- Route: Ahurenga is in the Annex of the Town Network.
- He sends you to see Tekapuapuh located at 46.4N, 91.5W.
- Tekapuapuh sends to you the Secret Putiputi Place located at 46.3N, 82.1W to get the "Onga" for Putiputipuh.
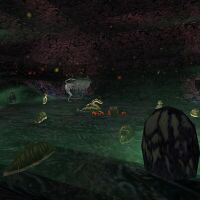
- Inside the first 3 levels of the dungeon, you must first find the Olthoi Cisterns, one of these will contain a Mysterious Tumerok Artifact some will contain nothing, and others will trigger spawns. See the maps below to find out which one to use (you can also examine them until you find the 'unlocked' cistern).
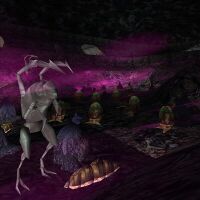
- When you have your artifact, find the room with the Glowing Pustules, by killing one of these it will open a portal to the next area. Again, only one specific one will open the portal, see the map for clarification.
- Do the same thing for the next two dungeons. You will then have 3 mysterious artifacts, and be in the fourth and final dungeon.
- In this dungeon when you use the correct pustule, you will not get anything other then this special message: As you reach into the cistern, your hand begins to itch. The sensation dies down after a moment. Note that the map seems to be slightly off as to which cistern is the correct one.
- This message means you're now flagged to feed Putiputipuh later on.
- From here you can go south to the room with the apples on the floor and pick one up.
- Once you have the apple take the "Way Back to Tekapuapuh's" portal in the east room.
- Turn in the apple to Putiputipuh the olthoi larva, and then the three artifacts to Tekapuapuh for your rewards. You must give the artifacts in the order you found them or Tekapuapuh won't take them.
Maps
| Dungeon | Coordinates | Wiki Map | ACmaps | Other | Quests |
| Secret Putiputi Place (Part 1 & 2) | 46.3N, 82.1W | -- | 5774 | -- | -- |
| Secret Putiputi Place (Part 3) | 46.3N, 82.1W | -- | 5775 | -- | -- |
| Secret Putiputi Place (Part 4) | 46.3N, 82.1W | -- | 5776 | -- | -- |
Items
| Quest Items | ||||||||
| Tekapuapuh's Note | Dead Olthoi | Mysterious Tumerok Artifact 1 | Mysterious Tumerok Artifact 2 | |||||
| Mysterious Tumerok Artifact 3 | Olthoi Cistern | Glowing Pustule | ||||||
| Rewards | ||||||||
| Panaq | ||||||||
Images
Click image for full size version.
-
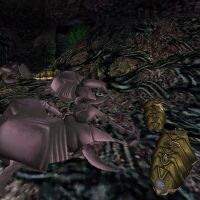
Dead Olthoi
-
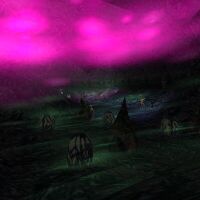
Glowing Pustule (part 1)
-
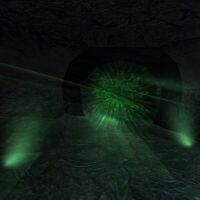
Entrance to Cisterns (part 2)
-
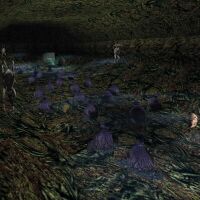
Olthoi Cisterns (part 2)
-
Olthoi Cisterns (part 4)
-
Tekapuapuh's Onga (Apples for Putiputipuh)
Lore & Dialog
Hea Mutuona tells you, "I'd tell you more but, ah, I'm a little parched. Need a little ale."
Hea Mutuona tells you, "You haven't heard the story, human? Fetch me an ale, and I'll tell you."
You give Hea Mutuona Ale.
Hea Mutuona tells you, "That hits the spot. So, Tekapuapuh. He's this melon-headed buhka -- an idiot boy. Goes out for his first hunt alone, and finds one of those death-bringer Wharu."
Hea Mutuona tells you, "'Cept he calls it 'Putiputi!' It's no ladybug! I still remember it... he comes into town, RIDING the Wharu. Nearly flattened the center of Ahurenga."
Hea Mutuona tells you, "He's puh now -- outcast. Lives on the tip of the delta out west of here. I hope he stays there. Anyway, thanks for the ale, human."
Tekapuapuh tells you, "Oh, man! You can help me! My beloved Putiputipuh, she's not happy. She needs special onga from where I found her!"
Tekapuapuh tells you, "I dropped my stuff in the hidey hole where I found her. It's all the way to the east, straight east from here, right until you hit a BIIIG wall."
Tekapuapuh tells you, "I set up a magic portal to the hidey-hole. Here, I'll give you the password."
Tekapuapuh gives you Tekapuapuh's Note.
Tekapuapuh tells you, "Thanks for your help!"
Tekapuapuh tells you, "Did you go to the hidey-hole! I think I left my onga near one of the bubble-pots there! Those onga are the only thing Putiputipuh will eat!"
You feel around in the warm slime for a bit. This one seems to be empty.
Something slimy grips your hand and then quickly releases it.
The pustule explodes, spraying you with it's rank fluids.
The Pustule shudders, then bursts. You have opened a gateway portal!
As you reach into the cistern, your hand begins to itch. The sensation dies down after a moment.
You give Tekapuapuh Mysterious Tumerok Artifact.
Tekapuapuh tells you, "Oh, my poor Putiputipuh! It makes me feel so bad!"
Tekapuapuh gives you Mysterious Tumerok Artifact.
You give Tekapuapuh Mysterious Tumerok Artifact.
Tekapuapuh tells you, "Oh, my poor Putiputipuh! She is so sad!"
Tekapuapuh gives you Mysterious Tumerok Artifact.
You give Tekapuapuh Mysterious Tumerok Artifact.
Tekapuapuh tells you, "Oh, my poor Putiputipuh! Nothing else matters!"
Tekapuapuh gives you Mysterious Tumerok Artifact.
Not flagged with Cistern in part 4
You give Putiputipuh Apple.
The grub seems to sniff the air, but doesn't eat.
Tekapuapuh sighs. "Hmm. I remember washing my hands in those splashy-bubble-pots, before feeding her an onga. Maybe your hands are dirty."
You give Putiputipuh Apple.
As you reach out with the apple, the grub emits a faint, high-pitched whine. You feel something squirming under your skin, along your arm and into the apple.
The grub happily devours the apple, swallowing it core and all.
Tekapuapuh squeals with delight. "You did it! Putiputipuh's happy again! Thank you thank you thank you!"
You've earned 25,000 experience.
The grub doesn't seem hungry at the moment.
You give Tekapuapuh Apple.
Tekapuapuh tells you, "Putiputipuh's all full now. But thanks anyway!"
Tekapuapuh gives you Apple.
Tekapuapuh tells you, "If you find the pieces I left behind, I'll put my old Panaq together for you!"
You give Tekapuapuh Mysterious Tumerok Artifact.
Tekapuapuh tells you, "It's the Pah! You don't know what do with this? Silly buhka! I'll help you then. Bring me Ahna next."
You give Tekapuapuh Mysterious Tumerok Artifact.
Tekapuapuh tells you, "See, Ahna fits into Pah like this--er, something like that. More or less. Um. Now I need Naq!"
You give Tekapuapuh Mysterious Tumerok Artifact.
Tekapuapuh tells you, "And then Naq goes into Ahna like, um... This! And here you go! Thanks again for your help!"
Tekapuapuh gives you Panaq.
Tekapuapuh tells you, "Thanks again, buhdi, and enjoy the Panaq!"
You give Tekapuapuh Panaq.
Tekapuapuh tells you, "Nooooooooooo. Uh uh. No takebacks. You keep it!"
Tekapuapuh gives you Panaq.
Allowing Putiputipuh to examine your items
You allow Putiputipuh to examine your Mysterious Tumerok Artifact.
Putiputipuh stares (if you can call it that) at the artifact for a moment.
Then stops.
You allow Putiputipuh to examine your Mysterious Tumerok Artifact. Putiputipuh rubs up against the artifact, then ignores it.
You allow Putiputipuh to examine your Mysterious Tumerok Artifact. Putiputipuh idly nibbles at the artifact.
You allow Putiputipuh to examine your Panaq.
Putiputipuh happily gnaws on the end of the bow for a moment, but does nothing more.
