Rynthid Foothold: Difference between revisions
imported>Sucamarto |
imported>Sanddh m →Items |
||
| (92 intermediate revisions by 4 users not shown) | |||
| Line 9: | Line 9: | ||
| Kill Task = False | | Kill Task = False | ||
| Start Location = Vision of Horror, 61.6S, 63.2W | | Start Location = Vision of Horror, 61.6S, 63.2W | ||
| Timer = | | Timer = 20 hours | ||
| Time to Complete = 1-1.5 hours | | Time to Complete = 1-1.5 hours | ||
| Level Restrictions = 180+ | | Level Restrictions = 180+ | ||
| Level Suggestions = 180+ | | Level Suggestions = 180+ | ||
| Contracts = | | Contracts = [[Contract for Rynthid Genesis]] | ||
| Item Rewards = 3 use [[Legendary Key]],<br>[[Rynthid Recall]] | | Item Rewards = 3 use [[Legendary Key]],<br>[[Rynthid Recall]] | ||
| Luminance Reward = 27,500 | | Luminance Reward = 27,500 | ||
| MMD Reward = 10 | |||
| Max XP Reward = 750,000,000 | | Max XP Reward = 750,000,000 | ||
| Titles = [[Emotional Wreck]] | | Titles = [[Emotional Wreck]] | ||
| Line 30: | Line 31: | ||
}} | }} | ||
== Quest Overview == | == Quest Overview == | ||
The Rynthid Virindi have begun invading Dereth. Assist the [[Vision of Horror]] in stopping them from expanding their foothold in the [[Obsidian Plains]] any further into Dereth. | |||
== Walk Through == | |||
== | === Ascending the Platforms === | ||
# To begin this quest, speak with [[Vision_of_Horror_(Emotions_Unbound)|Vision of Horror]]. | # To begin this quest, speak with [[Vision_of_Horror_(Emotions_Unbound)|Vision of Horror]] located at the [[Encampment near Rynthid Infested Plains]] at 61.6S, 63.3W. | ||
#* Note: You should also speak with the other NPCs at the encampment to flag for various kill tasks which can be done concurrently with the quest. | |||
[[File:Rynthid Infested Plains Initial Platforms 3 Live.jpg|thumb|350px|Initial platforms from the ground. The jump to the south is seen in the center. The [[Path of Torment]] portal is on the top right platform (portal not pictured).]] | |||
# Make your way to the access ramp at 62.5S, 65.4W to begin climbing the platforms | # Make your way to the access ramp at 62.5S, 65.4W to begin climbing the platforms | ||
# To get to the 1st of the dungeons, head up the ramp. Make a full power jump across to the southern platform, then take the west ramp. Head north to the T intersection, and turn west and head into the portal. | # To get to the 1st of the dungeons, head up the ramp. Make a full power jump across to the southern platform, then take the west ramp. Head north to the T intersection, and turn west and head into the portal [[Path of Torment]]. | ||
#* WARNING: the dungeon drop is HOT! | #* WARNING: the dungeon drop is HOT! | ||
# Inside the | # Inside the [[Path of Torment]] dungeon, head west and exit the room, then turn south. At the next split, head south. | ||
#* Note: | #* Note: If desired, you can flag with a crystal in this dungeon for a kill task which is part of the [[Rynthid Artifact Collection]] quest. | ||
# Continue west | # Continue west until you come to a large room. In here, head north east and take the far east exit, then bear south all the way to the Platforms of Rage portal. | ||
# | # From the Platforms of Rage drop, head down the ramp, and bear south down the ramp. Take the next ramp heading east and up into the [[Path of Rage]] portal. | ||
# In the dungeon you will come to a large room. Take the 1st exit on the right bearing west. | |||
# In the dungeon you will come to a large room. Take the 1st exit on the right bearing | #* Note: As in the first dungeon, you can optionally flag with a crystal in this dungeon for a kill task which is part of the [[Rynthid Artifact Collection]] quest. | ||
#* | # After exiting the large room head east, then take the right bearing south. When you come to a 4 way split, head east until you come to a large room. In here, take the 1st left heading east. At the next split, head east and continue to the Platforms of Rage portal. | ||
# After exiting the large room | |||
#* WARNING: the drop is VERY hot!! | #* WARNING: the drop is VERY hot!! | ||
# | [[File:Rynthid Infested Plains Rynthid Genesis Platform Live.jpg|thumb|350px|Shift jump down to [[Rynthid Genesis]] from Platforms of Rage drop point]] | ||
# From the Platforms of Rage drop, walk north and look down. You will see a platform below you with a portal to [[Rynthid Genesis]] on it. Shift-jump down onto the platform and enter the portal. | |||
== | === Rynthid Genesis === | ||
# When you enter you will be standing on a grate above the floor. Jump down and head | # When you enter you will be standing on a grate above the floor. Jump down and head east. At the intersection there will be a door to the south. In order to continue past it you will need to pull a series of levers to open it. | ||
#* WARNING: Beyond that door, all the hallways do | #* WARNING: Beyond that door, all the hallways do constant electric damage. The rooms beyond are safe, but all hallways have this lightning damage. There is no way to jump over or avoid it, but a lightning protection rare will render all damage 0. It is best to move quickly through the hallways into the larger rooms. | ||
# To find the levers to open the door, return to the main entrance room. You will be heading to 2 different rooms, each containing a pair of levers you will need to hit. | # To find the levers to open the door, return to the main entrance room. You will be heading to 2 different rooms, each containing a pair of levers you will need to hit. | ||
#* Note: the order in which you hit the levers does NOT matter & the hallways leading to all the lever rooms also have the electric damage. | #* Note: the order in which you hit the levers does NOT matter & the hallways leading to all the lever rooms also have the electric damage. | ||
# To get to the 1st pair of levers, head | # To get to the 1st pair of levers, head north from the main room. The hallway will split but it doesnt matter which path you take as they both meet up in the room with the levers. Hit the 2 levers, then return back to the main entrance. | ||
# From the main entrance head | # From the main entrance head south to find the second pair of levers. Again, when the hallway splits it does not matter which way you go, as they meet up in the lever room. Hit the pair of levers here, then return to the main entrance, and head east to the door which should now be open. | ||
# Head south through the now open door, until you come to another large room. In the room is a hallway to the south, blocked by another portal door. To open it, you will need to hit the levers contained in the room to the | # Head south through the now open door, until you come to another large room. In the room is a hallway to the south, blocked by another portal door. To open it, you will need to hit the levers contained in the room to the north. | ||
#* Note: | #* Note: Again the hallways leading to the levers split, but it does not matter which way you go. The hallway again contains the electric damage. | ||
# After hitting the levers in the room to the | # After hitting the levers in the room to the north, the portal door blocking the south hallway will open. Continue moving forward through the hallways (it does not matter if you go left or right at T intersections, they all meet up) until you come to a large room. Exit this room to the east where you will come across a room with a [[Corrupt Bulwark]] and a hallway to the south, blocked once again by a portal-door. | ||
# When the [[Corrupt Bulwark]] dies, the portal door opens, and you may continue | # When the [[Corrupt Bulwark]] dies, the portal door opens, and you may continue south until you come to a large room with a pit in the middle, and a portal down in it. This is your last chance to heal, rebuff, and prepare for the final fight. When everyone is ready, jump down into the pit and enter the portal, to begin the final fight. | ||
#* Warning: | #* Warning: The drop is hot! | ||
== | === Final Fight and Rewards === | ||
# The final fight is not 1 fight, but a series of 5 successive waves. These waves of monsters get progressively tougher as you go. Immediately upon the death of the last monster for any given wave, the new wave will appear. | # The final fight is not 1 fight, but a series of 5 successive waves. These waves of monsters get progressively tougher as you go. Immediately upon the death of the last monster for any given wave, the new wave will appear. | ||
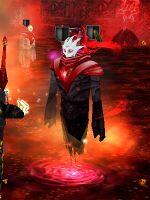
# In the 5th and final spawn will be the [[Aspect of Avarice]] | # In the 5th and final spawn will be the [[Aspect of Avarice]] who is accompanied by a host of minions on a VERY fast respawn. When the [[Aspect of Avarice]] dies, an NPC version of the [[Aspect of Avarice (NPC)|Aspect of Avariance]] will appear along with [[Legendary Chest]]s. | ||
#* Note: the minions do NOT disappear when the Aspect dies, so it would be wise to clear them out before collecting your rewards. | #* Note: The minions will also reset if you do not clear the spawns fast enough after the [[Aspect of Avarice]] is dead. | ||
# Talk to the NPC version of the Aspect to receive a 3 use [[Legendary Key]]. Loot one of the chests in the room, and then head back to the Vision of Horror (61.6S, 63.2W) to collect your | #* Note: The minions do NOT disappear when the [[Aspect of Avarice]] dies, so it would be wise to clear them out before collecting your rewards. | ||
#* Note: the surface portal in the room here is a SAFE drop, which will put you roughly 2.5 clicks away from the Vision of Horror. | # Talk to the NPC version of the [[Aspect of Avarice (NPC)|Aspect of Avariance]] to receive a 3 use [[Legendary Key]]. Loot one of the chests in the room, and then head back to the [[Vision_of_Horror_(Emotions_Unbound)|Vision of Horror]] (61.6S, 63.2W) to collect your 750,000,000 [[Xp]] and 27,500 [[Luminance]], and learn the [[Rynthid Recall]] spell (A level 3 item spell). | ||
#* Note: the surface portal in the room here is a SAFE drop, which will put you roughly 2.5 clicks away from the [[Vision_of_Horror_(Emotions_Unbound)|Vision of Horror]] at the [[Encampment near Rynthid Infested Plains]] at (61.6S, 63.2W). | |||
== Maps == | == Maps == | ||
| Line 85: | Line 87: | ||
== Items == | == Items == | ||
{{Item Table|Caption= | {{Item Table|Caption=Items|}} | ||
{{Item Table|Caption=Rewards|Legendary Key|Rynthid Recall}} | {{Item Table|Caption=Rewards|Legendary Key|Rynthid Recall}} | ||
| Line 94: | Line 96: | ||
| Table Rows = | | Table Rows = | ||
{{Quest Task | {{Quest Task | ||
| Description = | | Description = Talk to the NPC version of the [[Aspect of Avarice]] then head back to the [[Vision_of_Horror_(Emotions_Unbound)|Vision of Horror]]. | ||
| Max XP = | | Max XP = 750,000,000 | ||
| Percent of Level = | | Percent of Level = | ||
| Level Cap = | | Level Cap = | ||
| Line 101: | Line 103: | ||
| Repeat Percent of Level = | | Repeat Percent of Level = | ||
| Repeat Level Cap = | | Repeat Level Cap = | ||
}} | }} | ||
}} | }} | ||
| Line 119: | Line 110: | ||
| Table Rows = | | Table Rows = | ||
{{Title | {{Title | ||
| Title = | | Title = [[Emotional Wreck]] | ||
| Task = | | Task = Talk to the NPC version of the [[Aspect of Avarice]] then head back to the [[Vision_of_Horror_(Emotions_Unbound)|Vision of Horror]]. | ||
}} | }} | ||
}} | }} | ||
| Line 136: | Line 117: | ||
== Images == | == Images == | ||
Click image for full size version. | Click image for full size version. | ||
<gallery widths=200px heights=200px perrow= | <gallery widths=200px heights=200px perrow=4> | ||
File:Live.jpg| | File:Vision_of_Horror_(Emotions_Unbound) Live.jpg|[[Vision_of_Horror_(Emotions_Unbound)|Vision of Horror]] at the [[Encampment near Rynthid Infested Plains]] | ||
File:Live.jpg| | File:Rynthid Genesis Live.jpg|[[Rynthid Genesis]] dungeon portal. | ||
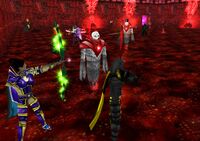
File:Corrupt Bulwark Live.jpg|[[Corrupt Bulwark]] | |||
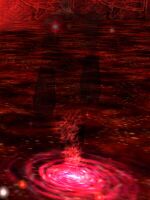
File:Rynthid_Foothold_Final_Room_Live.jpg|[[Rynthid Foothold]] Final Room. | |||
File:Aspect of Avarice Live.jpg|[[Aspect of Avarice]] | |||
File:Aspect of Avarice (NPC) Live.jpg|[[Aspect of Avarice (NPC)]] | |||
File:Rynthid Infested Plains Rynthid Genesis Platform Live.jpg|Rynthid Genesis Platform | |||
File:Rynthid Infested Plains Rynthid Genesis Platform 2 Live.jpg|Rynthid Genesis Platform | |||
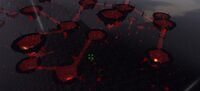
File:Rynthid Infested Plains All Platforms Live.jpg|Rynthid Infested Plains | |||
File:Rynthid Infested Plains Platforms of Rage Top Down Live.jpg|Platforms of Rage top down view | |||
File:Rynthid Infested Plains Initial Platforms 3 Live.jpg|Initial platforms | |||
</gallery> | </gallery> | ||
== Lore & Dialog == | == Lore & Dialog == | ||
<font color=darkgoldenrod>Vision of Horror tells you, "These are dark hours friend. The new visitors bring an immense capacity for destruction to this land."</font><br> | |||
<font color=darkgoldenrod>Vision of Horror tells you, "It is imperative that we hold back their onslaught and contain these creatures before they spread across Dereth."</font><br> | |||
<font color=darkgoldenrod>Vision of Horror tells you, "These Virindi are unlike any you have battled against in the past. Gather your most powerful companions and venture into their newly created habitat."</font><br> | |||
<font color=darkgoldenrod>Vision of Horror tells you, "Destroy every living thing you come across. These beings will have no mercy as they unleash their fierce magics. You must show no quarter to these invaders."</font><br> | |||
---- | |||
<font color=darkgoldenrod>Vision of Horror tells you, "Were you able to fight back the Rynthid invaders? We must not let them spread across Dereth."</font><br> | |||
---- | |||
<font color=darkgoldenrod>Vision of Horror tells you, "Feeding on your emotions will do the Rynthid little good when they are being massacred by your hand."</font><br> | <font color=darkgoldenrod>Vision of Horror tells you, "Feeding on your emotions will do the Rynthid little good when they are being massacred by your hand."</font><br> | ||
<font color=darkgoldenrod>Vision of Horror tells you, "Your courage is unmatched friend. This entire land, not just the Council, owes you a sincere thanks."</font><br> | <font color=darkgoldenrod>Vision of Horror tells you, "Your courage is unmatched friend. This entire land, not just the Council, owes you a sincere thanks."</font><br> | ||
| Line 148: | Line 145: | ||
<font color=green>You have been awarded the title of Emotional Wreck!</font><br> | <font color=green>You have been awarded the title of Emotional Wreck!</font><br> | ||
<font color=green>You have learned the spell Rynthid Recall!</font><br> | <font color=green>You have learned the spell Rynthid Recall!</font><br> | ||
---- | |||
<font color=darkgoldenrod>Aspect of Avarice tells you, "Your greed must be fed and nurtured for your accomplishments this day."</font><br> | |||
<font color=green>Aspect of Avarice gives you Legendary Key.</font> | |||
== Notes == | == Notes == | ||
* ?? | * ?? | ||
Latest revision as of 13:39, 7 December 2013
| Walk Through ___ Maps ___ Items ___ XP ___ Images ___ Lore & Dialog ___ |
| |||||||||||||||||||||||||||||||||||||||
Quest Overview
The Rynthid Virindi have begun invading Dereth. Assist the Vision of Horror in stopping them from expanding their foothold in the Obsidian Plains any further into Dereth.
Walk Through
Ascending the Platforms
- To begin this quest, speak with Vision of Horror located at the Encampment near Rynthid Infested Plains at 61.6S, 63.3W.
- Note: You should also speak with the other NPCs at the encampment to flag for various kill tasks which can be done concurrently with the quest.

- Make your way to the access ramp at 62.5S, 65.4W to begin climbing the platforms
- To get to the 1st of the dungeons, head up the ramp. Make a full power jump across to the southern platform, then take the west ramp. Head north to the T intersection, and turn west and head into the portal Path of Torment.
- WARNING: the dungeon drop is HOT!
- Inside the Path of Torment dungeon, head west and exit the room, then turn south. At the next split, head south.
- Note: If desired, you can flag with a crystal in this dungeon for a kill task which is part of the Rynthid Artifact Collection quest.
- Continue west until you come to a large room. In here, head north east and take the far east exit, then bear south all the way to the Platforms of Rage portal.
- From the Platforms of Rage drop, head down the ramp, and bear south down the ramp. Take the next ramp heading east and up into the Path of Rage portal.
- In the dungeon you will come to a large room. Take the 1st exit on the right bearing west.
- Note: As in the first dungeon, you can optionally flag with a crystal in this dungeon for a kill task which is part of the Rynthid Artifact Collection quest.
- After exiting the large room head east, then take the right bearing south. When you come to a 4 way split, head east until you come to a large room. In here, take the 1st left heading east. At the next split, head east and continue to the Platforms of Rage portal.
- WARNING: the drop is VERY hot!!

- From the Platforms of Rage drop, walk north and look down. You will see a platform below you with a portal to Rynthid Genesis on it. Shift-jump down onto the platform and enter the portal.
Rynthid Genesis
- When you enter you will be standing on a grate above the floor. Jump down and head east. At the intersection there will be a door to the south. In order to continue past it you will need to pull a series of levers to open it.
- WARNING: Beyond that door, all the hallways do constant electric damage. The rooms beyond are safe, but all hallways have this lightning damage. There is no way to jump over or avoid it, but a lightning protection rare will render all damage 0. It is best to move quickly through the hallways into the larger rooms.
- To find the levers to open the door, return to the main entrance room. You will be heading to 2 different rooms, each containing a pair of levers you will need to hit.
- Note: the order in which you hit the levers does NOT matter & the hallways leading to all the lever rooms also have the electric damage.
- To get to the 1st pair of levers, head north from the main room. The hallway will split but it doesnt matter which path you take as they both meet up in the room with the levers. Hit the 2 levers, then return back to the main entrance.
- From the main entrance head south to find the second pair of levers. Again, when the hallway splits it does not matter which way you go, as they meet up in the lever room. Hit the pair of levers here, then return to the main entrance, and head east to the door which should now be open.
- Head south through the now open door, until you come to another large room. In the room is a hallway to the south, blocked by another portal door. To open it, you will need to hit the levers contained in the room to the north.
- Note: Again the hallways leading to the levers split, but it does not matter which way you go. The hallway again contains the electric damage.
- After hitting the levers in the room to the north, the portal door blocking the south hallway will open. Continue moving forward through the hallways (it does not matter if you go left or right at T intersections, they all meet up) until you come to a large room. Exit this room to the east where you will come across a room with a Corrupt Bulwark and a hallway to the south, blocked once again by a portal-door.
- When the Corrupt Bulwark dies, the portal door opens, and you may continue south until you come to a large room with a pit in the middle, and a portal down in it. This is your last chance to heal, rebuff, and prepare for the final fight. When everyone is ready, jump down into the pit and enter the portal, to begin the final fight.
- Warning: The drop is hot!
Final Fight and Rewards
- The final fight is not 1 fight, but a series of 5 successive waves. These waves of monsters get progressively tougher as you go. Immediately upon the death of the last monster for any given wave, the new wave will appear.
- In the 5th and final spawn will be the Aspect of Avarice who is accompanied by a host of minions on a VERY fast respawn. When the Aspect of Avarice dies, an NPC version of the Aspect of Avariance will appear along with Legendary Chests.
- Note: The minions will also reset if you do not clear the spawns fast enough after the Aspect of Avarice is dead.
- Note: The minions do NOT disappear when the Aspect of Avarice dies, so it would be wise to clear them out before collecting your rewards.
- Talk to the NPC version of the Aspect of Avariance to receive a 3 use Legendary Key. Loot one of the chests in the room, and then head back to the Vision of Horror (61.6S, 63.2W) to collect your 750,000,000 Xp and 27,500 Luminance, and learn the Rynthid Recall spell (A level 3 item spell).
- Note: the surface portal in the room here is a SAFE drop, which will put you roughly 2.5 clicks away from the Vision of Horror at the Encampment near Rynthid Infested Plains at (61.6S, 63.2W).
Maps
| Dungeon | Coordinates | Wiki Map | ACmaps | Other | Quests |
| Rynthid Genesis | 62.5S, 65.4W | -- | -- | -- | -- |
Items
| Items |
| Rewards | ||||||||
|
|
Legendary Key |
|
Rynthid Recall | |||||
Experience Rewards
| Task Required | First Run Max Experience | Percentage & Level Cap | Repeated Run Max XP | Repeated Run Percentage & Level Cap | |
| Talk to the NPC version of the Aspect of Avarice then head back to the Vision of Horror. | 750,000,000xp |
??% up to level ?? | |||
|
| |||||
| See Level Costs for per level information. | |||||
Title Rewards
| Task Required | Title Reward |
| Talk to the NPC version of the Aspect of Avarice then head back to the Vision of Horror. | Emotional Wreck |
|
| |
| See Titles for a list of all available titles. | |
Images
Click image for full size version.
-

-
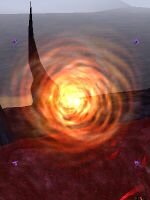 Rynthid Genesis dungeon portal.
 -

-
 Rynthid Foothold Final Room.
 -
-
-
 Rynthid Genesis Platform
 -
 Rynthid Genesis Platform
 -
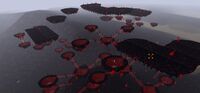 Rynthid Infested Plains
 -
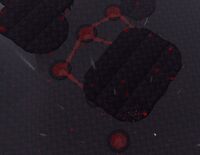 Platforms of Rage top down view
 -
 Initial platforms
_Live.jpg)


_Live.jpg)


Lore & Dialog
Vision of Horror tells you, "These are dark hours friend. The new visitors bring an immense capacity for destruction to this land."
Vision of Horror tells you, "It is imperative that we hold back their onslaught and contain these creatures before they spread across Dereth."
Vision of Horror tells you, "These Virindi are unlike any you have battled against in the past. Gather your most powerful companions and venture into their newly created habitat."
Vision of Horror tells you, "Destroy every living thing you come across. These beings will have no mercy as they unleash their fierce magics. You must show no quarter to these invaders."
Vision of Horror tells you, "Were you able to fight back the Rynthid invaders? We must not let them spread across Dereth."
Vision of Horror tells you, "Feeding on your emotions will do the Rynthid little good when they are being massacred by your hand."
Vision of Horror tells you, "Your courage is unmatched friend. This entire land, not just the Council, owes you a sincere thanks."
You've earned 750,000,000 experience.
You've earned 27,500 Luminance.
You have been awarded the title of Emotional Wreck!
You have learned the spell Rynthid Recall!
Aspect of Avarice tells you, "Your greed must be fed and nurtured for your accomplishments this day."
Aspect of Avarice gives you Legendary Key.
Notes
- ??