Shroud of Emotion: Difference between revisions
imported>Darkmurkrow No edit summary |
imported>Dakmor-Kavu |
||
| (6 intermediate revisions by 4 users not shown) | |||
| Line 51: | Line 51: | ||
# Next is a series of dungeons each leading to a mini boss. There are 4 dungeons and bosses total. | # Next is a series of dungeons each leading to a mini boss. There are 4 dungeons and bosses total. | ||
# The first dungeon is entirely linear. Make your way to the end where you will find a portal. | # The first dungeon is entirely linear. Make your way to the end where you will find a portal. | ||
# Go through the portal to begin the first boss fight with the [[Apparition of Bloodlust]]. He is weak to cold and accompanied several | # Go through the portal to begin the first boss fight with the [[Apparition of Bloodlust]]. He is weak to cold and accompanied several [[Deadly Spirit]]s which die easily but cast a fire ring spell on death. Beware of being fire vulned when killing them! When the Apparition dies, loot a [[Shroud of Bloodlust]] (drops 9), then exit through the portal that spawns. | ||
#* Note: The | #* Note: The Deadly Spirits will respawn if the fight lasts for a long time. | ||
# The second dungeon is also linear. Whether you choose to go east or west at the path splits does not matter, just keep moving north through the dungeon until you come to another portal. | # The second dungeon is also linear. Whether you choose to go east or west at the path splits does not matter, just keep moving north through the dungeon until you come to another portal. | ||
# Through the portal is the second boss fight with the [[Apparition of Apathy]]. He is weak to fire and has several [[Pillar of Frost]]s that spawn with him. Be sure to take out the pillars first as they can be dangerous. Kill him and loot a [[Shroud of Apathy]] then take the portal that spawns. | # Through the portal is the second boss fight with the [[Apparition of Apathy]]. He is weak to fire and has several [[Pillar of Frost]]s that spawn with him. Be sure to take out the pillars first as they can be dangerous. Kill him and loot a [[Shroud of Apathy]] then take the portal that spawns. | ||
#* Note: If attempting the quest alone or with a small group, you can back up from the drop and move into one of the corners. From here, only 1 of the pillars can shoot spells at you. The boss will eventually come and attack you. Stay dispelled to avoid taking major cold damage from the spells. | #* Note: If attempting the quest alone or with a small group, you can back up from the drop and move into one of the corners. From here, only 1 of the pillars can shoot spells at you. The boss will eventually come and attack you. Stay dispelled to avoid taking major cold damage from the spells. | ||
# The third dungeon is not linear like the previous 2. Head west from the drop, take the path south, take the 2nd hallway going west, then head east to the portal. | # The third dungeon is not linear like the previous 2. Head west from the drop, take the path south, take the 2nd hallway going west, then head east to the portal. | ||
# Beyond it is the third boss, the [[Apparition of Envy]], who is weak to lightning. He spawns with several Acidic | # Beyond it is the third boss, the [[Apparition of Envy]], who is weak to lightning. He spawns with several [[Acidic Tendril]]s. Beware of missile attacks and void magic during the fight. Kill the Apparition for a [[Shroud of Envy]] then take the portal that spawns. | ||
# The fourth dungeon is entirely linear again. Towards the end of the dungeon, you reach 4 long rooms that shoot wall spells as you run through them. Each of these rooms corresponds to one of the four elements and has a Virindi before it which casts the corresponding vuln spell. Be careful if you get vulned. | # The fourth dungeon is entirely linear again. Towards the end of the dungeon, you reach 4 long rooms that shoot wall spells as you run through them. Each of these rooms corresponds to one of the four elements and has a Virindi ([[Flame Spirit]], [[Acidic Spirit]]) before it which casts the corresponding vuln spell. Be careful if you get vulned. | ||
# Eventually you will come to a portal, leading to the final boss, the [[Apparition of Spite]]. He is weak to acid, but also counterbuffs when | # Eventually you will come to a portal, leading to the final boss, the [[Apparition of Spite]]. He is weak to acid, but also counterbuffs when vulned (this includes imperil). He spawns with [[Malicious Spirit]]s, Rynthid Virindi similar to the ones in the first boss, except that they cast lightning ring spells on death instead of fire. Kill the last boss for a [[Shroud of Spite]], then take the portal that spawns. | ||
== Rewards! == | == Rewards! == | ||
# You will find yourself in a room with legendary chests, and 4 large crystal "Annex". Each crystal is colored to match the shroud that you need to hand to it. Make sure you hand the correct shroud to the correct annex! | # You will find yourself in a room with legendary chests, and 4 large crystal "Annex". Each crystal is colored to match the shroud that you need to hand to it. Make sure you hand the correct shroud to the correct annex! | ||
#* Ruby Annex: [[Shroud of Bloodlust]] | #* [[Ruby Annex]]: [[Shroud of Bloodlust]] | ||
#* Amethyst Annex: [[Shroud of Spite]] | #* [[Amethyst Annex]]: [[Shroud of Spite]] | ||
#* Jade Annex: [[Shroud of Envy]] | #* [[Jade Annex]]: [[Shroud of Envy]] | ||
#* Sapphire Annex: [[Shroud of Apathy]] | #* [[Sapphire Annex]]: [[Shroud of Apathy]] | ||
# Upon handing in the final Shroud, you will be rewarded with a 2 use [[Legendary Key]] and a [[Spirit Crystal]]. | # Upon handing in the final Shroud, you will be rewarded with a 2 use [[Legendary Key]] and a [[Spirit Crystal]]. | ||
#* '''Note: ''' The surface portal in the middle of the room is not a safe drop! It will drop you on the third set of platforms again. | #* '''Note: ''' The surface portal in the middle of the room is not a safe drop! It will drop you on the third set of platforms again. | ||
| Line 101: | Line 101: | ||
== Items == | == Items == | ||
{{Item Table|Caption=Quest Items|Shroud of Bloodlust|Shroud of Apathy|Shroud of Envy|Shroud of Spite|Spirit | {{Item Table|Caption=Quest Items|Shroud of Bloodlust|Shroud of Apathy|Shroud of Envy|Shroud of Spite|Spirit Crystal}} | ||
{{Item Table|Caption=Rewards|Legendary Key|Spirited Apathy Guard|Spirited Bloodlust Guard|Spirited Envy Guard|Spirited Spite Guard}} | {{Item Table|Caption=Rewards|Legendary Key|Spirited Apathy Guard|Spirited Bloodlust Guard|Spirited Envy Guard|Spirited Spite Guard}} | ||
| Line 124: | Line 124: | ||
<gallery widths=200px heights=200px perrow=3> | <gallery widths=200px heights=200px perrow=3> | ||
File:Rinne Gorber Live.jpg|[[Rinne Gorber]] at the [[Encampment near Rynthid Infested Plains]]. | File:Rinne Gorber Live.jpg|[[Rinne Gorber]] at the [[Encampment near Rynthid Infested Plains]]. | ||
File:Rynthid Infested Plains Platforms of Rage Spirited Halls Portal Live.jpg|Platforms at the [[Rynthid Infested Plains]]. | |||
File: Path of Torment Live.jpg|Entrance to the [[Path of Torment]] | |||
File: Path of Rage Live.jpg|Entrance to the [[Path of Rage]] | |||
File:Apparition of Spite Live.jpg|[[Apparition of Spite]] | File:Apparition of Spite Live.jpg|[[Apparition of Spite]] | ||
File: | File:Spirited Halls 2 Live.jpg|Reward Room in the [[Spirited Halls]] | ||
</gallery> | </gallery> | ||
| Line 137: | Line 140: | ||
---- | ---- | ||
<font color=darkgoldenrod>Rinne Gorber tells you, "I am bubbling with anticipation! What have you discovered about the increased unusual activity in the area?"</font><br> | <font color=darkgoldenrod>Rinne Gorber tells you, "I am bubbling with anticipation! What have you discovered about the increased unusual activity in the area?"</font><br> | ||
---- | |||
<font color=green><br> | |||
A portal appears in the center of the chamber as scraps of cloth from the Apparition flutter to the ground.</font><br> | |||
---- | |||
<font color=green>The Apparition of Apathy appears unimpressed at your presence. With a wave of its hand the temperature in the chamber quickly drops.<br> | |||
A portal appears in the center of the chamber as scraps of cloth from the Apparition flutter to the ground.</font><br> | |||
---- | |||
<font color=green>A maniacal laugh comes from the Apparition of Envy as you enter the room.<br> | |||
A portal appears in the center of the chamber as scraps of cloth from the Apparition flutter to the ground.</font><br> | |||
---- | |||
<font color=green>The Apparition of Spite whispers, "Welcome friend, I have something just for you..."<br> | |||
A portal appears in the center of the chamber as scraps of cloth from the Apparition flutter to the ground. | |||
</font><br> | |||
---- | |||
<font color=green> | |||
You allow Ruby Annex to examine your Shroud of Bloodlust.<br> | |||
You hand over 1 of your Shroud of Bloodlusts.<br> | |||
The Shroud of Bloodlust dissolves into the Ruby Annex.<br> | |||
You allow Amethyst Annex to examine your Shroud of Spite.<br> | |||
You hand over 1 of your Shroud of Spites.<br> | |||
The Shroud of Spite dissolves into the Amethyst Annex.<br> | |||
You allow Jade Annex to examine your Shroud of Envy.<br> | |||
You hand over 1 of your Shroud of Envys.<br> | |||
The Shroud of Envy dissolves into the Jade Annex.<br> | |||
You allow Sapphire Annex to examine your Shroud of Apathy.<br> | |||
You hand over 1 of your Shroud of Apathys.<br> | |||
A tiny piece of the Annex and a small key fall to the floor. An irresistable urge compels you to pick them up.<br> | |||
Sapphire Annex gives you Spirit Crystal.<br> | |||
Sapphire Annex gives you Legendary Key. | |||
</font><br> | |||
---- | |||
<font color=darkgoldenrod>Rinne Gorber tells you, "I am bubbling with anticipation! What have you discovered about the increased unusual activity in the area?"<br> | |||
<font color=green>You allow Rinne Gorber to examine your Spirit Crystal.<br> | |||
You hand over 1 of your Spirit Crystals.<br> | |||
<font color=darkgoldenrod>Rinne Gorber tells you, "How magnificent! This crystal is teaming with incredible power!"</font><br> | |||
Rinne takes the crystal and closes his eyes. He begins to whisper softly to himself as he clasps both hands tightly around the Spirit Crystal.<br> | |||
<font color=darkgoldenrod>Rinne Gorber tells you, "The horror! Such unspeakable evil! Only with the assistance of my guardian spirits was I able to take something so vile and create something so beautiful."<br> | |||
Rinne Gorber tells you, "May this item guide and protect you from the wicked influences of this plagued land."</font><br> | |||
Rinne Gorber gives you Spirited Bloodlust Guard.<br> | |||
You've earned 264,999,985 experience.<br> | |||
You've earned 21,199 Luminance.<br> | |||
Rinne Gorber gives you 9 Trade Notes (250,000). | |||
</font><br> | |||
---- | |||
Latest revision as of 03:08, 1 December 2016
| Walk Through ___ Maps ___ Items ___ XP ___ Images ___ Lore & Dialog ___ |
| |||||||||||||||||||||||||||||||||||||||
Quest Overview
Investigate the Rynthid Infested Plains for evidence of strange emotional energy.
The dungeon for this quest is on the third set of platforms at the Rynthid Infested Plains. Getting to the dungeon is the most dangerous part of this quest.
Ascending the Platforms
- To begin this quest, speak with Rinne Gorber at 61.6S, 63.3W at the Encampment near Rynthid Infested Plains.
- Route: Use Rynthid Recall or take the Dangerous Portal Device from a mansion to Center of the Obsidian Plains.
- To gain entrance to the quest dungeon, you will need to make your way up the floating platforms and through a series of dungeons on the Rynthid Infested Plains.
- To begin the climb, run to the access ramp located at 62.5S, 65.4W. At the third platform, perform a full power jump to the south. Then go west one platform, north two platforms, then west again to the Path of Torment portal at 62.1S, 65.8W.
- Inside, you will need to make you way to the Platforms of Torment portal at the end of the dungeon. The dungeon is filled with Rynthid Virindi and their helpers.
- Begin by going through the large room and heading west. Take the south tunnel, followed by going west at the next split. Head northeast through the next large room and exit this room through the east tunnel. From there, turn right and head south and follow the hall until you come to a room with the Platforms of Torment portal.
- Back outside on the platforms, head down the ramp and then left. Head up the ramp ahead and turn left up another ramp to the Path of Rage portal. The drop is safe.
- Inside the Path of Rage you will need to make your way to the end of the dungeon to the Platforms of Rage portal.
- Proceed south through the 1st large room, exiting to the east. Continue east to another large room where you will take the 1st exit on the left (heading east). Stay east again at the split, and follow the halls to the Platforms of Rage portal.
- WARNING: The drop is HOT!
- Outside, quickly head south and into the Spirited Halls portal straight ahead!
Collecting the Shrouds
- Next is a series of dungeons each leading to a mini boss. There are 4 dungeons and bosses total.
- The first dungeon is entirely linear. Make your way to the end where you will find a portal.
- Go through the portal to begin the first boss fight with the Apparition of Bloodlust. He is weak to cold and accompanied several Deadly Spirits which die easily but cast a fire ring spell on death. Beware of being fire vulned when killing them! When the Apparition dies, loot a Shroud of Bloodlust (drops 9), then exit through the portal that spawns.
- Note: The Deadly Spirits will respawn if the fight lasts for a long time.
- The second dungeon is also linear. Whether you choose to go east or west at the path splits does not matter, just keep moving north through the dungeon until you come to another portal.
- Through the portal is the second boss fight with the Apparition of Apathy. He is weak to fire and has several Pillar of Frosts that spawn with him. Be sure to take out the pillars first as they can be dangerous. Kill him and loot a Shroud of Apathy then take the portal that spawns.
- Note: If attempting the quest alone or with a small group, you can back up from the drop and move into one of the corners. From here, only 1 of the pillars can shoot spells at you. The boss will eventually come and attack you. Stay dispelled to avoid taking major cold damage from the spells.
- The third dungeon is not linear like the previous 2. Head west from the drop, take the path south, take the 2nd hallway going west, then head east to the portal.
- Beyond it is the third boss, the Apparition of Envy, who is weak to lightning. He spawns with several Acidic Tendrils. Beware of missile attacks and void magic during the fight. Kill the Apparition for a Shroud of Envy then take the portal that spawns.
- The fourth dungeon is entirely linear again. Towards the end of the dungeon, you reach 4 long rooms that shoot wall spells as you run through them. Each of these rooms corresponds to one of the four elements and has a Virindi (Flame Spirit, Acidic Spirit) before it which casts the corresponding vuln spell. Be careful if you get vulned.
- Eventually you will come to a portal, leading to the final boss, the Apparition of Spite. He is weak to acid, but also counterbuffs when vulned (this includes imperil). He spawns with Malicious Spirits, Rynthid Virindi similar to the ones in the first boss, except that they cast lightning ring spells on death instead of fire. Kill the last boss for a Shroud of Spite, then take the portal that spawns.
Rewards!
- You will find yourself in a room with legendary chests, and 4 large crystal "Annex". Each crystal is colored to match the shroud that you need to hand to it. Make sure you hand the correct shroud to the correct annex!
- Upon handing in the final Shroud, you will be rewarded with a 2 use Legendary Key and a Spirit Crystal.
- Note: The surface portal in the middle of the room is not a safe drop! It will drop you on the third set of platforms again.
- Return the Spirit Crystal to Rinne Gorber at 61.6S, 63.3W for 20,000 Luminance, 250,000,000 Xp and 1 of 4 Spirited Guard necklaces; Spirited Spite Guard, Spirited Envy Guard, Spirited Apathy Guard or Spirited Bloodlust Guard. Each necklace randomly contains one of the 3 following spells Legendary Magic Resistance, Legendary Invulnerability or Legendary Impregnability.
Maps
| Dungeon | Coordinates | Wiki Map | ACmaps | Other | Quests |
| Path of Torment | 62.1S, 65.8W | -- | -- | -- | -- |
| Path of Rage | -- | -- | -- | -- | -- |
| Spirited Halls | -- | -- | -- | -- | -- |
Items
| Quest Items | ||||||||
| Shroud of Bloodlust | Shroud of Apathy | Shroud of Envy | Shroud of Spite | |||||
| Spirit Crystal | ||||||||
| Rewards | ||||||||
| Legendary Key | Spirited Apathy Guard | Spirited Bloodlust Guard | Spirited Envy Guard | |||||
| Spirited Spite Guard | ||||||||
Experience Rewards
| Task Required | Max Experience | Percentage & Level Cap | |||
| Return the Spirit Crystal to Rinne Gorber | 250,000,000xp |
??% up to level ?? | |||
|
| |||||
| See Level Costs for per level information. | |||||
Images
Click image for full size version.
-
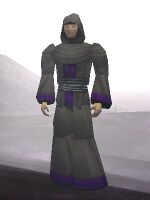
Platforms at the Rynthid Infested Plains.
-
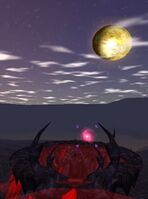
Entrance to the Path of Torment
-
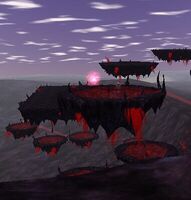
Entrance to the Path of Rage
-
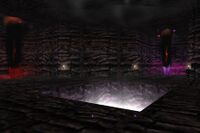
Reward Room in the Spirited Halls
Lore & Dialog
Rinne appears to be engrossed in thought. He smiles as he notices your presence.
Rinne Gorber tells you, "Why hello there. With such a drastic change to the Obsidian Plains by our new visitors, it's of little surprise that a surge of strange and unnatural activity has permeated the area."
Rinne Gorber tells you, "The energy I am detecting from the area is riddled with feelings of destruction, jealousy and malice. There are forces at work here that we can't yet hope to understand."
Rinne Gorber tells you, "This is why I am here, to learn all I can from the spirits that now reside here. But I can't hope to do this alone, I am a scholar not a warrior and the Rynthid would tear me to pieces."
Rinne Gorber tells you, "If you can find the source of these spirits, retrieve any artifacts or relics and bring them to me. I will reward you handsomely for your efforts."
Rinne Gorber tells you, "I am bubbling with anticipation! What have you discovered about the increased unusual activity in the area?"
A portal appears in the center of the chamber as scraps of cloth from the Apparition flutter to the ground.
The Apparition of Apathy appears unimpressed at your presence. With a wave of its hand the temperature in the chamber quickly drops.
A portal appears in the center of the chamber as scraps of cloth from the Apparition flutter to the ground.
A maniacal laugh comes from the Apparition of Envy as you enter the room.
A portal appears in the center of the chamber as scraps of cloth from the Apparition flutter to the ground.
The Apparition of Spite whispers, "Welcome friend, I have something just for you..."
A portal appears in the center of the chamber as scraps of cloth from the Apparition flutter to the ground.
You allow Ruby Annex to examine your Shroud of Bloodlust.
You hand over 1 of your Shroud of Bloodlusts.
The Shroud of Bloodlust dissolves into the Ruby Annex.
You allow Amethyst Annex to examine your Shroud of Spite.
You hand over 1 of your Shroud of Spites.
The Shroud of Spite dissolves into the Amethyst Annex.
You allow Jade Annex to examine your Shroud of Envy.
You hand over 1 of your Shroud of Envys.
The Shroud of Envy dissolves into the Jade Annex.
You allow Sapphire Annex to examine your Shroud of Apathy.
You hand over 1 of your Shroud of Apathys.
A tiny piece of the Annex and a small key fall to the floor. An irresistable urge compels you to pick them up.
Sapphire Annex gives you Spirit Crystal.
Sapphire Annex gives you Legendary Key.
Rinne Gorber tells you, "I am bubbling with anticipation! What have you discovered about the increased unusual activity in the area?"
You allow Rinne Gorber to examine your Spirit Crystal.
You hand over 1 of your Spirit Crystals.
Rinne Gorber tells you, "How magnificent! This crystal is teaming with incredible power!"
Rinne takes the crystal and closes his eyes. He begins to whisper softly to himself as he clasps both hands tightly around the Spirit Crystal.
Rinne Gorber tells you, "The horror! Such unspeakable evil! Only with the assistance of my guardian spirits was I able to take something so vile and create something so beautiful."
Rinne Gorber tells you, "May this item guide and protect you from the wicked influences of this plagued land."
Rinne Gorber gives you Spirited Bloodlust Guard.
You've earned 264,999,985 experience.
You've earned 21,199 Luminance.
Rinne Gorber gives you 9 Trade Notes (250,000).


