Valley of Death: Difference between revisions
imported>Tlosk |
imported>Arkalor's Bot m Text replace - "Category:HighXP" to "" |
||
| (86 intermediate revisions by 6 users not shown) | |||
| Line 1: | Line 1: | ||
The Valley of Death (VoD) is located in the heart of the [[Direlands]] north of the [[Obsidian Plains]]. The area is very difficult to navigate due to the closely spaced ridges. Bounded roughly between 55W and 75W, and 30S and 45S. | {{Intro | ||
| Patch Introduced = [[Release]] | |||
| Related Quests = [[{{PAGENAME}}#Related_Quests|See Below]] | |||
| Updated = [[The Slumbering Giant]] | |||
}} | |||
{|align=right | |||
|[[File:Valley of Death.jpg]] | |||
|- | |||
|align=center|__TOC__ | |||
|} | |||
=== Description === | |||
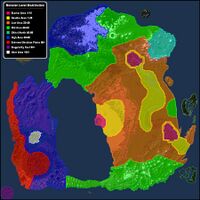
The [[Media:Dereth Spawn Distribution.jpg|Spawn Distribution]] in the Valley of Death makes this area is an uber (white) zone aimed at characters level 100 and above.<br> | |||
Home of the [[Tremendous Monouga]], the Valley of Death (VoD) is located in the heart of the [[Direlands]] north of the [[Obsidian Plains]]. The area is very difficult to navigate due to the closely spaced ridges. Bounded roughly between 55W and 75W, and 30S and 45S.<br> | |||
During the [[The Slumbering Giant]] event, the valley was updated with special high level creatures that are both high in xp and health points and drop [[Granite Key]]s and [[Marble Key]]s that open loot chests that randomly spawn in VoD. The keys are givable and must be made usable first with lockpick skill. | |||
==== Shadowy Statues ==== | |||
There are also statues called [[Shadowy Statue of the Hopeslayer]]. These statues can appear where creatures normally spawn. Use the statue to spawn two [[Void Knight]]s and 2 [[Raven Augur]]s. When killed, these have a chance of dropping a [[Small Shadow Statue of the Hopeslayer]]. Collect three and turn them in to [[Sarkin Killcrane]] in [[Wai Jhou]] for experience. | |||
== | === Route === | ||
* [[Obsidian Rim Portal]]s drop you at a Lifestone on the southern edge of VoD. This portal is found at the [[Singularity Caul]] drop point and also at the [[Northwest Direlands Portal]] drop point. | |||
* There is also a [[Direlands Valleys Portal]] southeast of the [[Obsidian Plains]] at [[74.1S, 52.4W - Lifestone & Portals|74.1S, 52.4W]] next to a Lifestone. | |||
* In addition, there is a retired portal that some people still have a tie to and can summon that drops deep in VoD at 36.7S 66.2W. Unlike other summoned portals, when you tie to a summoned VoD portal, you may then re-summon it. | |||
* {{ACMaps.com|ac_vod}} | |||
=== Related [[Quests]] === | |||
* [[Hidden Cavern Quest]] | |||
* [[Mukkir Aspect of Grael Quest]] | |||
* [[Shadow Statues]] | |||
[ | ==== Kill Tasks ==== | ||
* [[Fallen Creature Kill Task]] | |||
* [[K'nath An'dras Kill Task]] | |||
* [[Shadow-touched Virindi Paradox Kill Task]] | |||
* [[Shadow-touched Virindi Quidiox Kill Task]] | |||
* [[Virindi Paradox Kill Task]] | |||
* [[Virindi Quidiox Kill Task]] | |||
== | === [[Items]] === | ||
{{Item Table Three|Caption=[[Trophies]] | |||
| Mangled Dark Key | |||
| Twisted Dark Key | |||
| Tremendous Monouga Skull | |||
| Knath Head | |||
| Swarthy Mattekar Hide | |||
| Small Shadow Statue of the Hopeslayer | |||
| Virindi Singularity Key | |||
| Sezzherei's Lair (Portal Gem) | |||
| Hammer of the Fallen | |||
| Mace of the Fallen | |||
| Atlatl of the Fallen | |||
| Eye of the Fallen | |||
| Staff of the Fallen | |||
| Blade of the Fallen | |||
}} | |||
{{Item Table Three|Caption=Landscape Items | |||
{{ | | Bloodroot Vine | ||
| Red Monster Seed | |||
| Reinforced Mahogany Chest | |||
{{ | | Reinforced Oaken Chest | ||
{{ | | Shadowy Statue of the Hopeslayer | ||
}} | |||
=== [[Points of Interest]] === | |||
{|border=0 cellpadding=3 | |||
| | |||
* [[Precarious Sojourn]] | |||
|} | |||
=== [[Dungeons]] === | |||
{{Dungeon Table | |||
| Table Rows = | |||
{{Dungeon Maps | |||
| Dungeon = Hidden Cavern | |||
| Coordinates = 37.9S, 65.5W | |||
| Wiki Map File = | |||
| ACmaps ID = 5F48 | |||
| Related Quests = [[Hidden Cavern Quest]] | |||
}} | |||
{{Dungeon Maps | |||
| Dungeon = Mukkir Infested Black Spear Temple | |||
| Coordinates = 37.2S, 67.0W | |||
| Wiki Map File = 0076.gif | |||
| ACmaps ID = | |||
| Related Quests = [[Mukkir Aspect of Grael Quest]] | |||
}} | |||
}} | |||
=== | === [[Creatures]] === | ||
{|cellpadding=5 | {|cellpadding=5 | ||
|-valign=top | |-valign=top | ||
| Line 33: | Line 102: | ||
| Banderling Hierophant | | Banderling Hierophant | ||
| Banderling Paragon | | Banderling Paragon | ||
}} | |||
{{Creature Class|Crystal | |||
| Location = Landscape | |||
| Sentient Crystal Shard | |||
}} | }} | ||
{{Creature Class|Drudge | {{Creature Class|Drudge | ||
| Line 38: | Line 111: | ||
| Drudge Seraph | | Drudge Seraph | ||
| Drudge Seraph Mystic | | Drudge Seraph Mystic | ||
}} | |||
{{Creature Class|Gear Knight | |||
| Location = Landscape | |||
| Bronze Gauntlet Heavy Scout | |||
| Copper Cog Heavy Scout | |||
| Iron Blade Heavy Scout | |||
| Gold Gear Heavy Scout | |||
| Silver Scope Heavy Scout | |||
}} | }} | ||
{{Creature Class|Golem | {{Creature Class|Golem | ||
| Location = Landscape | | Location = Landscape | ||
| Platinum Golem | |||
| Platinum Golem Mountain King | | Platinum Golem Mountain King | ||
}} | }} | ||
| Line 48: | Line 130: | ||
| Raider Prefect | | Raider Prefect | ||
}} | }} | ||
| | |||
{{Creature Class|Grievver | {{Creature Class|Grievver | ||
| Location = Landscape | | Location = Landscape | ||
| Line 59: | Line 142: | ||
| Adolescent Rust Gromnie | | Adolescent Rust Gromnie | ||
}} | }} | ||
{{Creature Class|Knathtead | {{Creature Class|Knathtead | ||
| Location = Landscape | | Location = Landscape | ||
| Line 83: | Line 165: | ||
| Olthoi Sentinel | | Olthoi Sentinel | ||
}} | }} | ||
| | |||
{{Creature Class|Shadow | {{Creature Class|Shadow | ||
| Location = Landscape | | Location = Landscape | ||
| Line 94: | Line 177: | ||
| Tormenter | | Tormenter | ||
}} | }} | ||
{{Creature Class|Tumerok | {{Creature Class|Tumerok | ||
| Location = Landscape | | Location = Landscape | ||
| Line 120: | Line 202: | ||
| Virindi Paradox | | Virindi Paradox | ||
| Virindi Quidiox | | Virindi Quidiox | ||
}} | |||
| | |||
==== Rare Spawns ==== | |||
{|cellpadding=5 | |||
|-valign=top | |||
| | |||
{{Creature Class|Crystal | |||
| Location = Landscape | |||
| Fallen Crystal Shard | |||
}} | |||
{{Creature Class|Drudge | |||
| Location = Landscape | |||
| Fallen Drudge | |||
}} | |||
{{Creature Class|Grievver | |||
| Location = Landscape | |||
| Fallen Grievver | |||
}} | |||
| | |||
{{Creature Class|Lugian | |||
| Location = Landscape | |||
| Fallen Lugian | |||
}} | |||
{{Creature Class|Shadow | |||
| Location = Landscape | |||
| Fallen Shadow | |||
}} | |||
{{Creature Class|Tumerok | |||
| Location = Landscape | |||
| Fallen Tumerok | |||
}} | }} | ||
|} | |||
|} | |} | ||
=== Images === | |||
<gallery widths=200px heights=200px perrow=4> | |||
File:Dereth Spawn Distribution.jpg|Spawn Distribution Map | |||
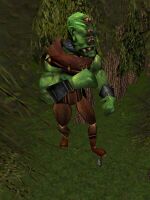
File:Tremendous Monouga Live.jpg|Tremendous Monouga | |||
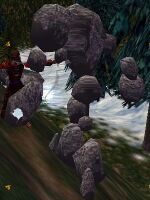
File:Platinum Golem Mountain King Live.jpg|Platinum Golem Mountain King | |||
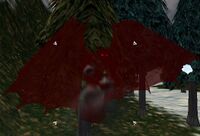
File:Shadowy Statue of the Hopeslayer Live.jpg|Shadowy Statue of the Hopeslayer | |||
</gallery> | |||
[[Category:Geographic Area]] | [[Category:Geographic Area]] | ||
Latest revision as of 18:03, 22 March 2013
|
|
Description
The Spawn Distribution in the Valley of Death makes this area is an uber (white) zone aimed at characters level 100 and above.
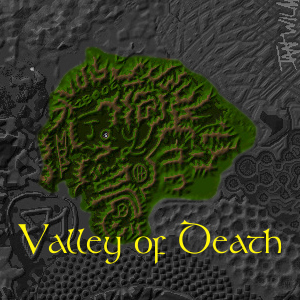
Home of the Tremendous Monouga, the Valley of Death (VoD) is located in the heart of the Direlands north of the Obsidian Plains. The area is very difficult to navigate due to the closely spaced ridges. Bounded roughly between 55W and 75W, and 30S and 45S.
During the The Slumbering Giant event, the valley was updated with special high level creatures that are both high in xp and health points and drop Granite Keys and Marble Keys that open loot chests that randomly spawn in VoD. The keys are givable and must be made usable first with lockpick skill.
Shadowy Statues
There are also statues called Shadowy Statue of the Hopeslayer. These statues can appear where creatures normally spawn. Use the statue to spawn two Void Knights and 2 Raven Augurs. When killed, these have a chance of dropping a Small Shadow Statue of the Hopeslayer. Collect three and turn them in to Sarkin Killcrane in Wai Jhou for experience.
Route
- Obsidian Rim Portals drop you at a Lifestone on the southern edge of VoD. This portal is found at the Singularity Caul drop point and also at the Northwest Direlands Portal drop point.
- There is also a Direlands Valleys Portal southeast of the Obsidian Plains at 74.1S, 52.4W next to a Lifestone.
- In addition, there is a retired portal that some people still have a tie to and can summon that drops deep in VoD at 36.7S 66.2W. Unlike other summoned portals, when you tie to a summoned VoD portal, you may then re-summon it.
- Map available at ACMaps.com
Related Quests
Kill Tasks
- Fallen Creature Kill Task
- K'nath An'dras Kill Task
- Shadow-touched Virindi Paradox Kill Task
- Shadow-touched Virindi Quidiox Kill Task
- Virindi Paradox Kill Task
- Virindi Quidiox Kill Task
| Landscape Items | ||||||||
| Bloodroot Vine | Red Monster Seed | Reinforced Mahogany Chest | ||||||
| Reinforced Oaken Chest | Shadowy Statue of the Hopeslayer | |||||||
| Dungeon | Coordinates | Wiki Map | ACmaps | Other | Quests |
| Hidden Cavern | 37.9S, 65.5W | -- | 5F48 | -- | Hidden Cavern Quest |
| Mukkir Infested Black Spear Temple | 37.2S, 67.0W | -- | -- | Mukkir Aspect of Grael Quest |
|
|
Rare Spawns |
Images
-
Spawn Distribution Map
-
Tremendous Monouga
-
Platinum Golem Mountain King
-
Shadowy Statue of the Hopeslayer
