Viridian Rise: Difference between revisions
imported>Zen1605 No edit summary |
imported>Zen1605 |
||
| (58 intermediate revisions by 3 users not shown) | |||
| Line 2: | Line 2: | ||
| Patch Introduced = [[Forces of Nature]] | | Patch Introduced = [[Forces of Nature]] | ||
| Related Quests = | | Related Quests = | ||
| Updated = [[Spring 2014]], [[March | | Updated = [[Spring 2014]], [[March Patch]] | ||
}} | }} | ||
{|valign=top align=right style="float:right" | {|valign=top align=right style="float:right" | ||
| Line 32: | Line 32: | ||
=== Getting to the Deru Tree === | === Getting to the Deru Tree === | ||
In order to reach the Deru Tree, you must fight across the 7 areas of the forest surrounding it. Each area contains creatures which drop [[Viridian Essence]]s upon death. These are needed to reach the next area of the forest. There are also several statues scattered in each area. One of the statues will have a blue flame over its head, marking it as active. You must have a specific amount of Viridian Essences before talking to the blue flame statue. Then it will open a portal to the next area. The amount of essences is 10 for players without the [[Lockpick]] skill and can be reduced based upon skill level. | In order to reach the Deru Tree, you must fight across the 7 areas of the forest surrounding it. Each area contains creatures which drop [[Viridian Essence]]s upon death. These are needed to reach the next area of the forest. There are also several statues scattered in each area. One of the statues will have a blue flame over its head, marking it as active. You must have a specific amount of Viridian Essences before talking to the blue flame statue. Then it will open a portal to the next area. The amount of essences is 10 for players without the [[Lockpick]] skill and can be reduced based upon skill level. 500+ lockpick reduces the number. 517 skill reduces it to 7. Less lockpick will require more essences. | ||
'''Important:''' the blue flame rotates from statue to statue within each area and does not stay in the same place. You will likely need to search for the statue that is currently "active". The statue takes all of your essences when you use it, so there is no stockpiling for future areas. '''The portal summoned has a very short timer''' (10 seconds) and must be used quickly. Occasionally there may be no active statue in the current area. When this happens you must simply wait for one to become active. Only one person needs to collect the essences, so long as your entire group can use the portal before it disappears! | '''Important:''' the blue flame rotates from statue to statue within each area and does not stay in the same place. You will likely need to search for the statue that is currently "active". The statue takes all of your essences when you use it, so there is no stockpiling for future areas. '''The portal summoned has a very short timer''' (10 seconds) and must be used quickly. Occasionally there may be no active statue in the current area. When this happens you must simply wait for one to become active. Only one person needs to collect the essences, so long as your entire group can use the portal before it disappears! | ||
In the 4th area of the forest, there is only a single statue near the jump bridge connecting to the 5th area. You can either attempt to cross the bridge using short shift jumps, or collect 20 essences and use the nearby statue for a portal across. | In the 4th area of the forest, there is only a single statue near the jump bridge connecting to the 5th area. You can either attempt to cross the bridge using short shift jumps, or collect 20 essences and use the nearby statue for a portal across. 500+ lockpick reduces the number. 517 skill reduces it to 15. Less lockpick will require more essences. | ||
In the 7th area of the forest, there is also only a single statue near the jump bridge connecting to the Deru Tree. Again you can choose to collect 20 essences or attempt to jump. Collecting 20 essences is easier in this area because it is very large and you must cross the entire area to reach the bridge. | In the 7th area of the forest, there is also only a single statue near the jump bridge connecting to the Deru Tree. Again you can choose to collect 20 essences or attempt to jump. Collecting 20 essences is easier in this area because it is very large and you must cross the entire area to reach the bridge. | ||
| Line 78: | Line 77: | ||
{{NPC Row | {{NPC Row | ||
| NPC Name= Brellegia | | NPC Name= Brellegia | ||
| Location = | |||
| Type = Quest NPC | |||
| Details = [[Viridian A'nekshen Kill Task]] | |||
}} | |||
{{NPC Row | |||
| NPC Name= Brellegia's Marker | |||
| Location = | | Location = | ||
| Type = Quest NPC | | Type = Quest NPC | ||
| Line 84: | Line 89: | ||
{{NPC Row | {{NPC Row | ||
| NPC Name= Aangesilus | | NPC Name= Aangesilus | ||
| Location = | |||
| Type = Quest NPC | |||
| Details = [[Viridian Wasp Kill Task]] | |||
}} | |||
{{NPC Row | |||
| NPC Name= Aangesilus' Marker | |||
| Location = | | Location = | ||
| Type = Quest NPC | | Type = Quest NPC | ||
| Line 90: | Line 101: | ||
{{NPC Row | {{NPC Row | ||
| NPC Name= Swift | | NPC Name= Swift | ||
| Location = | |||
| Type = Quest NPC | |||
| Details = [[Viridian Zefir Kill Task]] | |||
}} | |||
{{NPC Row | |||
| NPC Name= Swift's Marker | |||
| Location = | | Location = | ||
| Type = Quest NPC | | Type = Quest NPC | ||
| Line 104: | Line 121: | ||
| Location = | | Location = | ||
| Type = NPC | | Type = NPC | ||
| Details = [[ | | Details = [[Honeyed Meads]] | ||
}} | }} | ||
{{NPC Row | {{NPC Row | ||
| Line 127: | Line 144: | ||
=== [[Items]] === | === [[Items]] === | ||
{{Item Table|Caption=Area Items | |||
|Viridian Key of the Second Portal | |||
|Viridian Key of the Third Portal | |||
|Viridian Key of the Fourth Portal | |||
|Viridian Key of the Fifth Portal | |||
|Viridian Key of the Sixth Portal | |||
}} | |||
{{Item Table|Caption=[[Trophies]] | {{Item Table|Caption=[[Trophies]] | ||
| Infused Amber Shard | | Infused Amber Shard | ||
| Line 135: | Line 160: | ||
| Essence of Wind Fury | | Essence of Wind Fury | ||
| Essence of Zerzelikyr | | Essence of Zerzelikyr | ||
| Life Infused Nightbloom | |||
| Vigor Infused Nightbloom | |||
| Mana Infused Nightbloom | |||
| Viridian Rise Deru Portal Sending Gem | |||
}} | }} | ||
{{Item Table|Caption=[[ | {{Item Table|Caption=[[Infused Amber Collection]] Quest: [[Scrolls]] | ||
| Scroll of Cassius' Ring of Fire II | | Scroll of Cassius' Ring of Fire II | ||
| Scroll of Eye of the Storm II | | Scroll of Eye of the Storm II | ||
| Line 145: | Line 174: | ||
| Scroll of Tectonic Rifts II | | Scroll of Tectonic Rifts II | ||
| Scroll of Clouded Soul II | | Scroll of Clouded Soul II | ||
| Scroll of Ring of Skulls II | |||
| Scroll of Viridian Rise Recall | | Scroll of Viridian Rise Recall | ||
| Scroll of Viridian Rise Tree Recall | | Scroll of Viridian Rise Tree Recall | ||
}} | }} | ||
{{Item Table|Caption= | {{Item Table|Caption=[[Infused Amber Collection]] Quest: Viridian Weapons | ||
| Stormwood Claw | | Stormwood Claw | ||
| Stormwood Sword | | Stormwood Sword | ||
| Line 171: | Line 190: | ||
| Oak Stormwood Staff | | Oak Stormwood Staff | ||
| Oak Stormwood Sword | | Oak Stormwood Sword | ||
| Oak Stormwood Greatsword | |||
| Oak Stormwood Wand | | Oak Stormwood Wand | ||
| Derubloom Wand | | Derubloom Wand | ||
| Vortex Thorn | | Vortex Thorn | ||
| Storming Portal Axe | | Storming Portal Axe | ||
| | }} | ||
{{Item Table|Caption=[[Infused Amber Collection]], or [[Corrupted Amber Collection]] Quest Enhancements | |||
| Gem of Verdant Force | |||
| Luminous Amber: Breastplate of the Bulwark | |||
| Luminous Amber: Bracers of Thunderous Blows | |||
| Luminous Amber: Helm of Healing | |||
| Luminous Amber: Shield Fortification | |||
| Luminous Amber: Sollerets of the Storm | |||
| Luminous Amber: Gauntlets of the Storm | |||
| Luminous Amber: Greaves of the Tower | |||
| Empowered Amber: Bracers of Life | |||
| Empowered Amber: Helm of Life | |||
| Empowered Amber: Pauldrons of Life | |||
| Empowered Amber: Sollerets of Life | |||
| Corrupted Amber: Bracers of the Corrupted Heart | |||
| Corrupted Amber: Girth of the Corrupted Soul | |||
| Oak Corrupted Heartwood Wand | |||
}} | |||
{{Item Table|Caption=[[Honeyed Meads]] | |||
| Honeyed Life Mead | | Honeyed Life Mead | ||
| Honeyed Vigor Mead | | Honeyed Vigor Mead | ||
| Honeyed Mana Mead | | Honeyed Mana Mead | ||
}} | }} | ||
{{Item Table|Caption= Objects | {{Item Table|Caption= Objects | ||
| Brier Wasp Hive | | Brier Wasp Hive | ||
| Nightbloom | | Blossoming Nightbloom | ||
| Amber Crystal | |||
}} | }} | ||
{{Item Table|Caption= Menhir Ring at 43.2S 41.6E | {{Item Table|Caption= Menhir Ring at 43.2S 41.6E | ||
| Ancient Statue of the Viridian Rise | | Ancient Statue of the Viridian Rise | ||
| Line 224: | Line 267: | ||
}} | }} | ||
{{Creature Class|Phyntos Wasp | {{Creature Class|Phyntos Wasp | ||
| Brier Wasp | |||
| Brier Wasp Swarm | | Brier Wasp Swarm | ||
| Poisonous Brier Wasp | | Poisonous Brier Wasp | ||
| Venomous Brier Wasp | | Venomous Brier Wasp | ||
}} | |||
{{Creature Class|Wisp | |||
| Guardian Wisp | |||
}} | }} | ||
{{Creature Class|Zefir | {{Creature Class|Zefir | ||
| Line 247: | Line 294: | ||
File:A'nekshay Woods 3 Live.jpg|Menhir Ring with Statues in the Viridian Rise | File:A'nekshay Woods 3 Live.jpg|Menhir Ring with Statues in the Viridian Rise | ||
File:Viridian Rise 5 Live.jpg|Second "hedged off" section | File:Viridian Rise 5 Live.jpg|Second "hedged off" section | ||
File:Viridian Deru Tree Live.jpg|Viridian Deru Tree | |||
File:Viridian Deru Tree 2 Live.png|Viridian Deru Tree | |||
</gallery> | </gallery> | ||
Latest revision as of 06:33, 7 April 2016
|
 |
Description
Located between Khayyaban and Baishi around 44.0S, 43.4E, Viridian Rise is a large forest area surrounding a newly revealed Deru Tree. It is a tier 8 loot area filled with high level A'nekshay, Phyntos Wasps, Zefirs, Golems, Wisps, and Gromnies. There is a flagging quest to access the area.
The plateau in the very center of the area holds the Deru Tree and several NPCs. The 2 surrounding plateaus are divided into a total of 7 isolated forest areas that must be completed sequentially in order to reach the Deru Tree. The isolated forest sections are separated by thick forest walls that cannot be crossed by creatures or players. There are also 2 jump bridges that must be crossed or bypassed along the way. In order to reach the NPCs in this area, you must fight through the forest areas one by one. In the valleys between the plateaus are six statues leading to the Viridian Root dungeon.
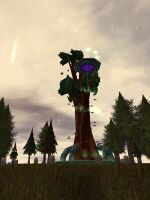
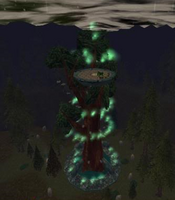
The Deru Tree itself has a very challenging jump puzzle associated with it. There is a single NPC at the top of the tree which can only be accessed by jumping to the top. The jumping puzzle has a once per character reward associated with it.
Many creatures in the Viridian Rise utilize new "advance warning" attacks. Prior to the attack occurring, a broadcast message is sent in the chat window, as well as a visual animation in many cases. There is then a several second delay before the attack goes into effect. These attacks are extremely powerful and must be dodged/handle in a specific manner in order to avoid taking damage.
Viridian Rise has 2 forms of alternate currency associated with it: Infused Amber Shards and Corrupted Amber Shards.
Route
- From Baishi, take the Kelnen Village portal at 50.0S 63.5E.
Location
Entrance Flagging
- Main page: Access to the Viridian Rise
In order to access the starting point in the forest, each player must complete a one time flagging. See Access to the Viridian Rise for more information.
Getting to the Deru Tree
In order to reach the Deru Tree, you must fight across the 7 areas of the forest surrounding it. Each area contains creatures which drop Viridian Essences upon death. These are needed to reach the next area of the forest. There are also several statues scattered in each area. One of the statues will have a blue flame over its head, marking it as active. You must have a specific amount of Viridian Essences before talking to the blue flame statue. Then it will open a portal to the next area. The amount of essences is 10 for players without the Lockpick skill and can be reduced based upon skill level. 500+ lockpick reduces the number. 517 skill reduces it to 7. Less lockpick will require more essences. Important: the blue flame rotates from statue to statue within each area and does not stay in the same place. You will likely need to search for the statue that is currently "active". The statue takes all of your essences when you use it, so there is no stockpiling for future areas. The portal summoned has a very short timer (10 seconds) and must be used quickly. Occasionally there may be no active statue in the current area. When this happens you must simply wait for one to become active. Only one person needs to collect the essences, so long as your entire group can use the portal before it disappears!
In the 4th area of the forest, there is only a single statue near the jump bridge connecting to the 5th area. You can either attempt to cross the bridge using short shift jumps, or collect 20 essences and use the nearby statue for a portal across. 500+ lockpick reduces the number. 517 skill reduces it to 15. Less lockpick will require more essences.
In the 7th area of the forest, there is also only a single statue near the jump bridge connecting to the Deru Tree. Again you can choose to collect 20 essences or attempt to jump. Collecting 20 essences is easier in this area because it is very large and you must cross the entire area to reach the bridge.
Use caution if running to the active statue in an area! It is easy for many creatures to crowd the statue and kill many players while attempting to enter the portal.
Climbing the Deru Tree
- Main page: Climbing the Viridian Deru Tree
Related Quests
| Quest | Restriction | Rewards |
|---|---|---|
| Access to the Viridian Rise | None | None |
| Climbing the Viridian Deru Tree | None | 100 Infused Amber Shards |
| Infused Amber Collection | None | Varies |
| Corrupted Amber Collection | None | Varies |
| Viridian Rise Rare Bosses | None | Varies |
| Viridian A'nekshen Kill Task | None | 80,000,000 xp, 5,000 lum, 1 MMD, 5 Aged Legendary Keys, 10 Infused Amber Shards |
| Viridian Wasp Kill Task | None | 80,000,000 xp, 5,000 lum, 1 MMD, 5 Aged Legendary Keys, 10 Infused Amber Shards |
| Viridian Zefir Kill Task | None | 80,000,000 xp, 5,000 lum, 1 MMD, 5 Aged Legendary Keys, 10 Infused Amber Shards |
| Paragon Weapons | None | Luminous Paragon Ambers |
| Enlightenment | 275 | +1 to all skills, +2 vitality |
| NPC Name | Location | Type | Details |
| Brellegia | -- | Quest NPC | Viridian A'nekshen Kill Task |
| Brellegia's Marker | -- | Quest NPC | Viridian A'nekshen Kill Task |
| Aangesilus | -- | Quest NPC | Viridian Wasp Kill Task |
| Aangesilus' Marker | -- | Quest NPC | Viridian Wasp Kill Task |
| Swift | -- | Quest NPC | Viridian Zefir Kill Task |
| Swift's Marker | -- | Quest NPC | Viridian Zefir Kill Task |
| Kervim'telek | -- | Quest NPC | Infused Amber Collection |
| Dridge | -- | NPC | Honeyed Meads |
| Doriathazaar | -- | Quest NPC | Climbing the Viridian Deru Tree |
| Vvermurgor | -- | Quest NPC | Corrupted Amber Collection |
| Summercrown | -- | Quest NPC | Paragon Weapons |
| Area Items | ||||||||
| Viridian Key of the Second Portal | Viridian Key of the Third Portal | Viridian Key of the Fourth Portal | Viridian Key of the Fifth Portal | |||||
| Viridian Key of the Sixth Portal | ||||||||
| Honeyed Meads | ||||||||
| Honeyed Life Mead | Honeyed Vigor Mead | Honeyed Mana Mead | ||||||
| Objects | ||||||||
| Brier Wasp Hive | Blossoming Nightbloom | Amber Crystal | ||||||
|
|
Images
-
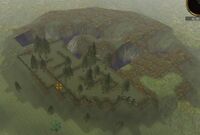
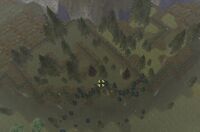
Bird's eye view
-
Viridian Rise
-
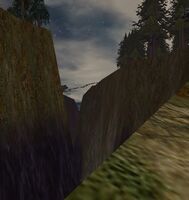
Canyon and bridge in the Viridian Rise
-
Crossing the Bridge in the Viridian Rise
-
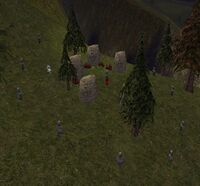
Menhir Ring with Statues in the Viridian Rise
-
Second "hedged off" section
-
Viridian Deru Tree
-
Viridian Deru Tree
Notes
- During the Spring 2014 event the Paragon Weapons and Enlightenment quests was added to the Viridian Rise.


