Dark Cavern: Difference between revisions
Jump to navigation
Jump to search
imported>Sanddh m →General |
imported>Peccasan mNo edit summary |
||
| (63 intermediate revisions by 5 users not shown) | |||
| Line 1: | Line 1: | ||
{{Dungeon Summary | {{Dungeon Summary | ||
| Patch Introduced = [[Blood From Stone]] | | Patch Introduced = [[Blood From Stone]] | ||
| Related Quests = | | Related Quests = [[Deewain's Dark Cavern]] | ||
| Updated = | | Updated = | ||
| | | | ||
| Line 7: | Line 7: | ||
| Live Image Caption = | | Live Image Caption = | ||
| | | | ||
| Wiki Map File = | | Wiki Map File = Deewains Map.png | ||
| Wiki Map Two = | | Wiki Map Two = | ||
| ACmaps.com ID = | | ACmaps.com ID = | ||
| Other Map = | | Other Map = http://acinfo.fantasyguilds.com/Maps/7E03.gif Retrospek's | ||
| | | | ||
| Coordinates = 87.9N 9.3W | | Coordinates = 87.9N 9.3W | ||
| Line 23: | Line 23: | ||
| Recallable = False | | Recallable = False | ||
| Summonable = False | | Summonable = False | ||
| Lifestone if Log = | | Lifestone if Log = False | ||
| Quest Flag = | | Quest Flag = | ||
}} | }} | ||
| Line 63: | Line 63: | ||
** If you take a wrong portal, you're back at the start of the jumping puzzle... | ** If you take a wrong portal, you're back at the start of the jumping puzzle... | ||
* If you do it right, you will end up in another big room with LOTS of | * If you do it right, you will end up in another big room with LOTS of Falling Spikes | ||
** Go left wall, watch sequence, when last one nearby falls, run like hell | ** Go left wall, watch sequence, when last one nearby falls, run like hell | ||
* Next, there are Missile Defender Golems who hurl rocks at you | * Next, there are [[Missile Defender]] Golems who hurl rocks at you | ||
* Step back into the hallway and kill the 4 [[Fallen Rock]]s that lie on the platform. | |||
* On the other side, there is another large room with [[Follower of Deewain]], 1 [[Fiery Defender]], 1 [[Charged Defender]] and a [[Chilled Defender]] | |||
* Kill [[Chilled Defender]], [[Fiery Defender]], [[Charged Defender]] and a 5 minute portal to [[Deewain]]'s Chambers will spawn. | |||
* [[Deewain]] is surrounded by a few Rocks and Followers of [[Deewain]]. He is weak to bludgeoning and acid. [[Deewain]] has 200,250 health and nasty debuffs. If you defeat him, the rocks blocking the passage out of the room dissappear. Follow the passage and pick up a rock on the ground (27 day timer) and hand to [[Fayza]] in [[Xarabyadun]] for your reward. | |||
:You allow [[Fayza]] to examine your [[Energy Infused Rock]].<br> | |||
:<font color=darkgoldenrod>Fayza tells you, "What a magnificent sample! So light for such a large stone, truly amazing."<br> | |||
:Fayza tells you, "I wonder if I could use this material to create something special....."<br> | |||
:Fayza tells you, "Ah right, I should also reward you bringing me this"<br></font> | |||
:You hand over 1 of your Energy Infused Rocks.<br> | |||
:You've earned 42,399 [[Luminance]].<br> | |||
:You've earned 529,999,971 experience.<br> | |||
:Fayza gives you [[Reinforced Mana Forge Key]]. | |||
== Maps == | == Maps == | ||
* Wiki Map: | * Wiki Map: - [[Media:Dark Cavern Map.png|Retrospek's Map Updated]] | ||
*[http://acinfo.fantasyguilds.com/Maps/7E03.gif Retrospek's Map] | |||
* [ | |||
== Creatures == | == Creatures == | ||
{{Creature Class|Golem | {{Creature Class|Golem | ||
| Location = Dungeon | | Location = Dungeon | ||
| Charged Defender | |||
| Chilled Defender | |||
| Deewain (Creature) | |||
| Fiery Defender | |||
| Follower of Deewain | | Follower of Deewain | ||
| Missile Defender | |||
| Rock (Creature) | | Rock (Creature) | ||
}} | }} | ||
== Items and Objects == | == Items and Objects == | ||
* {{Icon Link| | * {{Icon Link|Fallen Rock}} | ||
* {{Icon Link|Energy Infused Rock}} | |||
== Portals == | == Portals == | ||
* [[ | * "Surface" - though it portals you to the next section. | ||
* "Portal" - See the portal puzzle. | |||
* [[Deewain]]'s Chamber - Boss Room with [[Deewain]], spawns after you kill the [[Charged Defender]], [[Chilled Defender]] and [[Fiery Defender]], lasts 5 Minutes. | |||
== Images == | == Images == | ||
| Line 92: | Line 112: | ||
<gallery heights=200px widths=200px perrow=3> | <gallery heights=200px widths=200px perrow=3> | ||
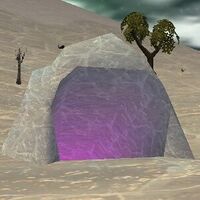
File:Dark Cavern Live.jpg|Entrance to Dark Cavern | File:Dark Cavern Live.jpg|Entrance to Dark Cavern | ||
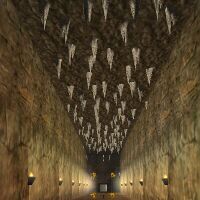
File: | File:Dark Cavern Spike Room Live.jpg|Room with Falling Spikes | ||
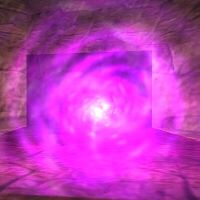
File:Deewain's Chamber Live.jpg|Portal to Deewain's Chamber | |||
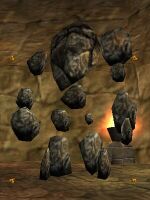
File:Deewain (Creature) Live.jpg|Deewain | |||
</gallery> | </gallery> | ||
Latest revision as of 07:14, 2 December 2015
| Maps NPCs Creatures Items and Objects Portals Images Update History |
|
|||||||||||||||||||||||||||||||||||
General
You are dropped at a random starting location when you enter.
- Ulgrim the Unpleasant tells you, "Deewain is holed up pretty well in that cave he created. He did tell me that if I wanted to visit him the rocks would guide my path."
- Ulgrim the Unpleasant tells you, "Ya, I don't know what that means either."
- Preliminary Directions:
- Go up and as far S or N where you can
- When you reach a big room with a pit, you can zoom out, and see an opening one level down
- The pit has an invisible floor, do a shift jump
- At the end of the level below, there is a "Surface" Portal
- This portals you to another big room with stones you need to jump
- Jumping Puzzle
- The locations of the platforms change, so there will be different routes
- Route 1:
- Shift Jump to the rock in the middle, just below the platform
- Looong jump N, towards another rock in the middle, you won't land on top of it, but bump off it on another one
- Shift jump to the NW
- Long jump E, slightly N, to a rock against the wall
- Shift jump to the next one
- Backwards shift jump
- Step backwards, shift jump
- Long jump straight N
- Shift jump W
- Backwards shift jump on the platform
- Portal Puzzle
- Next, there will be three portals, each bringing you to a next section with more portals
- Worked:
- Left
- Left
- Mid
- Right
- Mid
- If you take a wrong portal, you're back at the start of the jumping puzzle...
- If you do it right, you will end up in another big room with LOTS of Falling Spikes
- Go left wall, watch sequence, when last one nearby falls, run like hell
- Next, there are Missile Defender Golems who hurl rocks at you
- Step back into the hallway and kill the 4 Fallen Rocks that lie on the platform.
- On the other side, there is another large room with Follower of Deewain, 1 Fiery Defender, 1 Charged Defender and a Chilled Defender
- Kill Chilled Defender, Fiery Defender, Charged Defender and a 5 minute portal to Deewain's Chambers will spawn.
- Deewain is surrounded by a few Rocks and Followers of Deewain. He is weak to bludgeoning and acid. Deewain has 200,250 health and nasty debuffs. If you defeat him, the rocks blocking the passage out of the room dissappear. Follow the passage and pick up a rock on the ground (27 day timer) and hand to Fayza in Xarabyadun for your reward.
- You allow Fayza to examine your Energy Infused Rock.
- Fayza tells you, "What a magnificent sample! So light for such a large stone, truly amazing."
- Fayza tells you, "I wonder if I could use this material to create something special....."
- Fayza tells you, "Ah right, I should also reward you bringing me this"
- You hand over 1 of your Energy Infused Rocks.
- You've earned 42,399 Luminance.
- You've earned 529,999,971 experience.
- Fayza gives you Reinforced Mana Forge Key.
Maps
- Wiki Map: - Retrospek's Map Updated
- Retrospek's Map
Creatures
Items and Objects
Portals
- "Surface" - though it portals you to the next section.
- "Portal" - See the portal puzzle.
- Deewain's Chamber - Boss Room with Deewain, spawns after you kill the Charged Defender, Chilled Defender and Fiery Defender, lasts 5 Minutes.
Images
Click image for full size version.
-
Entrance to Dark Cavern
-
Room with Falling Spikes
-
Portal to Deewain's Chamber
-
Deewain


