Gear Knight Parts: Difference between revisions
imported>Darkmurkrow |
imported>Darkmurkrow No edit summary |
||
| (9 intermediate revisions by the same user not shown) | |||
| Line 1: | Line 1: | ||
{{Quest Summary | {{Quest Summary | ||
| Patch Introduced = [[Cogs in the Machine]] | | Patch Introduced = [[Cogs in the Machine]] | ||
| Related Quests = [[Thugs Part I]]<br>[[Thugs Part II]]<br>[[Thugs Part III]]<br>[[Rescue Fiona Woron]] | | Related Quests = [[Thugs Part I]]<br>[[Thugs Part II]]<br>[[Thugs Part III]]<br>[[Rescue Fiona Woron]]<br/>[[Lord Rytheran's Journal]]<br/>[[Collegium Occultus Ring Quest]]<br/>[[Armor of Darkness Quest]] | ||
| Updated = [[Gears of Change]] | | Updated = [[Gears of Change]] | ||
| | | | ||
| Line 9: | Line 9: | ||
| Kill Task = False | | Kill Task = False | ||
| Start Location = [[Xarabydun]] | | Start Location = [[Xarabydun]] | ||
| Timer = | | Timer = 20 hours | ||
| Level Restrictions = | | Level Restrictions = 130+<br>180+ wield on Shield | ||
| Level Suggestions = 150+ | | Level Suggestions = 150+ | ||
| Contracts = | | Contracts = | ||
| Item Rewards = | | Item Rewards = [[Gear Shield]] | ||
| Luminance Reward = | | MMD Reward = | ||
| Luminance Reward = None | |||
| Max XP Reward = 297,235,856 | | Max XP Reward = 297,235,856 | ||
| Titles = | | Titles = | ||
| | | | ||
| Link Walk Through = True | | Link Walk Through = True | ||
| Line 27: | Line 28: | ||
| Link Notes = False | | Link Notes = False | ||
}} | }} | ||
''This quest is for the [[Gear Shield]], for the related quest for the [[Armor of Darkness]], see [[Armor of Darkness Quest]]. Note that portions of the quests overlap.'' | |||
== Quest Overview == | == Quest Overview == | ||
[[Nurino]] sends you to various dungeons to look for [[Gear Knight]] parts to aid in his quest to build one himself. | [[Nurino]] sends you to various dungeons to look for [[Gear Knight]] parts to aid in his quest to build one himself. | ||
* This quest requires someone with Lockpick skill. | * This quest requires someone with Lockpick skill. | ||
* In order to complete the [[Gear Shield]] part of this quest, you need to have at least started the following quests: | * In order to complete the [[Gear Shield]] part of this quest, you need to have at least started the following quests: | ||
** [[Lord Rytheran's Journal]] | ** [[Lord Rytheran's Journal]] | ||
| Line 37: | Line 38: | ||
== Walk Through == | == Walk Through == | ||
# Speak to [[Nurino]] in [[Xarabydun]] (you will not be able to pick up the first item if you have not spoken to him). | # Speak to [[Nurino]] in [[Xarabydun]] (you will not be able to pick up the first item if you have not spoken to him). | ||
#* '''Route:''' Portal to [[Xarabydun]] in the West wing of the [[Town Network]]. | #* '''Route:''' Portal to [[Xarabydun]] in the West wing of the [[Town Network]]. | ||
# | # Complete the [[Armor of Darkness Quest]] and get the [[Pile of random parts]] which is near the end of the quest. | ||
#* Completing the quest is not required, but the parts are very close to the end of the quest. | |||
# Return to [[Xarabydun]] and give [[Nurino]] the [[Pile of random parts]]. He will instruct you to travel to [[Lord Rytheran's Private Sanctum]]. If you have not previously done the quest [[Lord Rytheran's Journal]], you will need to begin it to gain entrance. | |||
#* | |||
# | |||
#* '''Route:''' Take the [[Neydisa Castle]] portal in the South wing of the [[Town Network]]. Then run to 74.7N, 18.5E and '''use the statue''' (not either of the two portals next to the statue). | #* '''Route:''' Take the [[Neydisa Castle]] portal in the South wing of the [[Town Network]]. Then run to 74.7N, 18.5E and '''use the statue''' (not either of the two portals next to the statue). | ||
# You will need to retrieve the two halves of the [[Key to the Lord's Sanctum]] or Cloister Key (see the [[Media:00D8.gif|map]]) then unlock the door to the east wing and jump over the acid pit, then before the final room you will pass an [[Ancient Chest]] that contains the [[Strange Mana Gem]]. | # You will need to retrieve the two halves of the [[Key to the Lord's Sanctum]] or Cloister Key (see the [[Media:00D8.gif|map]]) then unlock the door to the east wing and jump over the acid pit, then before the final room you will pass an [[Ancient Chest]] that contains the [[Strange Mana Gem]]. | ||
#Return the gem to [[Nurino]] who will then instruct you to travel to Lyceum of Knorr to retrieve a tome. | # Return the gem to [[Nurino]] who will then instruct you to travel to Lyceum of Knorr to retrieve a tome. | ||
# Travel to the [[Halls of Knorr]] to the [[Collegium Occultus]] and retrieve the [[Large Empyrean Tome]] from near [[Master Malsivir]]. Note that you must have at least once turned in the seal from the [[Collegium Occultus Ring Quest]] in order to enter the portal. | # Travel to the [[Halls of Knorr]] to the [[Collegium Occultus]] and retrieve the [[Large Empyrean Tome]] from near [[Master Malsivir]]. Note that you must have at least once turned in the seal from the [[Collegium Occultus Ring Quest]] in order to enter the portal. | ||
#* '''Warning:''' <font color=red>If you happen to have town criered the [[Broken Occultus Seal]] without handing it to [[Roderick]], you cannot currently get another, you will need an envoy to fix it for you</font>. | #* '''Warning:''' <font color=red>If you happen to have town criered the [[Broken Occultus Seal]] without handing it to [[Roderick]], you cannot currently get another, you will need an envoy to fix it for you</font>. | ||
| Line 156: | Line 90: | ||
== Items == | == Items == | ||
{{Item Table|Caption=Quest Items | {{Item Table|Caption=Quest Items|Pile of random parts|Strange Mana Gem|Large Empyrean Tome|Lock|Open Book (Gear Knight Parts)}} | ||
{{Item Table|Caption=Rewards|Gear Shield|Interactions and Observations, 'Gear Knights' | {{Item Table|Caption=Rewards|Gear Shield|Interactions and Observations, 'Gear Knights'}} | ||
== Experience Rewards == | == Experience Rewards == | ||
| Line 183: | Line 117: | ||
}} | }} | ||
}} | }} | ||
== Images == | == Images == | ||
| Line 201: | Line 124: | ||
File:Armor of Darkness Set Live.jpg|Armor of Darkness | File:Armor of Darkness Set Live.jpg|Armor of Darkness | ||
File:Ries Woron Live.png|Ries Woron | File:Ries Woron Live.png|Ries Woron | ||
</gallery> | </gallery> | ||
| Line 252: | Line 173: | ||
<font color="darkgoldenrod">Nurino tells you, "Thank you again for your assistance. In all my researches, I never expected to find an entire sentient race of golem-like creatures. I could spend my entire life researching and studying these Gear Knights!"</font><br /> | <font color="darkgoldenrod">Nurino tells you, "Thank you again for your assistance. In all my researches, I never expected to find an entire sentient race of golem-like creatures. I could spend my entire life researching and studying these Gear Knights!"</font><br /> | ||
Latest revision as of 18:28, 9 December 2013
| Walk Through ___ Maps ___ Items ___ XP ___ Titles ___ Images ___ Lore & Dialog ___ |
| |||||||||||||||||||||||||||||||||||||||
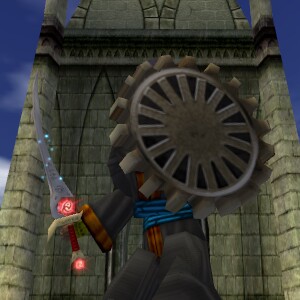 | |||||||||||||||||||||||||||||||||||||||
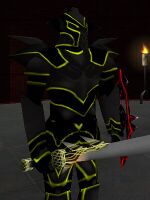
This quest is for the Gear Shield, for the related quest for the Armor of Darkness, see Armor of Darkness Quest. Note that portions of the quests overlap.
Quest Overview
Nurino sends you to various dungeons to look for Gear Knight parts to aid in his quest to build one himself.
- This quest requires someone with Lockpick skill.
- In order to complete the Gear Shield part of this quest, you need to have at least started the following quests:
Walk Through
- Speak to Nurino in Xarabydun (you will not be able to pick up the first item if you have not spoken to him).
- Route: Portal to Xarabydun in the West wing of the Town Network.
- Complete the Armor of Darkness Quest and get the Pile of random parts which is near the end of the quest.
- Completing the quest is not required, but the parts are very close to the end of the quest.
- Return to Xarabydun and give Nurino the Pile of random parts. He will instruct you to travel to Lord Rytheran's Private Sanctum. If you have not previously done the quest Lord Rytheran's Journal, you will need to begin it to gain entrance.
- Route: Take the Neydisa Castle portal in the South wing of the Town Network. Then run to 74.7N, 18.5E and use the statue (not either of the two portals next to the statue).
- You will need to retrieve the two halves of the Key to the Lord's Sanctum or Cloister Key (see the map) then unlock the door to the east wing and jump over the acid pit, then before the final room you will pass an Ancient Chest that contains the Strange Mana Gem.
- Return the gem to Nurino who will then instruct you to travel to Lyceum of Knorr to retrieve a tome.
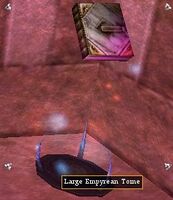
- Travel to the Halls of Knorr to the Collegium Occultus and retrieve the Large Empyrean Tome from near Master Malsivir. Note that you must have at least once turned in the seal from the Collegium Occultus Ring Quest in order to enter the portal.
- Warning: If you happen to have town criered the Broken Occultus Seal without handing it to Roderick, you cannot currently get another, you will need an envoy to fix it for you.
- Route: Go to Stonehold and talk to Olcris, Nuhmudira's Student and then give him an M Note to him for a Knorr Portal Gem. Use the gem to be portaled to the Halls. Once inside, first give the Book on the ground to the Diamond Guardian golem, next give the Mead on ground to Diamond Guardian golem, last give the Kite Shield to Diamond Guardian golem. You can now go into the Collegium Occultus Anteroom portal to the south.
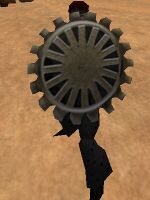
- Return to Xarabydun and give Nurino the Large Empyrean Tome. He will give you a readable copy, experience (30% up to Lvl 200), and a Gear Shield.
- [OPTIONAL]: Give your Gear Shield back to Nurino for experience (5% up to Lvl 200).
Maps
| Dungeon | Coordinates | Wiki Map | ACmaps | Other | Quests |
| Thug Hideout | 65.8S, 77.2E | File:7E04.png 7E04.png | -- | -- | -- |
| Lord Rytheran's Private Sanctum | 74.7N, 18.5E | -- | -- | -- | |
| Seat of Knorr | Knorr Portal Gem | -- | 6444 | -- | -- |
| Collegium Occultus | Seat of Knorr | -- | 0044 | -- | -- |
Items
| Quest Items | ||||||||
| Pile of random parts | Strange Mana Gem | Large Empyrean Tome | Lock | |||||
| Open Book (Gear Knight Parts) | ||||||||
| Rewards | ||||||||
| Gear Shield | Interactions and Observations, 'Gear Knights' | |||||||
Experience Rewards
| Task Required | First Run Max Experience | Percentage & Level Cap | Repeated Run Max XP | Repeated Run Percentage & Level Cap | |
| Give Large Empyrean Tome to Nurino | 297,235,856xp |
30% up to level 200 |
148,617,928xp | 15% up to level 200 | |
|
| |||||
| Give Gear Shield to Nurino | 49,539,309xp |
5% up to level 200 |
49,539,309xp | 5% up to level 200 | |
|
| |||||
| See Level Costs for per level information. | |||||
Images
-
Large Empyrean Tome
-
Gear Shield
-
Armor of Darkness
-
Ries Woron
Lore & Dialog
Town Crier tells you, "Have you spoken to Nurino the Arcanum researcher above Xarabydun? He thinks there are clues about the nature of the clockwork soldiers, or Gear Knights as he calls them, in the cave where the desperados threatening Baishi and Lin were holed up."
Ulgrim the Unpleasant tells you, "Nurino? Nice guy, but I think the fumes from Xarabydun are getting to him. A suit of armor fell on him in the royal palace and now he thinks he sees 'Gear Knights' everywhere. Take it from me, he's crazy, and I know crazy."
Nurino tells you, "Greetings."
Nurino tells you, "My name is Nurino. I am a researcher for the Arcanum who specializes in ancient constructs. I've recently heard both rumors and reports of some strange parts being seen that could be a portion of some ancient form of Golem. I would be very interested in piecing together the truth of these rumors, and if they are true, piecing together this Golem itself."
Nurino tells you, "The majority of the reports have come from adventurers who were dealing with some problem with thugs. I sent a scout to look in the areas reported, but the pieces seem to have been moved. Perhaps the pieces can be found wherever these thugs have gone?"
You give Nurino Pile of random parts.
Nurino tells you, "Fascinating!"
Nurino tells you, "These appear to be exceptionally advanced when compared even to the most intricate Empyrean Golems. I've never seen anything like this."
Nurino sets the large gear aside and examines the head very carefully.
Nurino tells you, "There seems to be a great deal of interlocked parts in this head..."
Nurino tells you, "What's this? Some sort of socket? Hmmm..."
Nurino pulls out a book, flipping quickly through the pages and comparing diagrams to the socket in the head.
Nurino tells you, "It just might work..."
Nurino tells you, "In my studies, I've heard of a gem that should fit in this socket. The last known owner of this gem was the undead, Rytheran. As, last I heard, he was having problems in the Direlands, why don't you go, um, explore for this gem in his Library. if you happen to find this strange gem, and happen to accidently pocket it and return to me, we can see if I can make this golem function."
Nurino tells you, "You should begin your search for the Mana Gem in Rytheran's Library. It's the only place where I've heard reports of a gem that matches the general dimensions of the socket I found in the head of this golem-like contraption."
You give Diamond Guardian Book.
Diamond Guardian teleports you with Courtyard of Knorr.
You give Diamond Guardian Mead.
Diamond Guardian teleports you with Interior Gates of Knorr.
You give Diamond Guardian Kite Shield.
Diamond Guardian teleports you with Seat of Knorr.
Nurino tells you, "Were you able to retrieve the gem from Rytheran's Library?"
You give Nurino Strange Mana Gem.
Nurino tells you, "Beautiful! It looks like it'll fit!"
Nurino flips the head over in his hand, working the gem into the socket with the other.
Nurino tells you, "Now, we'll see if this works..."
With a whirring click, the head begins to generate small internal lights and a crackling sound.
The Gear Knight Head yells, "Have at thee!"
The Gear Knight Head yells, "This is one Gear Knight you won't defeat so easily!"
The Gear Knight Head says, "Oh, where am I?"
The Gear Knight Head begins to spit out sparks.
The Gear Knight Head says, "Initiating diagnostic scan... Massive internal and external damage. Missing 95% of systems. Status: Critical."
The Gear Knight Head says, "Well, this is unfortunate..."
The Gear Knight Head spits out a gout of sparks and smoke.
The Gear Knight Head says, "Seek the *crack* book! Lyceum... Knorr... Tome. Directions... for *fizzle* Healing... Us."
The Gear Knight Head says, "Aetherium Core Failure. Shutting down..."
Nurino tells you, "Oh my..."
Nurino tells you, "This seems to be a lot more than a Golem."
Nurino tells you, "If I could garner your assistance once again, I was wondering if you could go retrieve this tome the Gear Knight head mentioned. If it still exists, it could be the key to bringing this being back."
Nurino tells you, "If this book is a guide for these beings, these Gear Knights, then it was likely a highly valued tome. Things of such an occult nature were usually stored, as I've been told by other adventurers who've been there, in the deeper sections of the Lyceum."
Nurino tells you, "If you could find your way into the Lyceum of Knorr, and find this occult tome, we may be able to unravel this mystery once and for all."
Nurino tells you, "I'll be here if you need me, seeing what I can make of these parts..."
Nurino tells you, "Before it... fizzled, the head noted the existence of a book in the Lyceum of Knorr. I leave it up to you to find your way to Knorr and retrieve this occult tome."
Nurino tells you, "Look in the deeper sections. The more valued an item was in the Lyceum, the deeper in it was placed."
Nurino tells you, "Have you found the tome mentioned by the head?"
You allow Nurino to examine your Large Empyrean Tome.
Nurino tells you, "Fascinating. Of course, it's written in Empyrean, and in the rather esoteric hand of a true scholar of mysteries. Let me take that and see if I can translate it for us both."
You hand over 1 of your Large Empyrean Tomes.
Nurino tells you, "This is amazing! The whole first section of this book appears to be a documentary of the Empyrean exploration of the Gear Knight world, as well as their interaction with the Gear Knights, up through the Olthoi Invasion and the collapse of the Portal Network!"
Nurino tells you, "I've never seen such a detailed study of a race of beings before. The whole second half of this book is filled with diagrams and notes on how these Gear Knights work. I don't even know where to begin..."
Nurino tells you, "Oh, sorry. I almost forgot you there for a minute. Please, let me give you this copy of the history. I'm afraid these diagrams defy simple translation."
You've earned 297,235,856 experience. (at level 216)
Nurino gives you Interactions and Observations, 'Gear Knights'.
Nurino tells you, "Also, I was able to fashion this large gear into something you may find useful."
Nurino gives you Gear Shield.
You give Nurino Gear Shield.
Nurino tells you, "Very well, I can always use this for my research.I can reward you thusly instead."
You've earned 49,539,309 experience.(at level 215)
You allow Nurino to examine your Interactions and Observations, 'Gear Knights'.
Nurino tells you, "Thank you, but I can read the original. That's for your collection, and for posterity."
Nurino tells you, "Thank you again for your assistance. In all my researches, I never expected to find an entire sentient race of golem-like creatures. I could spend my entire life researching and studying these Gear Knights!"
