Oubliette Quest: Difference between revisions
Jump to navigation
Jump to search
imported>Arkalor Created page with '{{Quest Summary | Patch Introduced = Mired Hearts | Related Quests = | Updated = | | Live Image = Live.jpg | Live Image Caption = | …' |
imported>Sucamarto No edit summary |
||
| (13 intermediate revisions by 3 users not shown) | |||
| Line 2: | Line 2: | ||
| Patch Introduced = [[Mired Hearts]] | | Patch Introduced = [[Mired Hearts]] | ||
| Related Quests = | | Related Quests = | ||
| Updated = | | Updated = [[The Risen Princess]] | ||
| | | | ||
| Live Image = | | Live Image = Oubliette Quest Live.jpg | ||
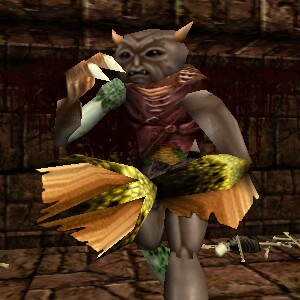
| Live Image Caption = | | Live Image Caption = The Gibbering | ||
| Quest Type = Solo/Group | | Quest Type = Solo/Group | ||
| Kill Task = False | | Kill Task = False | ||
| Start Location = [[Oubliette|Oubliette Portal Gem]] | | Start Location = [[Oubliette|Oubliette Portal Gem]] | ||
| Timer = | | Timer = 13 Days | ||
| Level Restrictions = None | | Level Restrictions = None | ||
| Level Suggestions = | | Level Suggestions = 80+ (Group)<br>120+ (Solo) | ||
| Contracts = | |||
| Item Rewards = [[Gibbering Claw]] | | Item Rewards = [[Gibbering Claw]] | ||
| Luminance Reward = | |||
| Max XP Reward = None | | Max XP Reward = None | ||
| Titles = | | Titles = | ||
| Line 21: | Line 23: | ||
| Link XP Rewards = False | | Link XP Rewards = False | ||
| Link Title Rewards = False | | Link Title Rewards = False | ||
| Link Images = | | Link Images = True | ||
| Link Lore & Dialog = | | Link Lore & Dialog = False | ||
| Link Notes = False | | Link Notes = False | ||
}} | }} | ||
== Quest Overview == | == Quest Overview == | ||
The dungeon can only be accessed by using a [[Oubliette|portal gem]] found on [[Virindi Consul]]s and [[Virindi Adjudicator]]s. | |||
The Oubliette is the Virindi's disposal site for "non-viable" test subjects. | |||
== Walk Through == | == Walk Through == | ||
# Once you have entered the dungeon, head north through the large room ignoring the side passages and jump into the pit. | |||
# From here, go south through the corridors until the walls and ceiling look different and then make your way around and down either of the ramps heading north. | |||
# Here you will find a pit with a very long drop. At the bottom is the [[The Gibbering]]. | |||
# Make sure you're buffed before jumping down. It debuffs your attributes as well as vulning you for armor and bludgeoning using level 7 spells. | |||
# Once you have defeated him take the [[Gibbering Claw]]. | |||
== Maps == | == Maps == | ||
| Line 34: | Line 43: | ||
| Table Rows = | | Table Rows = | ||
{{Dungeon Maps | {{Dungeon Maps | ||
| Dungeon = Oubliette (Dungeon) | | Dungeon = Oubliette (Dungeon){{!}}Oubliette | ||
| Coordinates = | | Coordinates = N/A | ||
| Wiki Map File = | | Wiki Map File = | ||
| ACmaps ID = | | ACmaps ID = | ||
| Other Site Name = | | Other Site Name = | ||
| Other Site Link = | | Other Site Link = | ||
| Line 44: | Line 53: | ||
== Items == | == Items == | ||
{{Item Table | {{Item Table|Caption=Quest Items | ||
|Caption=Quest Items | | Oubliette | ||
|Oubliette | |||
}} | }} | ||
{{Item Table | {{Item Table|Caption=Rewards | ||
|Caption=Rewards | | Gibbering Claw | ||
|Gibbering Claw | |||
}} | }} | ||
== Images == | == Images == | ||
<gallery widths=200px heights=200px perrow=3> | <gallery widths=200px heights=200px perrow=3> | ||
File:Live.jpg| | File:Oubliette Dungeon Live.jpg| | ||
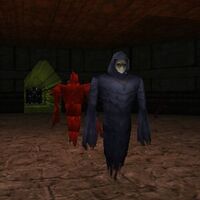
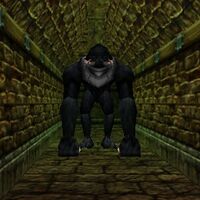
File:Live.jpg| | File:Oubliette Dungeon Live 2.jpg| | ||
File:Oubliette Dungeon Live 3.jpg| | |||
</gallery> | </gallery> | ||
== Notes == | == Notes == | ||
* | * During the [[The Risen Princess]] event the way the [[Oubliette Quest]] resets was addressed to avoid encountering possible ways to get stuck with extra long reset timers. | ||
Latest revision as of 06:05, 14 August 2012
| Walk Through ___ Maps ___ Items ___ Images ___ |
| |||||||||||||||||||||||||||||||||||||||
 | |||||||||||||||||||||||||||||||||||||||
Quest Overview
The dungeon can only be accessed by using a portal gem found on Virindi Consuls and Virindi Adjudicators.
The Oubliette is the Virindi's disposal site for "non-viable" test subjects.
Walk Through
- Once you have entered the dungeon, head north through the large room ignoring the side passages and jump into the pit.
- From here, go south through the corridors until the walls and ceiling look different and then make your way around and down either of the ramps heading north.
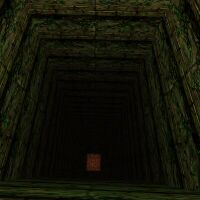
- Here you will find a pit with a very long drop. At the bottom is the The Gibbering.
- Make sure you're buffed before jumping down. It debuffs your attributes as well as vulning you for armor and bludgeoning using level 7 spells.
- Once you have defeated him take the Gibbering Claw.
Maps
| Dungeon | Coordinates | Wiki Map | ACmaps | Other | Quests |
| Oubliette | N/A | -- | -- | -- | -- |
Items
| Quest Items | ||||||||
| Oubliette | ||||||||
| Rewards | ||||||||
| Gibbering Claw | ||||||||
Images
Notes
- During the The Risen Princess event the way the Oubliette Quest resets was addressed to avoid encountering possible ways to get stuck with extra long reset timers.


