Tumerok Dungeon: Difference between revisions
Jump to navigation
Jump to search
imported>Tlosk m Text replace - "* [http://www.acmaps.com/map.php?id=" to "* {{ACMaps.com|" |
imported>Arkalor |
||
| (15 intermediate revisions by 2 users not shown) | |||
| Line 1: | Line 1: | ||
{{Dungeon Summary | {{Dungeon Summary | ||
| Patch Introduced = [[Release]] | | Patch Introduced = [[Release]] | ||
| Related Quests = | | Related Quests = None | ||
| Updated = | | Updated = [[Heroes' Respite]],<br>[[A Perfect Paradox]] | ||
| | | | ||
| Wiki Map File = | | Wiki Map File = | ||
| Line 9: | Line 9: | ||
| Other Map = | | Other Map = | ||
| | | | ||
| Coordinates = 9. | | Coordinates = [[9.7S, 63.3W - Tumerok Fort]] | ||
| Landblock = | | Landblock = 01A0 | ||
| Dereth Map = {{Map Point|9.6|S|62.9|W|Marker=Dungeon}} | | Dereth Map = {{Map Point|9.6|S|62.9|W|Marker=Dungeon}} | ||
| Nearest Town = [[Fort Tethana]] | | Nearest Town = [[Fort Tethana]] | ||
| Nearest LS = 18.1S, 56.9W | | Nearest LS = 18.1S, 56.9W | ||
| Route = [[ | | Route = From the [[Town Network]], take the Aluvian wing to [[Fort Teth]]. | ||
| | | | ||
| Level Restrictions = None | | Level Restrictions = None | ||
| Line 23: | Line 23: | ||
| Quest Flag = | | Quest Flag = | ||
| | | | ||
| Live Image = | | Live Image = Tumerok Dungeon Live.jpg | ||
| Live Image Caption = | | Live Image Caption = Portal to the Tumerok Dungeon | ||
}} | }} | ||
== General == | == General == | ||
Complicated dungeon with lots of | Complicated dungeon with lots of locked doors. | ||
The portal can be found in the center of a huge Tumerok Fortress | The portal can be found in the center of a huge Tumerok Fortress that is guarded by lots of Tumeroks. | ||
== Maps == | == Maps == | ||
* {{ACMaps.com|01A0 | * {{ACMaps.com|01A0}} | ||
* Wiki Map: | * Wiki Map: | ||
:[[File:Name.png]] | :[[File:Name.png]] | ||
| Line 41: | Line 41: | ||
== Creatures == | == Creatures == | ||
{{Creature Class|Armoredillo | |||
| Location = Dungeon | |||
| Plate Armoredillo | |||
}} | |||
{{Creature Class|Banderling | {{Creature Class|Banderling | ||
| Location = Dungeon | | Location = Dungeon | ||
| Banderling | | Banderling Enforcer | ||
| Banderling | | Banderling Thrasher | ||
}} | }} | ||
{{Creature Class|Drudge | {{Creature Class|Drudge | ||
| Location = Dungeon | | Location = Dungeon | ||
| Drudge | | Altered Drudge | ||
| Augmented Drudge | |||
}} | }} | ||
{{Creature Class|Golem | {{Creature Class|Golem | ||
| Location = Dungeon | | Location = Dungeon | ||
| | | Diamond Golem | ||
| | | Pyreal Golem | ||
}} | }} | ||
{{Creature Class|Rat | {{Creature Class|Rat | ||
| Location = Dungeon | | Location = Dungeon | ||
| | | Wasteland Rat | ||
}} | }} | ||
{{Creature Class|Skeleton | {{Creature Class|Skeleton | ||
| Location = Dungeon | | Location = Dungeon | ||
| Skeleton | | Great Skeleton | ||
}} | }} | ||
{{Creature Class|Tumerok | {{Creature Class|Tumerok | ||
| Location = Dungeon | | Location = Dungeon | ||
| Tumerok | | Ascendant Tumerok | ||
| Tumerok | | Augmented Tumerok | ||
}} | }} | ||
== Items and Objects == | == Items and Objects == | ||
* {{Icon Link|Chest}} - | * {{Icon Link|Chest}} - Most unlocked and contain tier 3 [[Loot]]. | ||
* {{Icon Link|Sturdy Iron Chest}} - | * {{Icon Link|Sturdy Iron Chest}} - Two chests - one is not on the map (Lvl 0 NE room from the statue area) | ||
== Portals == | == Portals == | ||
| Line 104: | Line 90: | ||
Click image for full size version. | Click image for full size version. | ||
<gallery heights=200px widths=200px perrow=3> | <gallery heights=200px widths=200px perrow=3> | ||
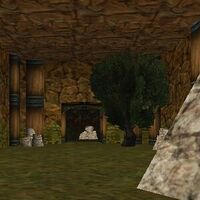
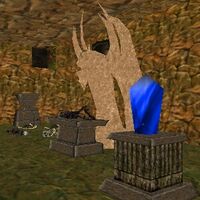
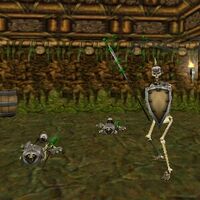
File:Tumerok Dungeon 2 Live.jpg|Drop Point of Tumerok Dungeon | File:Tumerok Dungeon 2 Live.jpg|Drop Point of Tumerok Dungeon | ||
File:Tumerok Dungeon 3 Live.jpg| | |||
File:Tumerok Dungeon 4 Live.jpg| | |||
</gallery> | </gallery> | ||
== Update History == | |||
{{Update History| | |||
[[Heroes' Respite]] | |||
* Two chests updated to Sturdy Iron Chests. | |||
[[A Perfect Paradox]] | |||
* Creatures updated from: | |||
** Banderling Bandit | |||
** Banderling Captain | |||
** Banderling Guard | |||
** Banderling Raider | |||
** Banderling Raver | |||
** Drudge Slave | |||
** Copper Golem | |||
** Granite Golem | |||
** Black Rat | |||
** Brown Rat | |||
** Desert Rat | |||
** White Rat | |||
** Adult Reedshark | |||
** Reedshark Pup | |||
** Veteran Reedshark | |||
** Skeleton | |||
** Skeleton Warrior | |||
** Tumerok Fighter | |||
** Tumerok Officer | |||
** Tumerok Priest | |||
** Tumerok Gladiator | |||
** High Tumerok | |||
** Tumerok High Priest | |||
** Tumerok Warrior | |||
** Tumerok Worker | |||
}} | |||
Latest revision as of 14:01, 18 February 2013
| Maps NPCs Creatures Items and Objects Portals Images Update History |
|
 |
||||||||||||||||||||||||||||||||||
General
Complicated dungeon with lots of locked doors.
The portal can be found in the center of a huge Tumerok Fortress that is guarded by lots of Tumeroks.
Maps
- Map available at ACMaps.com
- Wiki Map:
NPCs
- None
Creatures
Items and Objects
 Chest - Most unlocked and contain tier 3 Loot.
 Sturdy Iron Chest - Two chests - one is not on the map (Lvl 0 NE room from the statue area)
Portals
- Surface - near drop
Images
Click image for full size version.
-
Drop Point of Tumerok Dungeon
Update History
Heroes' Respite
- Two chests updated to Sturdy Iron Chests.
- Creatures updated from:
- Banderling Bandit
- Banderling Captain
- Banderling Guard
- Banderling Raider
- Banderling Raver
- Drudge Slave
- Copper Golem
- Granite Golem
- Black Rat
- Brown Rat
- Desert Rat
- White Rat
- Adult Reedshark
- Reedshark Pup
- Veteran Reedshark
- Skeleton
- Skeleton Warrior
- Tumerok Fighter
- Tumerok Officer
- Tumerok Priest
- Tumerok Gladiator
- High Tumerok
- Tumerok High Priest
- Tumerok Warrior
- Tumerok Worker


