Dragon's Power: Difference between revisions
Jump to navigation
Jump to search
imported>Sanddh m New page: == Dungeon == Introduced in Mirror, Mirror. {|border=1 width=300 cellpadding=3 !colspan=2| Dungeon Summary |- !Location | 82.3S 41.4E |- !Restrictions | 35+, recallable, summonable, ... |
imported>Immortalbob m Text replace - "Font of Jojii Quest" to "Path of the Jojii Adherent" |
||
| (14 intermediate revisions by 4 users not shown) | |||
| Line 1: | Line 1: | ||
== Dungeon == | {{Dungeon Summary | ||
| Patch Introduced = [[Mirror, Mirror]] | |||
| Related Quests = [[Path of the Jojii Adherent]] | |||
| Updated = | |||
| | |||
| Wiki Map File = | |||
| Wiki Map Two = | |||
| ACmaps.com ID = 6449 | |||
| Other Map = | |||
| | |||
| Coordinates = 82.3S, 41.4E | |||
| Landblock = 6449 | |||
| Dereth Map = {{Map Point|82.3|S|41.4|E|Marker=Dungeon}} | |||
| Nearest Town = [[Kara]] | |||
| Nearest LS = | |||
| Route = Run from [[Kara]] | |||
| | |||
| Level Restrictions = 35+ | |||
| Tieable = True | |||
| Recallable = True | |||
| Summonable = True | |||
| Lifestone if Log = False | |||
| Quest Flag = Talk to [[Miko Li, Jojii Adherent]] in the tavern in Kara, 83.3S 47.2E to flag for entry. | |||
| | |||
| Live Image = Live.jpg | |||
| Live Image Caption = | |||
}} | |||
== General == | == General == | ||
From drop, hug left wall till you find a ramp down to the E. Through a few rooms and up a ramp with an intersection. Go straight, left, head N, till you can go down 2 ramps again. Another room, at the intersection go left. <br> Double click the [[Smoldering Brazier]], you get the [[Brazier of Power]], which says it looks like a shield. | From drop, hug left wall till you find a ramp down to the E. Through a few rooms and up a ramp with an intersection. Go straight, left, head N, till you can go down 2 ramps again. Another room, at the intersection go left. <br> Double click the [[Smoldering Brazier]], you get the [[Brazier of Power]], which says it looks like a shield. | ||
== Map == | |||
* {{ACMaps.com|6449}} | |||
== NPCs == | |||
* None | |||
== Creatures == | == Creatures == | ||
{{Creature Class|Undead | |||
| Location = Dungeon | |||
| Revenant | |||
| Dark Revenant | |||
| Dark Leech | |||
| Dark Magus | |||
| Great Revenant | |||
}} | |||
== Items and Objects == | |||
* {{Icon Link|Smoldering Brazier}} - See map. | |||
* {{Icon Link|Brazier of Power}} - Obtained by using the Smoldering Brazier | |||
* {{Icon Link|Journey's End}} - on floor near Smoldering Brazier | |||
== Portals == | |||
* | * Surface - near drop | ||
== Images == | |||
Click image for full size version. | |||
<gallery heights=200px widths=200px perrow=4> | |||
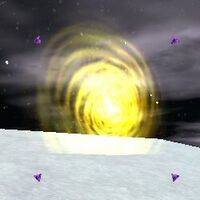
File:Dragon's Power Live.jpg|Entrance to Dragon's Power | |||
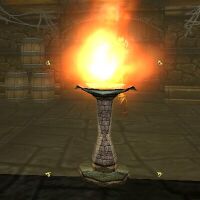
File:Smoldering Brazier Live.jpg|Smoldering Brazier | |||
</gallery> | |||
Latest revision as of 19:39, 3 July 2012
| Maps NPCs Creatures Items and Objects Portals Images Update History |
|
|||||||||||||||||||||||||||||||||||
General
From drop, hug left wall till you find a ramp down to the E. Through a few rooms and up a ramp with an intersection. Go straight, left, head N, till you can go down 2 ramps again. Another room, at the intersection go left.
Double click the Smoldering Brazier, you get the Brazier of Power, which says it looks like a shield.
Map
NPCs
- None
Creatures
Items and Objects
 Smoldering Brazier - See map.
 Brazier of Power - Obtained by using the Smoldering Brazier
 Journey's End - on floor near Smoldering Brazier
Portals
- Surface - near drop
Images
Click image for full size version.
-
Entrance to Dragon's Power
-
Smoldering Brazier


