Gelidite Library Quest: Difference between revisions
imported>Arkalor No edit summary |
imported>Arkalor m Text replace - " | Item Rewards = " to " | Contracts = | Item Rewards = " |
||
| (4 intermediate revisions by 2 users not shown) | |||
| Line 12: | Line 12: | ||
| Level Restrictions = None | | Level Restrictions = None | ||
| Level Suggestions = 40+ | | Level Suggestions = 40+ | ||
| Contracts = | |||
| Item Rewards = | | Item Rewards = | ||
| Luminance Reward = | | Luminance Reward = | ||
| Line 40: | Line 41: | ||
# Go to the [[Gelidite Library]] at 69.2N, 17.2W near [[Stonehold]] . | # Go to the [[Gelidite Library]] at 69.2N, 17.2W near [[Stonehold]] . | ||
# Talk to [[Kai Mallan, Sho Enchanter]] near the entrance to the dungeon. | # Talk to [[Kai Mallan, Sho Enchanter]] near the entrance to the dungeon. | ||
# Enter [[Gelidite Library]], | # Enter [[Gelidite Library]], {{ACMaps Link|5464|AC Maps - Gelidite Library: Entrance}}. There are lower level elementals in this dungeon. | ||
# Go down, and down a ramp to a T intersection. To the left (S), there is a room with the lore book [[Linaural Urilaentai]]. To the right (N), there is a room with the lore book [[Miadun hu Okardunai]]. | # Go down, and down a ramp to a T intersection. To the left (S), there is a room with the lore book [[Linaural Urilaentai]]. To the right (N), there is a room with the lore book [[Miadun hu Okardunai]]. | ||
# If you are not interested in picking up the books, go right (N) through the room. On the N side, there is a hidden entrance to a corridor with a ramp down. | # If you are not interested in picking up the books, go right (N) through the room. On the N side, there is a hidden entrance to a corridor with a ramp down. | ||
# Follow this corridor through a smaller room, another corridor, a larger room, and exit this large room to the SE. You will find the portal to the next dungeon, the Gelidite Library Labyrinth | # Follow this corridor through a smaller room, another corridor, a larger room, and exit this large room to the SE. You will find the portal to the next dungeon, the Gelidite Library Labyrinth {{ACMaps Link|5463|AC Maps - Gelidite Library: Labyrinth}} | ||
# At the drop, you will find the [[Empty Binding]]. Pick it up. Goal is to collect 8 pages. | # At the drop, you will find the [[Empty Binding]]. Pick it up. Goal is to collect 8 pages. | ||
# The dungeon holds no creatures. Look at the map for the location of the pages, or see below for directions. | # The dungeon holds no creatures. Look at the map for the location of the pages, or see below for directions. | ||
# After collecting all 8 pages, add them to the [[Empty Binding]] and hand the resulting [[Unreadable Tome]] to the NPC-Golem, the [[Oubliette Gatekeeper]] to be flagged to enter the next part, the Gelidite Library Oubliette ( | # After collecting all 8 pages, add them to the [[Empty Binding]] and hand the resulting [[Unreadable Tome]] to the NPC-Golem, the [[Oubliette Gatekeeper]] to be flagged to enter the next part, the Gelidite Library Oubliette ({{ACMaps Link|5462|AC Maps - Gelidite Library: Oubliette}}) | ||
# Again, no creatures in this dungeon. If you swap the camera up high, you can see where [[Nuhmudira]] used to be imprisoned, lying on top of the column in the middle. On the floor you will find different pieces of lore: 3 versions of [[A Hastily Scrawled Note (Text)]], [[Bloody Scrawled Note]] and [[A Painfully Scrawled Note]] | # Again, no creatures in this dungeon. If you swap the camera up high, you can see where [[Nuhmudira]] used to be imprisoned, lying on top of the column in the middle. On the floor you will find different pieces of lore: 3 versions of [[A Hastily Scrawled Note (Text)]], [[Bloody Scrawled Note]] and [[A Painfully Scrawled Note]] | ||
# There are TWO levers here. This is where you make your choice: | # There are TWO levers here. This is where you make your choice: | ||
Latest revision as of 16:14, 23 March 2012
| Walk Through ___ Maps ___ Items ___ Images ___ Lore & Dialog ___ |
| |||||||||||||||||||||||||||||||||||||||
Quest Overview
This Quest is a lore-heavy quest from the Gaerlan/Martine Story Arc. Nuhmudira was kidnapped, and held prisoner in this dungeon.
The way you complete this quest, and if you choose to save or damn Nuhmudira, has its influences on other quests.
- If you choose to damn her, you will be flagged for The Callous Heart Quest, but will have to do all 3 parts in the Soul Stone Quest.
- If you choose to save her, you will be flagged for the Nuhmudira's Boon Quest, and will have to do only the first part in the Soul Stone Quest.
(Note that these are not the only influencing choices upon the Soul Stone quest, and your required steps may differ regardless of your choice.)
Walk Through
- Go to the Gelidite Library at 69.2N, 17.2W near Stonehold .
- Talk to Kai Mallan, Sho Enchanter near the entrance to the dungeon.
- Enter Gelidite Library, AC Maps - Gelidite Library: Entrance. There are lower level elementals in this dungeon.
- Go down, and down a ramp to a T intersection. To the left (S), there is a room with the lore book Linaural Urilaentai. To the right (N), there is a room with the lore book Miadun hu Okardunai.
- If you are not interested in picking up the books, go right (N) through the room. On the N side, there is a hidden entrance to a corridor with a ramp down.
- Follow this corridor through a smaller room, another corridor, a larger room, and exit this large room to the SE. You will find the portal to the next dungeon, the Gelidite Library Labyrinth AC Maps - Gelidite Library: Labyrinth
- At the drop, you will find the Empty Binding. Pick it up. Goal is to collect 8 pages.
- The dungeon holds no creatures. Look at the map for the location of the pages, or see below for directions.
- After collecting all 8 pages, add them to the Empty Binding and hand the resulting Unreadable Tome to the NPC-Golem, the Oubliette Gatekeeper to be flagged to enter the next part, the Gelidite Library Oubliette (AC Maps - Gelidite Library: Oubliette)
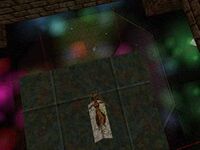
- Again, no creatures in this dungeon. If you swap the camera up high, you can see where Nuhmudira used to be imprisoned, lying on top of the column in the middle. On the floor you will find different pieces of lore: 3 versions of A Hastily Scrawled Note (Text), Bloody Scrawled Note and A Painfully Scrawled Note
- There are TWO levers here. This is where you make your choice:
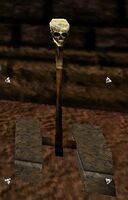
- The Skull Lever with a SKULL on it, to the West, will give your lifeforce to Nuhmudira, you will die and have 5% vitae, but without leaving a corpse. This means you saved her. You will appear at a lifestone just outside of Zaikhal at 15.8N, 2.1E.
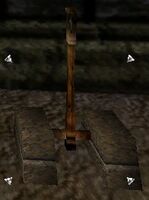
- The Plain Lever, to the east, will make Nuhmudira suffer more, and you will be portaled back to Kai Mallan, Sho Enchanter. This means you condemned Nuhmudira, and you can talk to Kai Mallan for further instructions (see The Callous Heart Quest.
Maps
| Dungeon | Coordinates | Wiki Map | ACmaps | Other | Quests |
| Gelidite Library: Entrance | 69.2N, 17.2W | -- | 5464 | -- | -- |
| Gelidite Library: Labyrinth | -- | -- | 5463 | -- | -- |
| Gelidite Library: Oubliette | -- | -- | 5462 | -- | -- |
Items
Detailed Walk Through
Filling the Empty Binding
- After you portal in into the Library, grab the Empty Binding on the floor next to a golem corpse.
- The Binding mentions it needs 8 pages, starting with a scrawling note. The following directions are not in the sequence you should add them, but the fastest way.
- From the drop, go take the west passage. Go left at first intersection, and follow the hallway all the way to a fork. To the left, on the floor, is the first note, A Hastily Scrawled Note.
- Backtrack to the first intersection, and go right (west) to find the third note.
- Back to the 4way intersection with the golem corpse.
- From there, take the South hallway. Go left (S) at the first fork, through 2 doors and up and down a ramp. The second note lies to the right in a little alcove.
- Backtrack to the dead golem
- The East hallway holds the next 4 notes.
- Keep right hand rule (a relatively long way) until you come into a little room which is a dead end. The seventh Note is on the floor.
- Backtrack S, at first intersection go left (S), hug right wall till you come to a 4way intersection. Go straight (SW), hug right wall till you come into a small room with a door on the other side. On the floor will be the fifth note.
- Exit on the other side, and hang right for a short while. The sixth note is in an alcove behind a door.
- Go back to the little room where the fifth note was, and from there, back up N to the 4way intersection. Go straight (NE) and keep hugging the right wall, up a few ramps to a little room which is a dead end. The fourth note is in this room.
- Backtrack, first intersection go right, next one left, and you're back at the dead golem
- The eighth and final note can be found by going into the N hallway. At the first intersection, go right (S), up a ramp, left, and right (N) up another. Left to a little room with the eighth note.
- Backtrack to the first intersection, and this time, go right and east, this is where the Gelidite Dais. the Oubliette Gatekeeper and the portal to the next section are.
- Assemble the Book, ID the notes for the right sequence:
- First Note: Use an empty book binding on this item.
- Second Note: Use a book binding with one page on this item.
- Third Note: Use a book binding with two pages on this item.
- Fourth Note: Use a book binding with two pages on this item.
- Fifth Note: Use a half full book binding on this item.
- Sixth Note: Use a book that is missing two pages on this note
- Seventh Note: Use a book that is missing two pages on this page.
- Eighth Note: Use a nearly full book binding on this note to complete the book
- Adding the 8th Note changes the Book Binding into an Unreadable Tome.
- Give the Unreadable Tome to the Oubliette Gatekeeper to receive Nuhmudira's Charm and be flagged to enter the portal
Images
-
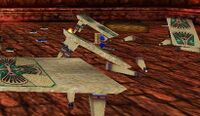
One of the ravaged library rooms
-
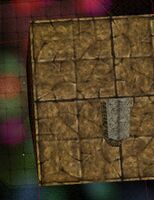
The now empty oubliette
-
Skull Lever
-
Plain Lever
-
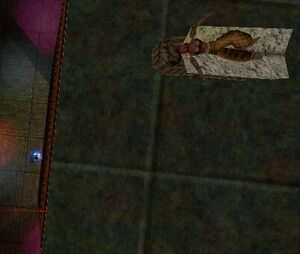
Nuhmudira imprisoned in the Oubliette during the Gaerlan/Martine Story Arc.
-
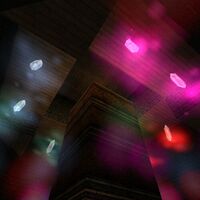
Crystals that held Nuhmudira
Lore & Dialog
For the story on how and why Nuhmudira was kidnapped, and Kai Mallan, Sho Enchanter 's role it in it, see the Teaser of Betrayal.
Also from what Kai has to say, he did not agree with her experiments with the ancient Blood Magic.
Kai Mallan, Sho Enchanter tells you, "How did you come to me? You have overstayed your welcome here. Return to your precious cities! My master cares not for those that will let her evil go unpunished."
Oubliette Gatekeeper tells you, "It is forbidden to pass these walls unless you have been given the permission of he who watches the gate. To be given that passage, hand me your key so that I may verify the inscriptions and grant you access. But be forewarned, your entry to this place will place you in direct contact with the accused. Make your decision wisely, for you may cast your vote only once."
Oubliette Gatekeeper tells you, "The key, had you forgotten, is a writing infused with the magic of my masters. I will infuse the writing with the power of the dias, and then return it to you."
You give Oubliette Gatekeeper Unreadable Tome.
The Golem lifts a metallic hand toward the dais holding the book. A soft thrum echoes through the room, as a warm glow surrounds the book. Pages twist upon one another, and a feeling of warmth cascades over you.
Oubliette Gatekeeper gives you Nuhmudira's Charm.
Oubliette Gatekeeper tells you, "Read well the words within, this is a living being that has been imprisoned. There is too much passion in the writing for it to be otherwise. Choose wisely for the work within has never been used upon living flesh before and the results are as of yet untested and unknown. This prisoner must be guilty of heinous crimes against my masters."
Oubliette Gatekeeper tells you, "You may now pass. Remember your judgement is final."
Message if you choose to condemn her:
The feeling that you have abandoned a friend washes over you.
Lever teleports you with Portal Sending Merciless.
Message if you choose to save her:
Your strength deserts you as your soul is stripped of essence. In your mind, a woman's voice says, "Thank You."
Notes
- During the Into the Darkness event, the quest became non-repeatable.
