Halt Dericost Ritual Quest: Difference between revisions
Jump to navigation
Jump to search
imported>Arkalor No edit summary |
imported>Darkmurkrow No edit summary |
||
| (74 intermediate revisions by 6 users not shown) | |||
| Line 1: | Line 1: | ||
{{Quest Summary | {{Quest Summary | ||
| Patch Introduced = [[Dark Deliveries]] | | Patch Introduced = [[Dark Deliveries]] | ||
| Related Quests = [[Dericost Ritual Investigation]] | | Related Quests = [[Dericost Ritual Investigation]]<br>[[Strathelar Royal Cloak Quest]] | ||
| Updated = | | Updated = [[The Risen Princess]],<br>[[Feelings of Dread]] | ||
| | | | ||
| Live Image = Live.jpg | | Live Image = Live.jpg | ||
| Live Image Caption = | | Live Image Caption = | ||
| Quest Type = | | Quest Type = Group/Solo | ||
| Kill Task = False | | Kill Task = False | ||
| Start Location = [[Sir Learth]] | | Start Location = [[Sir Learth]] | ||
| Timer = | | Timer = 20 hours | ||
| Time to Complete = | | Time to Complete = | ||
| Level Restrictions = 200+ | | Level Restrictions = 200+ | ||
| Level Suggestions = 200+ | | Level Suggestions = 200+ | ||
| Item Rewards = [[Empowered Robe of the Perfect Light]] | | Contracts = [[Contract for Ritual Disruption]] | ||
| Item Rewards = [[Empowered Robe of the Perfect Light]], 4 use [[Legendary Key]] | |||
| Luminance Reward = 40,000 | | Luminance Reward = 40,000 | ||
| MMD Reward = 18 | |||
| Max XP Reward = 502,789,262 | | Max XP Reward = 502,789,262 | ||
| Titles = None | | Titles = None | ||
| Line 28: | Line 30: | ||
| Link Notes = True | | Link Notes = True | ||
}} | }} | ||
== Quest Overview == | == Quest Overview == | ||
This quest requires the [[Dericost Ritual Investigation]] quest to be completed to flag for this quest. This is a one time flagging and does not need to be repeated. | |||
This quest features an important storyline confrontation between Borelean Strathelar, Hoshino Kei, and Geraine. | |||
== Walk Through == | == Walk Through == | ||
# | # Complete the [[Dericost Ritual Investigation]] to flag for this quest. | ||
# After completing the Dericost Ritual Investigation, talk to [[Lady Daenerah]] at the [[Cabin by the Frozen Valley]]. | |||
# After completing the Dericost Ritual Investigation, talk to Lady Daenerah at the | #* '''Route:''' Take the [[Stonehold]] portal in [[Town Network]], then run to [[Wisp Lake Cottages]] portal at 69.6N, 20.2W, then run west to 83.8N, 4.3W. | ||
#* '''Route:''' Take the [[Stonehold]] portal in [[Town Network]], then run to [[Wisp Lake Cottages]] portal at 69.6N, 20.2W, then run west to 83.8N, 4.3W | |||
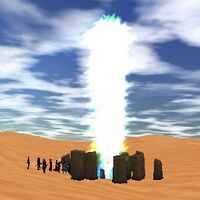
# Travel to the Menhir Ring at 21.7S, 9.4E | # Travel to the Menhir Ring at 21.7S, 9.4E | ||
#* '''Route:''' Take the [[Al-Arqas]] portal in [[Town Network]], then run to [[Djinaya Wind Cottages]] portal at 33.5S, 13.1E. | #* '''Route:''' Take the [[Al-Arqas]] portal in [[Town Network]], then run to [[Djinaya Wind Cottages]] portal at 33.5S, 13.1E. | ||
# Use the west [[Menhir]] to portal into the first | # Use the west [[Menhir]] (21.7S, 9.4E) to portal into the first dungeon. | ||
# This dungeon has 4 [[Enchanted Mnemosyne]]s that must be used to flag for entry to the second part of the dungeon. High level Undead, Bloodstones and Skeletons abound in both dungeons, including highly dangerous Undead Commanders. | # This dungeon has 4 [[Enchanted Mnemosyne]]s that must be used to flag for entry to the second part of the dungeon. High level Undead, Bloodstones and Skeletons abound in both dungeons, including highly dangerous [[Undead Commander|Undead Commanders]]. | ||
# After using all four Mnemosynes, take the surface portal | # Proceed straight ahead until you reach an intersection. The paths to the east and west lead to 2 Mnemosynes each. Following one of the paths will eventually lead to another path split, where one Mnemosyne is in a large room at the end of each path. | ||
# After using all four Mnemosynes, return to the drop and take the surface portal. Then use the eastern Menhir to portal into the second dungeon. The drop is safe. | |||
# The dungeon is linear, jump down two jumps and run to a third. This is a good spot to rebuff and/or park a healer. Only 1-2 creatures spawn at the top of the third jump. | # The dungeon is linear, jump down two jumps and run to a third. This is a good spot to rebuff and/or park a healer. Only 1-2 creatures spawn at the top of the third jump. | ||
# | # <font color=green>[OPTIONAL]:</font> In a side room off the main hall in this dungeon, pick up the [[Large Tome]], which is used in the [[Strathelar Royal Cloak Quest]]. | ||
# When ready, jump down and clear the large ritual room of undead, skeletons, and bloodstones. Loot the dead [[Corpse of Royal Knight|Aluvian Soldiers]] for a [[Broken Shield]] (lore item). | |||
# After clearing, use the [[Bloody Breastplate]] on the ground to begin a cutscene involving [[Apparition of Borelean Strathelar|Borelean]], [[Apparition of Hoshino Kei|Hoshino Kei]], and [[Apparition of Emperor Geraine|Geraine]]. | # After clearing, use the [[Bloody Breastplate]] on the ground to begin a cutscene involving [[Apparition of Borelean Strathelar|Borelean]], [[Apparition of Hoshino Kei|Hoshino Kei]], and [[Apparition of Emperor Geraine|Geraine]]. | ||
# After the cutscene, more Bloodstones, Undead, and Skeletons will spawn, followed by [[Lord Winstead]] and his accompanying [[Filinuvekta Hieromancer]]s. The Hieromancers cast level 8 vulns and wars, and are quite dangerous. | # After the cutscene, more Bloodstones, Undead, and Skeletons will spawn, followed by [[Lord Winstead]] and his 3 accompanying [[Filinuvekta Hieromancer]]s. The Hieromancers cast level 8 vulns and wars, and are quite dangerous. | ||
#* '''Tip:''' Shield yourself from incoming war magic spells by hiding behind the pillars. Eventually one or more of the enemies will switch to melee and come and attack you. | |||
#* '''Note: ''' It's possible to solo this quest, but the bosses must be killed within a certain amount of time. This can be difficult as Lord Winstead has approximately 200,000 health. | |||
# After killing Lord Winstead, loot the [[Sealed Tome]] from his corpse (he drops 30). | # After killing Lord Winstead, loot the [[Sealed Tome]] from his corpse (he drops 30). | ||
# | # Enter the [[Hidden Treasury]] portal which spawns in the alcove after Lord Winstead is killed. | ||
#* Note: Sometimes the portal has failed to spawn. It may be safest to kill Lord Winstead on the north side of the room as that side seems to always spawn the portal. | |||
# Loot a 4 use [[Legendary Key]] from the altars in the middle of the room and use on the nearby chests. | |||
# Return to [[Lady Daenerah]] and give her the Sealed Tome for robe, luminance, MMDs, and experience points. | |||
== Maps == | == Maps == | ||
{{Dungeon Table | {{Dungeon Table | ||
| Table Rows = | | Table Rows = | ||
{{Dungeon Maps | {{Dungeon Maps | ||
| Dungeon = Warded Cavern Passage | | Dungeon = Warded Cavern Passage | ||
| Coordinates = 21.7S, 9.4E | | Coordinates = 21.7S, 9.4E | ||
| Wiki Map File = | | Wiki Map File = | ||
| ACmaps ID = | | ACmaps ID = | ||
| Other Site Name = | | Other Site Name = | ||
| Other Site Link = | | Other Site Link = | ||
}} | }} | ||
{{Dungeon Maps | {{Dungeon Maps | ||
| Dungeon = Warded Dungeon Passage | | Dungeon = Warded Dungeon Passage | ||
| Coordinates = 21.7S, 9.4E | | Coordinates = 21.7S, 9.4E | ||
| Wiki Map File = | |||
| ACmaps ID = | |||
| Other Site Name = | |||
| Other Site Link = | |||
}} | |||
{{Dungeon Maps | |||
| Dungeon = Hidden Treasury | |||
| Coordinates = | |||
| Wiki Map File = | | Wiki Map File = | ||
| ACmaps ID = | | ACmaps ID = | ||
| Line 69: | Line 88: | ||
== Items == | == Items == | ||
{{Item Table|Caption=Quest Items|Menhir|Enchanted Mnemosyne|Bloody Breastplate|Corpse of Royal Knight|Broken Shield|Sealed Tome}} | {{Item Table|Caption=Quest Items|Menhir|Enchanted Mnemosyne|Bloody Breastplate|Corpse of Royal Knight|Broken Shield|Sealed Tome|Large Tome}} | ||
{{Item Table|Caption=Rewards|Empowered Robe of the Perfect Light}} | {{Item Table|Caption=Rewards|Empowered Robe of the Perfect Light|Legendary Key|Book 3: The Time Ritual and the Sand Kings}} | ||
== Experience Rewards == | == Experience Rewards == | ||
| Line 238: | Line 257: | ||
:Lady Daenerah tells you, "Either way, you have helped remove a dangerous artifact from the hands of the Dericost. Please, accept this as a reward, with our thanks."</font> | :Lady Daenerah tells you, "Either way, you have helped remove a dangerous artifact from the hands of the Dericost. Please, accept this as a reward, with our thanks."</font> | ||
:<font color=green>Lady Daenerah gives you Empowered Robe of the Perfect Light. | :<font color=green>Lady Daenerah gives you Empowered Robe of the Perfect Light. | ||
:Lady Daenerah gives you Legendary Key | |||
:You've earned 502,789,262 experience. | :You've earned 502,789,262 experience. | ||
:You've earned 40,000 Luminance.</font> | :You've earned 40,000 Luminance.</font> | ||
== Notes == | == Notes == | ||
* | * During the [[The Risen Princess]] event the quest flag was altered and now only requires players to run the [[Dericost Ritual Investigation]] quest once to repeat. | ||
* During the [[Feelings of Dread]] event a [[Legendary Key]] reward was also added. | |||
Latest revision as of 21:40, 15 January 2014
| Walk Through ___ Maps ___ Items ___ XP ___ Images ___ Lore & Dialog ___ Notes |
| |||||||||||||||||||||||||||||||||||||||
Quest Overview
This quest requires the Dericost Ritual Investigation quest to be completed to flag for this quest. This is a one time flagging and does not need to be repeated.
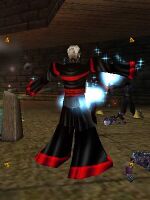
This quest features an important storyline confrontation between Borelean Strathelar, Hoshino Kei, and Geraine.
Walk Through
- Complete the Dericost Ritual Investigation to flag for this quest.
- After completing the Dericost Ritual Investigation, talk to Lady Daenerah at the Cabin by the Frozen Valley.
- Route: Take the Stonehold portal in Town Network, then run to Wisp Lake Cottages portal at 69.6N, 20.2W, then run west to 83.8N, 4.3W.
- Travel to the Menhir Ring at 21.7S, 9.4E
- Route: Take the Al-Arqas portal in Town Network, then run to Djinaya Wind Cottages portal at 33.5S, 13.1E.
- Use the west Menhir (21.7S, 9.4E) to portal into the first dungeon.
- This dungeon has 4 Enchanted Mnemosynes that must be used to flag for entry to the second part of the dungeon. High level Undead, Bloodstones and Skeletons abound in both dungeons, including highly dangerous Undead Commanders.
- Proceed straight ahead until you reach an intersection. The paths to the east and west lead to 2 Mnemosynes each. Following one of the paths will eventually lead to another path split, where one Mnemosyne is in a large room at the end of each path.
- After using all four Mnemosynes, return to the drop and take the surface portal. Then use the eastern Menhir to portal into the second dungeon. The drop is safe.
- The dungeon is linear, jump down two jumps and run to a third. This is a good spot to rebuff and/or park a healer. Only 1-2 creatures spawn at the top of the third jump.
- [OPTIONAL]: In a side room off the main hall in this dungeon, pick up the Large Tome, which is used in the Strathelar Royal Cloak Quest.
- When ready, jump down and clear the large ritual room of undead, skeletons, and bloodstones. Loot the dead Aluvian Soldiers for a Broken Shield (lore item).
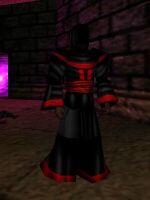
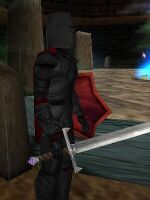
- After clearing, use the Bloody Breastplate on the ground to begin a cutscene involving Borelean, Hoshino Kei, and Geraine.
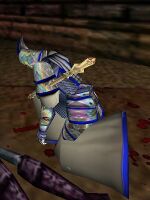
- After the cutscene, more Bloodstones, Undead, and Skeletons will spawn, followed by Lord Winstead and his 3 accompanying Filinuvekta Hieromancers. The Hieromancers cast level 8 vulns and wars, and are quite dangerous.
- Tip: Shield yourself from incoming war magic spells by hiding behind the pillars. Eventually one or more of the enemies will switch to melee and come and attack you.
- Note: It's possible to solo this quest, but the bosses must be killed within a certain amount of time. This can be difficult as Lord Winstead has approximately 200,000 health.
- After killing Lord Winstead, loot the Sealed Tome from his corpse (he drops 30).
- Enter the Hidden Treasury portal which spawns in the alcove after Lord Winstead is killed.
- Note: Sometimes the portal has failed to spawn. It may be safest to kill Lord Winstead on the north side of the room as that side seems to always spawn the portal.
- Loot a 4 use Legendary Key from the altars in the middle of the room and use on the nearby chests.
- Return to Lady Daenerah and give her the Sealed Tome for robe, luminance, MMDs, and experience points.
Maps
| Dungeon | Coordinates | Wiki Map | ACmaps | Other | Quests |
| Warded Cavern Passage | 21.7S, 9.4E | -- | -- | -- | -- |
| Warded Dungeon Passage | 21.7S, 9.4E | -- | -- | -- | -- |
| Hidden Treasury | -- | -- | -- | -- | -- |
Items
| Quest Items | ||||||||
| Menhir | Enchanted Mnemosyne | Bloody Breastplate | Corpse of Royal Knight | |||||
| Broken Shield | Sealed Tome | Large Tome | ||||||
| Rewards | ||||||||
| Empowered Robe of the Perfect Light | Legendary Key | Book 3: The Time Ritual and the Sand Kings | ||||||
Experience Rewards
| Task Required | First Run Max Experience | Percentage & Level Cap | Repeated Run Max XP | Repeated Run Percentage & Level Cap | |
| Give the book to Lady Daenerah | 502,789,262xp |
35% up to level 220 | |||
|
| |||||
| See Level Costs for per level information. | |||||
Images
Click image for full size version.
-
Menhir Ring
-
Apparition of Emperor Geraine
-
Apparition of Borelean Strathelar
-
Apparition of Hoshino Kei
-
Lord Winstead
Lore & Dialog
Rumors:
- Town Crier tells you, "There now seems to be a third one of Borelean's knights up by the Gurogs and Snow Tuskers. Why is that hut in the middle of the snow so popular these days?"
- Town Crier tells you, "A Royal Knight named Lady Daenerah has joined Sir Donovan and Sir Learth in the area held by the Gurog, and is rewarding adventurers for assistance in dealing with the ritual the knights have been hunting down."
- Ulgrim the Unpleasant tells you, "Borelean and Hoshino came by asking me to go and stop some ritual. I counter offered that Hoshino stay here and have a drink with me while Borelean got lost. In the end, neither offer was accepted, but at least that meant more stout for me."
Opening Dialog:
- Lady Daenerah tells you, "Greetings, Citizen."
- Lady Daenerah tells you, "Prince Borelean has stationed me here to aid adventurers, such as yourself, in the attacks against Emperor Geraine's ritual which has been altering the timeline."
- Lady Daenerah tells you, "As you have recently aided Sir Learth, I can pull the information from his enchantment and the mnemosynes you found in order to allow you to bypass the wards that protect the location."
- Lady Daenerah tells you, "Once inside, it'll be up to you to locate and disrupt the ritual itself. Bring me back whatever you find."
- Lady Daenerah tells you, "Even better, if you can bring back something vital to their ritual as proof of your success, you will be handsomely rewarded."
- Lady Daenerah tells you, "From what Lord Asheron was able to divine from Sir Learth's research, the ritual site is a nexus, previously hidden, in the desert east of Yaraq. Find the point where that nexus touches the surface of the desert, and you should be able to find a way in."
- Lady Daenerah tells you, "Now, let's see about those protections."
- Lady Daenerah touches your head, and a series of slight vibrations passes through your body as her spells draw forth the needed information, and then turn it into a protective enchantment.
- Lady Daenerah tells you, "There, that should be all you need to gain access to the site. From that point on, you are on your own."
- Lady Daenerah tells you, "I expect it will be very dangerous in there, so you should go with similarly attuned friends."
- Lady Daenerah tells you, "Just be sure that they come to me first! I'd hate for them to get there and then have the outer wards fry them to death."
Speaking to Daenerah again:
- Lady Daenerah tells you, "Were you able to locate the ritual yet? According to Lord Asheron's scrying, it should be located somewhere east of Yaraq, in the desert."
- As you activate the runes in the order Lady Daenerah gave you, you can feel the buildup of energy in the menhir stone.
- You use the enchantments placed upon you to attune your aura to the enchanted mnemosyne.
- As you touch the menhir stone, the enchantments from the ritual markers allow you to bypass the ward and activate the planar magics held within.
Cut Scene Dialog:
- The apparitions that haunt this artifact begin to stir.
- Apparition of Emperor Geraine says, "Ah, there you are my child. I have been expecting thee."
- With a wave of his hand, the Apparition of Emperor Geraine magically pins Hoshino Kei to the ground.
- Apparition of Hoshino Kei says, "Arggh!"
- Apparition of Emperor Geraine says, "Oh no, whelp. You will not be interfering today. There is much here for you to learn, and I'd hate to have to kill you before then."
- With a wave of his hand, the Apparition of Emperor Geraine magically pins Borelean to the ground.
- Apparition of Borelean says, "Arggh!"
- Apparition of Emperor Geraine says, "That's better. Stay there for a while, and lern something for once."
- Apparition of Borelean Strathelar says, "You... You're the one ... who warned me about my mother's assassination... Why?"
- Apparition of Emperor Geraine says, "That was a pivotal moment in your timeline, boy."
- Apparition of Emperor Geraine says, "That assassination would've driven forth a timeline that was... less than optimal to my plans."
- Apparition of Emperor Geraine says, "Your actions saved me a great deal of effort in this ritual, I should thank you."
- The Apparition of Emperor Geraine smiles.
- Apparition of Borelean Strathelar says, "Leave... Her... Alone!"
- Apparition of Emperor Gerain says, "And, I should thank you for bringing your darling wife here. I've been waiting for her to come back to me."
- The Apparition of Borelean Strathelar struggles against the magical bonds that hold him.
- Apparition of Emperor Geraine says, "Oh, I'm afraid I cannot do that, boy.."
- Apparition of Emperor Geraine says, "You see, she has been a key to my success for some time."
- Apparition of Emperor Geraine says, "Why did you think I had my undead kidnap her all those months ago?"
- Apparition of Emperor Geraine says, "I set in her the preparations needed to sacrifice her to the Book, so as to complete this ritual in its entirety."
- Apparition of Emperor Geraine says, "You came here to stop me, but all you accomplished was guaranteeing my success."
- Apparition of Emperor Geraine says, "For that, I thank you."
- Apparition of Borelean Strathelar says, "NO!!!!"
- The Apparition of Borelean Strathelar struggles against the magical bonds that hold him, almost escaping before the magic redoubles and pins him to the ground.
- The Apparition of Emperor Geraine points at Borelean in mocking laughter.
- Apparition of Emperor Geraine says, "It will take more than that to break my hold on thee, boy. ow sit quiet and watch. You're about to see history remade..."
- With a screm that tears through your heart and soul, Hoshino Kei dies.
- The Apparition of Emperor Geraine laughs maniacally.
- Apparition of Emperor Geraine says, "Ahh, boy, you have made all of these long plans so worthwhile."
- Apparition of Emperor Geraine says, "For that gift, and the soul of your wife, I'll send her corpse to you after you leave this place."
- Apparition of Emperor Geraine says, "I'm afraid that's all of her that you will be getting back, however."
- The Apparition of Emperor Geraine smiles.
- Apparition of Emperor Geraine says, "The Book is a rather voracious eater when it comes to certain sacrifices."
- The Apparition of Emperor Geraine sighs.
- Apparition of Emperor Geraine says, "Now, I tire of this."
- Apparition of Emperor Geraine says, "Die."
- The Apparition of Borelean Strathelar lets out a strangled grunt as the life is crushed out of him and he is whisked back to the Lifestone.
- Apparition of Emperor Geraine says, "No one can stop me now. Not you, whelp, not your precious mother and not even your upstart of a tutor, Asheron."
- Apparition of Emperor Geraine says, "With this sacrifice, this retual will be anchored in eternity!"
- The Apparition of Emperor Geraine pulls a struggling ball of light from Hoshino Kei's chest.
- Apparition of Emperor Geraine says, "Begin the final stage of the Ritual! Our victory is now at hand!"
- A hot, dry wind blows through the chamber as the vision fades. Shortly thereafter, a ripple seems to pass through everything, and the world shifts.
- The air shimmers and hums with power as time itself shifts, revealing the Time Ritual's defenders.
Defeating the boss (first run per server?):
- As Lord Winstead collapses into dust, a maniacal voice echoes in your mind, "You are too late, <Player>! The world is irrevocably changed!"
- With the lead ritualist's death, the temporal distortions caused by the ritual fade.
Defeating the boss (subsequent runs?):
- The air shimmers all around you and you have a vision of a city in the desert. Far in the distance, behind the city and lit by the setting sun, you can see Yaraq on the coast. as quickly as the vision comes to you, it fades.
- As Lord Winstead collapses into dust, a maniacal voice echoes in your mind, "You are a fool, <Player>! Disrupting me only delays the inevitable!"
- With the lead ritualist's death, the temporal distortions caused by the ritual fade.
Showing the broken shield to NPCs:
- You allow Asheron to examine your Broken Shield.
- Asheron looks sad for a moment.
- Asheron tells you, "This is the remnant of a very sad day. I was not there, and as such I will not speak of it. Take that shield to Lady Daenerah. She can explain the events to you if she wishes."
- You allow Lord Dargeth to examine your Broken Shield.
- Lord Dargeth tells you, "Where did you get this?"
- You explain how you found the shield on a corpse in the ritual room hidden under the desert, where Emperor Geraine was performing his rituals to alter time.
- Lord Dargeth tells you, "Ahh, so you've seen. I won't speak more of it. If you wish to hear the tale, try Lady Daenerah. She sent you to that abominable place, she can explain what happened."
Giving the broken shield to Daenerah:
- You give Lady Daenerah Broken Shield.
- Lady Daenerah tells you, "Where did you get this?"
- You explain how you found the shield on a corpse in the ritual room.
- Lady Daenerah tells you, "Ahh, yes. I heard about that..."
- Lady Daenerah tells you, "It was a very sad day for the kingdom. When we first identified the location of the ritual, the Prince and Princess took a squad of knights and attacked the ritual."
- Lady Daenerah tells you, "They were underprepared for what they would face. Geraine massacred them all, and sacrificed the Princess to his ritual..."
- Lady Daenerah tells you, "About an hour after they all returned to their lifestones, the Princess's body appeared in her rooms."
- Lady Daenerah tells you, "No amount of magic tried thus far has done anything to bring her back..."
- Lady Daenerah tells you, "Poor Borelean. He's devastated, and is refusing to see anyone at present."
- Lady Daenerah tells you, "It was after that attack that I was sent here to organize further attacks. You adventurers have the most uncanny success rate, historically speaking."
Giving the sealed tome to Daenerah:
- You allow Lady Daenerah to examine your Sealed Tome.
- Lady Daenerah tells you, "What is this?"
- You hand over 1 of your Sealed Tomes.
- Lady Daenerah tells you, "Is this the Book of Eibhil!?!"
- Lady Daenerah tells you, "No, it can't be, could it?"
- Lady Daenerah casts a quick spell and a tiny portal opens. She quickly passes the sealed tome into the portal. A moment later, her expression goes blank, like her focus is wholly elsewhere...
- Lady Daenerah tells you, "I see..."
- Lady Daenerah tells you, "It would seem that the sealed tome you brought me both is and is not the Book of Eibhil. Geraine has somehow either made empowered copies of the book, or somehow broken the Book into aspects. Lord Asheron is not yet sure which."
- Lady Daenerah tells you, "Either way, you have helped remove a dangerous artifact from the hands of the Dericost. Please, accept this as a reward, with our thanks."
- Lady Daenerah gives you Empowered Robe of the Perfect Light.
- Lady Daenerah gives you Legendary Key
- You've earned 502,789,262 experience.
- You've earned 40,000 Luminance.
Notes
- During the The Risen Princess event the quest flag was altered and now only requires players to run the Dericost Ritual Investigation quest once to repeat.
- During the Feelings of Dread event a Legendary Key reward was also added.
