Aerbax's Citadel: Difference between revisions
imported>An Adventurer m →First Fellowships to Defeat Aerbax: added LC fellow |
imported>An Adventurer m →First Fellowships to Defeat Aerbax: added LC fellow |
(No difference)
| |
Revision as of 06:26, 24 February 2008
| Quest Summary | |
|---|---|
| Quest type | Full Fellowship, 1hr time limit |
| XP Reward | 1,000,000,000 |
| XP Cap | 1,000,000,000 |
| Item Reward | Empowered Helm of the Perfect Light Aerbax's Defeat (first fellow only) |
| Title Reward | Aerbax Slayer Beacon of Hope |
| Starting location | Center of the Obsidian Plains |
| Timer | ??? |
| Level Restrictions | ??? |
| Level Suggestions | 180+ |
| Introduced in: | The Beast With Many Heads |
Walk Through
some details are available on this thread.
Each server must advance through the gate stones located at the center of the Obsidian Plains before gaining access to Aerbax's Citadel.
Purified Quiddity Ingots
BDC: Initial Quest > Blue Ingot > Purification Quest > Green Ingot
Ithaenc: Initial Quest > Red Ingot > Purification Quest > Purple Ingot
Knorr: Initial Quest > White Ingot > Purification Quest > Yellow Ingot
East Gate Stone
Location: 64.1S, 62.9W
Give the East Gate Stone a purified ingot. Yellow and Green ingots are known to work. This flags you to enter the three portals which surround the stone, the dungeon called East Gate.
The dungeon is long and linear, filled with high level shadows and virindi. There are four doors which must be destroyed as you move through the dungeon. The first door is guarded by the Drudge Protector. The second is guarded by the Mosswart Protector. The third is guarded by the Tusker Protector. The fourth is guarded by a Shadow-touched Virindi Quiddiox.
At the end is Aerbax's Device. Giving shadow droppings (specks, slivers, shards, and fragments) slowly disrupts the balance of the device.
As you bring the bit of shadow towards the device it seems to unravel in whirls of black dust that swirl towards the forks. You feel an unpleasant itching behind your eyes.
The device hums in a slightly discordant manner.
As you bring the bit of shadow towards the device it seems to unravel in whirls of black dust that swirl towards the forks. You feel an unpleasant itching behind your eyes.
The Device hums, but you see the forks blur in discordant vibrations from time to time.
As you bring the bit of shadow towards the device it seems to unravel in whirls of black dust that swirl towards the forks. You feel an unpleasant itching behind your eyes.
The device hums loudly. The forks appear to be vibrating out of sync almost all the time now.
After enough has been given (approximately 100 fragments equivalent), Bonecrunch and Bragara, the Chosen One spawn. Killing Bragara, the Chosen One caused the device to reset to it's non-attackable version and Bonecrunch to vanish.
Bragara laughs uncertainly.
<Player Name> has destroyed the Prodigal Mosswart!
Bragara, the Chosen One says, Of all the Mosswarts I was chosen to reign supreme. How is it an ordinary human could beat me? Are you a god?
Killing the device causes the gate to fall and opens the North Gate.
The North Gate flickers to life and a bolt of energy pierces the sky.
Aerbax's East Gate has been deactivated by <Player Name>!
The Device explodes in a wave of energy!
North Gate Stone
Location: 63.2S 63.8W
Once the East Gate falls, portals appear in the doorways and you are able to hand another purified ingot to the stone, which flags you for access. The North Gate dungeon is similar to the East Gate dungeon in layout and main spawns (shadows and virindi) but the door guardians are now elementals. At the end is another Aerbax Device. After handing aproximately 100-120 shadow fragments Mudmouth, Dark Bobo, and Paradox-touched Olthoi Queen spawn. Killing the device causes the gate to fall and opens the West Gate.
West Gate Stone
Location: 64.1S 64.7W
Once the North Gate falls, portals appear in the doorways and you are able to hand another purified ingot to the stone, which flags you for access.
South Gate Stone
Location: 65.0S, 63.8W
Once the West Gate falls this dungeon becomes accessible. It is entirely empty until the final room where you find the emmissary, several diamond guardian golems NPCs, and the portal to Aerbax's Citadel. The Emissary requests 3 crystals from three Virindi Artificers that spawn at the other (west/east/north) gates. Once you turn in the 3 crystals your fellow is locked and you can proceed through the portal to Aerbax.
Emissary of Asheron tells you, "You haven't brought me the East Gate Harmonic Crystal yet."
Emissary of Asheron tells you, "You haven't brought me the North Gate Harmonic Crystal yet."
Emissary of Asheron tells you, "You haven't brought me the West Gate Harmonic Crystal yet."
Emissary of Asheron tells you, "Return to me when you have them and I can send you and a Fellowship of your choosing through to Aerbax's Platforms above."
Aerbax's Citadel
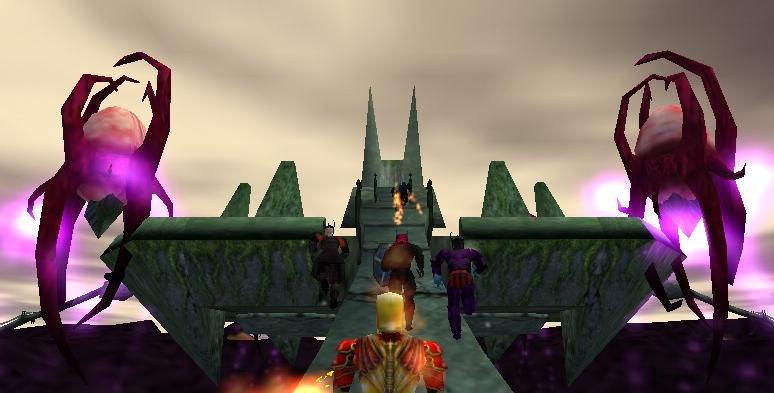
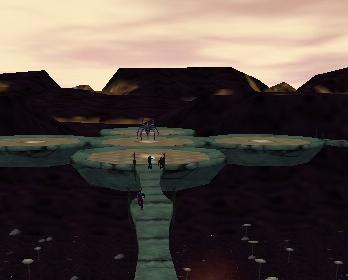
The portal drops you on one of the platforms surrounding the citadel. Aerbax starts out in the center of the Citadel complex but as the fight progresses he will teleport to the outer edges of his floating facility (the timing is probably tied to his health status). He does electric melee damage and has a nasty DoT effect that strips away health in increments of 20-40 hp as well as conventional spell attacks. Best way to fight him appear to be having everyone attacking with mages Tusker Fisting. Try to keep him in the center of the platform when he is around the edge of the citadel to limit the risk that he'll fall off. Occasionally he will teleport you so you drop into the center of the Obsidian Plains. When this happens immediately cast portal recall and you'll be back in the start of the Southern Gate dungeon. A couple minute run through an empty dungeon and you can use the portal to return to the fight.
When Aerbax dies a number of portals called "Return to the Emissary" spawn. So you can use them after you collect the reward item.
Path up to the Citadel from the Platform: 
The skies flicker with light and a thunderous roar can be heard across the lands.
<Fellow Leader Name>'s Fellowship has defeated Aerbax! Aerbax retreats to some unknown location, but a dark portion of his being has been left behind to watch over his floating base above the Obsidian Plains.
Aerbax whips around in agony. A burst of energy erupts from his mask and shard go flying everywhere.
Rewards
You've earned 1,000,000,000 experience.
Emissary of Asheron gives you Empowered Helm of the Perfect Light.
You allow Emissary of Asheron to examine your Aerbax Mask Shard.
The Emissary carefully takes the Aerbax Mask Shard, surrounding it in a ball of white light. The Shard writhes with dark energy.
Emissary of Asheron tells you, "I cannot cleanse this mask shard, it is far too corrupted. Perhaps Leopold, the Virindi in Ayan Baqur, can do something with it."
First Fellowships to Defeat Aerbax
Frostfell: Tectonic Rifts, Absolution, Ferahgo the Assasin, Ciara ni Fyst, Hobo al-Bargq, Dorian Grey, Rhesus, Greysen, and Blind's Soul
Harvestgain: Padain, Linkmage, Paul Mua'dib, Fri, Bavoot, B-I-Gs pusher, Angeni, Trade Mule, I S H A M A E L
Leafcull: Sandrick, Natalia Brynmad, D'nia, Orionzauberson, Missprizzy, Arvath, Xcasper, Peerless, Grig es'Hobo
Morningthaw: Immortalbob, Sig-the-Feared, Machine, Life's Revenge, Dread Lord Boba Fett, Hungtolo, Krunk, Chia, Mao Tse Tung
Solclaim: Taomagicdragon, Gaffman, Sergeant Stab, Ronbo, Scourgeman, Killa UA, Mr. Smash, U Want Summa Me, Steve Perry
Thistledown: (Progress Unknown)
Verdantine: (Progress Unknown)
Wintersebb: (Progress Unknown)
Darktide: (Progress Unknown)

