Aerbax's Citadel: Difference between revisions
imported>An Adventurer m →Images |
imported>An Adventurer |
||
| Line 72: | Line 72: | ||
== Lore & Dialog == | == Lore & Dialog == | ||
'''Speaking with Emissary of Asheron:'''<br> | |||
<font color=darkgoldenrod>Emissary of Asheron tells you, "Good, you made it."<br> | |||
Emissary of Asheron tells you, "I have been sent here by Lord Asheron to help you stop Aerbax."<br> | |||
Emissary of Asheron tells you, "I have been unable to destroy this device. Aerbax realized what you were doing and protected his last device somehow."<br> | |||
Emissary of Asheron tells you, "However, I have studied the device and believe there is a way to use it's resonant magic field."<br> | |||
Emissary of Asheron tells you, "Scouts report that Aerbax's forces are even now attempting to repair the other devices you destroyed. Return to the other Gates and bring me back the crystals they are using to repair the devices. Once I have all three crystals I believe I can send a fellowship of you through to the platforms above."</font> | |||
---- | |||
'''Turning in Harmonic Crystals:'''<br> | '''Turning in Harmonic Crystals:'''<br> | ||
<font color=green>You give Emissary of Asheron West Gate Harmonic Crystal.<br></font> | <font color=green>You give Emissary of Asheron West Gate Harmonic Crystal.<br></font> | ||
Revision as of 18:33, 31 July 2008

| Quest Summary | |
|---|---|
| Quest type | Full Fellowship, 1hr time limit |
| XP Reward | First run: ??% Subsequent Runs: ??% |
| XP Cap | First run: 1,000,000,000 Subsequent Runs: 400,000,000 |
| Item Rewards | Aerbax's Defeat (first fellow only) Empowered Helm of the Perfect Light Empowered Girth of the Perfect Light Empowered Greaves of the Perfect Light Empowered Tassets of the Perfect Light |
| Title Reward | Aerbax Slayer or Aerbax's Bane Beacon of Hope |
| Starting location | Center of the Obsidian Plains |
| Timer | 29 days |
| Level Restrictions | ??? |
| Level Suggestions | 180+ |
| Introduced in: | The Beast With Many Heads |
General
The quest was significantly more elaborate the first time the quest was run, the details of this are given in this section.
Walk Through
- Go to the middle of the Obsidian Plains, the Dangerous Portal mansion statue drops right there, or it's a short run from the Obsidian Plains BSD.
- Kill the Virindi Artificers at 63.3S 63.7W, 64.0S 62.9W, and 64.1S 64.7W. Pick up the three gems (no pick up timer, the Artificers respawn quickly). You only need one set of three gems per fellowship.
- Finalize the fellowship (max 9 people) and all enter the South Gate portal at 65.0S 63.8W (this portal can be tied to before hand and avoid having to get everyone to the Obsidian Plains).
- Run to the end of the dungeon (no creatures), have one person hand all three crystals in (this will lock the fellowship). You have one hour to kill Aerbax, if you die or disconnect, you can last portal recall, then use one of the three portals at the drop (all the same) to get back to Aerbax's Citadel.
- Once Aerbax's Shadow is slain, use the portal that appears (this flags you for having completed the quest) and speak to the Emissary for your reward. The first time you get the Helm, the second time the Girth, the third time Greaves, the fourth time Tassets. There is a 29 day timer to repeat.
Items
- File:North Gate Harmonic Crystal icon.png North Gate Harmonic Crystal
- File:East Gate Harmonic Crystal icon.png East Gate Harmonic Crystal
- File:West Gate Harmonic Crystal icon.png West Gate Harmonic Crystal
 Empowered Helm of the Perfect Light
 Empowered Girth of the Perfect Light
 Empowered Greaves of the Perfect Light
 Empowered Tassets of the Perfect Light
 Aerbax Mask Shard (First fellowship only, retired)
 Aerbax's Defeat (First fellowship only, retired)
Images
 |
 |
 |
 |
Lore & Dialog
Speaking with Emissary of Asheron:
Emissary of Asheron tells you, "Good, you made it."
Emissary of Asheron tells you, "I have been sent here by Lord Asheron to help you stop Aerbax."
Emissary of Asheron tells you, "I have been unable to destroy this device. Aerbax realized what you were doing and protected his last device somehow."
Emissary of Asheron tells you, "However, I have studied the device and believe there is a way to use it's resonant magic field."
Emissary of Asheron tells you, "Scouts report that Aerbax's forces are even now attempting to repair the other devices you destroyed. Return to the other Gates and bring me back the crystals they are using to repair the devices. Once I have all three crystals I believe I can send a fellowship of you through to the platforms above."
Turning in Harmonic Crystals:
You give Emissary of Asheron West Gate Harmonic Crystal.
Emissary of Asheron tells you, "You haven't brought me the East Gate Harmonic Crystal yet."
Emissary of Asheron tells you, "You haven't brought me the North Gate Harmonic Crystal yet."
Emissary of Asheron tells you, "Return to me when you have them and I will prepare you and a Fellowship of your choosing for travel to Aerbax's Platforms above."
You give Emissary of Asheron North Gate Harmonic Crystal.
Emissary of Asheron tells you, "You haven't brought me the East Gate Harmonic Crystal yet."
Emissary of Asheron tells you, "Return to me when you have them and I will prepare you and a Fellowship of your choosing for travel to Aerbax's Platforms above."
You give Emissary of Asheron East Gate Harmonic Crystal.
Emissary of Asheron tells you, "Excellent! You have brought me all three Harmonic Crystals."
Emissary of Asheron tells you, "Have you prepared a fellowship friend?"
[Fellowship] Emissary of Asheron says, "Good, I am attuning your fellowship to the resonant magic field surrounding the device. Be warned, this spell will only allow you access to Aerbax's platforms for one hour before it fails and Aerbax expels you."
[Fellowship] Emissary of Asheron says, "Please return to me if you succeed in defeating Aerbax and I will reward you."
Your fellowship is now locked. You may not recruit new members. If you leave the fellowship, you have 15 minutes to be recruited back into the fellowship.
Defeating Aerbax:
The skies flicker with light and a thunderous roar can be heard across the lands.
<Fellow Leader Name>'s Fellowship has defeated Aerbax! Aerbax retreats to some unknown location, but a dark portion of his being has been left behind to watch over his floating base above the Obsidian Plains.
Aerbax whips around in agony. A burst of energy erupts from his mask and shard go flying everywhere.
Reward text for first fellowship:
You've earned 1,000,000,000 experience.
Emissary of Asheron gives you Empowered Helm of the Perfect Light.
Showing Aerbax Mask Shard to Emissary of Asheron:
You allow Emissary of Asheron to examine your Aerbax Mask Shard.
The Emissary carefully takes the Aerbax Mask Shard, surrounding it in a ball of white light. The Shard writhes with dark energy.
Emissary of Asheron tells you, "I cannot cleanse this mask shard, it is far too corrupted. Perhaps Leopold, the Virindi in Ayan Baqur, can do something with it."
Showing Aerbax Mask Shard to Leopold:
You give Leopold Aerbax Mask Shard.
Leopold tells you, "Anomaly! Anomaly! Disruption in the Order!"
Leopold's eyes darken and his heal lolls to one side.
Leopold tells you, "Ah yes, a mask for me to repair. Order from Chaos. Chaos from Order. I see now that this is the true way of things."
Intricate tendrils of purple energy reach from Leopold's robes and rebuild the mask with blinding speed.
Leopold tells you, "Your mask fellow human."
Leopold gives you Aerbax's Defeat.
As soon as Leopold releases the mask he eyes flicker to life. His head rises and he looks around for a second.
Leopold tells you, "I appear to have mastered the human art of sleep. Which is what I as a human do periodically in order to reacquire energy and clarity of thought."
Leopold tells you, "How may I help you comrade?"
First Fellowships to Defeat Aerbax
Frostfell: Tectonic Rifts, Absolution, Ferahgo the Assasin, Ciara ni Fyst, Hobo al-Bargq, Dorian Grey, Rhesus, Greysen, and Blind's Soul
Harvestgain: Padain, Linkmage, Paul Mua'dib, Fri, Bavoot, B-I-Gs pusher, Angeni, Trade Mule, I S H A M A E L
Leafcull: Sandrick, Natalia Brynmad, D'nia, Orionzauberson, Missprizzy, Arvath, Xcasper, Peerless, Grig es'Hobo
Morningthaw: Immortalbob, Sig-the-Feared, Machine, Life's Revenge, Dread Lord Boba Fett, Hungtolo, Krunk, Chia, Mao Tse Tung
Solclaim: Taomagicdragon, Gaffman, Sergeant Stab, Ronbo, Scourgeman, Killa UA, Mr. Smash, U Want Summa Me, Steve Perry
Thistledown: N B K's Mage, Blackmancer, Bright Blade, Balaraform, Mizz Trexx, The Elite Ua, Jurist, Gainna, Chavez Ding
Verdantine: (Progress Unknown)
Wintersebb: Whitemagic, Madd Maxx, Calita, Alia Atreides, Endy Al-Unsane III, Cactus Kid, Nev, Death to Devil, Lockdog
Darktide: Silent Drainer, Sin's Dagger, Lyncher, Tenku, Kgb Agent, Born of Hatred, William Wallace', and I Love Lamp
Initial Quest
When this quest was first introduced, each server had advance through the gate stone dungeons located at the center of the Obsidian Plains and destroy the devices inside before gaining access to Aerbax's Citadel.
Purified Quiddity Ingots
BDC: Initial Quest > Blue Ingot > Purification Quest > Green Ingot
Ithaenc: Initial Quest > Red Ingot > Purification Quest > Purple Ingot
Knorr: Initial Quest > White Ingot > Purification Quest > Yellow Ingot
East Gate Stone
Location: 64.1S, 62.9W
Give the East Gate Stone a purified ingot. Yellow and Green ingots are known to work. This flags you to enter the three portals which surround the stone, the dungeon called East Gate.
The dungeon is long and linear, filled with high level shadows and virindi. There are four doors which must be destroyed as you move through the dungeon. The first door is guarded by the Drudge Protector. The second is guarded by the Mosswart Protector. The third is guarded by the Tusker Protector. The fourth is guarded by a Shadow-touched Virindi Quiddiox.
At the end is Aerbax's Device. Giving shadow droppings (specks, slivers, shards, and fragments) slowly disrupts the balance of the device.
As you bring the bit of shadow towards the device it seems to unravel in whirls of black dust that swirl towards the forks. You feel an unpleasant itching behind your eyes.
The device hums in a slightly discordant manner.
The Device hums, but you see the forks blur in discordant vibrations from time to time.
The Device hums loudly. The forks appear to be vibrating out of sync almost all the time now.
The Device hums and whines in rythmic waves. The loudly vibrating forks spark and rattle occasionally.
The Device whines loudly. You can feel your teeth wiggle in time to the vibrations. The forks of the device glow in an eerie way.
The Device whines and thrums. It is uncomfortable to be in the same room as the device now. Large discharges of red lightning occasionally strike the forks.
The Device thrums ominously. Constant discharges of red lightning strike the forks now. The whole structure seems to vibrate with the thrumming.
The structure thrums in time with the device. Red sparks coruscate across it wildly. Multi-hued fields wash the room. Waves of heat and sound punch you as you stand near the device.
The device stills. It emits an almost inaudible thrum. Its protective field shimmers and fails.
After enough has been given (approximately 100 fragments equivalent), Bonecrunch and Bragara, the Chosen One spawn. Killing Bragara, the Chosen One caused the device to reset to it's non-attackable version and Bonecrunch to vanish.
Bragara laughs uncertainly.
<Player Name> has destroyed the Prodigal Mosswart!
Bragara, the Chosen One says, Of all the Mosswarts I was chosen to reign supreme. How is it an ordinary human could beat me? Are you a god?
Killing the device causes the gate to fall and opens the North Gate.
The North Gate flickers to life and a bolt of energy pierces the sky.
Aerbax's East Gate has been deactivated by <Player Name>!
The Device explodes in a wave of energy!
North Gate Stone
Location: 63.2S 63.8W
Once the East Gate falls, portals appear in the doorways and you are able to hand another purified ingot to the stone, which flags you for access. The North Gate dungeon is similar to the East Gate dungeon in layout and main spawns (shadows and virindi) but the doors are now guarded by, in order, Elenmental Protectors of Frost, Fire, Lightning, and Acid. At the end is another Aerbax Device. After handing aproximately 100-120 shadow fragments Mudmouth, Dark Bobo, and Paradox-touched Olthoi Queen spawn. Killing the device causes the gate to fall and opens the West Gate.
West Gate Stone
Location: 64.1S 64.7W
Once the North Gate falls, portals appear in the doorways and you are able to hand another purified ingot to the stone, which flags you for access.
South Gate Stone
Location: 65.0S, 63.8W
Once the West Gate falls this dungeon becomes accessible. It is entirely empty until the final room where you find the emmissary, several diamond guardian golems NPCs, and the portal to Aerbax's Citadel. The Emissary requests 3 crystals from three Virindi Artificers that spawn at the other (west/east/north) gates. Once you turn in the 3 crystals your fellow is locked and you can proceed through the portal to Aerbax.
Emissary of Asheron tells you, "You haven't brought me the East Gate Harmonic Crystal yet."
Emissary of Asheron tells you, "You haven't brought me the North Gate Harmonic Crystal yet."
Emissary of Asheron tells you, "You haven't brought me the West Gate Harmonic Crystal yet."
Emissary of Asheron tells you, "Return to me when you have them and I can send you and a Fellowship of your choosing through to Aerbax's Platforms above."
Aerbax's Citadel
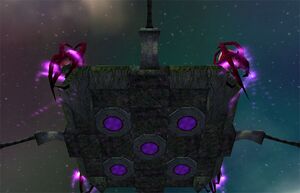
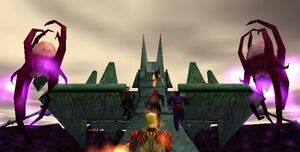
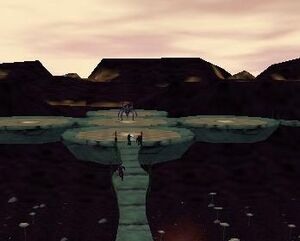
The portal drops you on one of the platforms surrounding the citadel. Aerbax starts out in the center of the Citadel complex but as the fight progresses he will teleport to the outer edges of his floating facility (at every "1" of health i.e. 91%, 81%, 71% etc until 22% where he stays in the center). He does electric melee damage and has a nasty DoT effect that strips away health in increments of 20-40 hp as well as conventional spell attacks. Best way to fight him appear to be having everyone attacking with mages Tusker Fisting. Try to keep him in the center of the platform when he is around the edge of the citadel to limit the risk that he'll fall off. Occasionally he will teleport you so you drop into the center of the Obsidian Plains. When this happens immediately cast portal recall and you'll be back in the start of the Southern Gate dungeon. A couple minute run through an empty dungeon and you can use the portal to return to the fight.
When Aerbax dies a number of portals called "Return to the Emissary" spawn. So you can use them after you collect the reward item.