Exploration Society Letters: Difference between revisions
imported>Arkalor |
imported>Arkalor Added rewards table |
||
| Line 3: | Line 3: | ||
| Patch Introduced = [[The Child of Daralet]] | | Patch Introduced = [[The Child of Daralet]] | ||
| Related Quests = [[Starter Quests]] | | Related Quests = [[Starter Quests]] | ||
| Updated = [[Discoveries]]<br>[[Waking From the Abyss]]<br>[[From the Darkness Born]] | | Updated = [[Betrayal]],<br>[[Discoveries]]<br>[[Waking From the Abyss]]<br>[[From the Darkness Born]] | ||
| | | | ||
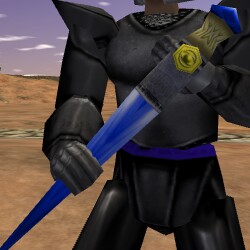
| Live Image = | | Live Image = Society Wand of Frost Live.jpg | ||
| Live Image Caption = Society | | Live Image Caption = Society Wand of Frost | ||
| Quest Type = Solo | | Quest Type = Solo | ||
| Kill Task = False | | Kill Task = False | ||
| Line 31: | Line 31: | ||
== Walk Through == | == Walk Through == | ||
To begin, talk to one of the Society Agents found below. They will give you a [[Nexus Town Information Guide]] and [[A Book of Quests for New Explorers]] that together will outline all of the stamps and rewards as well as the locations of all the agents, dungeons and other quest NPCs found in each of the towns. | # To begin, talk to one of the Society Agents found below. They will give you a [[Nexus Town Information Guide]] and [[A Book of Quests for New Explorers]] that together will outline all of the stamps and rewards as well as the locations of all the agents, dungeons and other quest NPCs found in each of the towns. | ||
# Once you have a Lucky Gold Letter or Scarlet Red Letter, it can be stamped using a town stamp taken from one of the starter quest dungeons near each town. | |||
#* '''Note:''' See [[Starter Quests]] for lists of all the level 1-20 quests, with summaries of each including the xp and item rewards and those that have a town stamp. | |||
# Take the stamped letter back to one of the Society Agents to be rewarded with a piece of equipment. Scarlet letters are rewarded with the lower Society equipment, and stamped Lucky Gold letters will get a more powerful Explorer piece. The item you receive depends on the town stamp that you use and also the town that you take the stamped letter to. See below for a table of rewards. | |||
#* '''Note:''' The society only rewards exploration; stamped letters cannot be returned to agents in the same town as the name on the stamp. | |||
== Society Agents == | |||
{|class="wikitable sortable" | |||
! Society Agent | |||
! Town | |||
! Starter Quests | |||
! Exact Location | |||
|- | |||
| [[Celcynd the Dour]] | |||
| [[Rithwic]] | |||
| [[Rithwic Starter Quests]] | |||
| 10.7N, 58.1E in the Bar | |||
|- | |||
| [[Dai Ya the Scholar]] | |||
| [[Yanshi]] | |||
| [[Yanshi Starter Quests]] | |||
| 12.0S, 42.6E in the Bar | |||
|- | |||
| [[Flinrala Ryndmad]] | |||
| [[Holtburg]] | |||
| [[Holtburg Starter Quests]] | |||
| 42.1N, 33.8E in the Bar | |||
|- | |||
| [[Jilsaya bint Dah]] | |||
| [[Al-Arqas]] | |||
| [[Al-Arqas Starter Quests]] | |||
| 31.3S, 13.5E in the Jeweler's building | |||
|- | |||
| [[Lord Aleval]] | |||
| [[Lytelthorpe]] | |||
| [[Lytelthorpe Starter Quests]] | |||
| 1.0N, 51.1E in Lytelthorpe Keep tower | |||
|- | |||
| [[Mara al-Luq]] | |||
| [[Yaraq]] | |||
| [[Yaraq Starter Quests]] | |||
| 21.7S, 1.6W in the Bar | |||
|- | |||
| [[Oi-Tong Ye]] | |||
| [[Shoushi]] | |||
| [[Shoushi Starter Quests]] | |||
| 33.5S, 73.0E in the Bar | |||
|- | |||
| [[Rubid al-Jurma]] | |||
| [[Samsur]] | |||
| [[Samsur Starter Quests]] | |||
| 0.0S, 16.3E at [[Northwest Samsur Outpost]] | |||
|- | |||
| [[Shin Ro]] | |||
| [[Nanto]] | |||
| [[Nanto Starter Quests]] | |||
| 52.6S, 82.1E in the Mage Tower | |||
|} | |||
=== Society | == Items == | ||
'''Key:''' | |||
* <font color=darkred>'''Red'''</font> = ''Society Equipment'' | |||
* <font color=goldenrod>'''Gold'''</font> = ''Explorer Equipment'' | |||
* The Yumi can be given back to an agent for the Atlatl. | |||
{|class="wikitable" | |||
|- | |||
| align=center|'''To''' | |||
}} | ! column width=10% rowspan=2|Holtburg | ||
{{ | ! rowspan=2|Lytelthorpe | ||
! column width=10% rowspan=2|Rithwic | |||
! column width=10% rowspan=2|Al-Arqas | |||
| | ! column width=10% rowspan=2|Samsur | ||
! column width=10% rowspan=2|Yaraq | |||
}} | ! column width=10% rowspan=2|Nanto | ||
{{ | ! rowspan=2|Shoushi | ||
! column width=10% rowspan=2|Yanshi | |||
|- | |||
| align=center|'''From''' | |||
|-bgcolor=darkred align=center | |||
}} | ! rowspan=2| Holtburg | ||
{{ | | N/A | ||
| N/A | |||
| N/A | |||
| {{Icon|A Society Leather Basinet}} | |||
| {{Icon|A Society Buckler}} | |||
}} | | {{Icon|A Pair Of Society Leather Leggings}} | ||
{{ | | {{Icon|A Society Jitte}} | ||
| {{Icon|A Society Dagger}} | |||
| {{Icon|A Society Sword}} | |||
|-bgcolor=goldenrod align=center | |||
| N/A | |||
}} | | N/A | ||
{{ | | N/A | ||
| {{Icon|An Explorer Leather Basinet}} | |||
| {{Icon|An Explorer Buckler}} | |||
| {{Icon|A Pair Of Explorer Leather Leggings}} | |||
| {{Icon|An Explorer Jitte}} | |||
}} | | {{Icon|An Explorer Dagger}} | ||
{{ | | {{Icon|An Explorer Sword}} | ||
|-bgcolor=darkred align=center | |||
! rowspan=2| Lytelthorpe | |||
| N/A | |||
| N/A | |||
}} | | N/A | ||
{{ | | {{Icon|A Society Leather Girth}} | ||
| {{Icon|A Pair Of Society Bracers}} | |||
| {{Icon|A Pair Of Society Leather Boots}} | |||
| {{Icon|A Society Spear}} | |||
| {{Icon|A Society Yumi}} '''Or''' {{Icon|A Society Atlatl}} | |||
}} | | {{Icon|A Society Axe}} | ||
{{ | |-bgcolor=goldenrod align=center | ||
| N/A | |||
| N/A | |||
| N/A | |||
| {{Icon|An Explorer Leather Girth}} | |||
}} | | {{Icon|A Pair Of Explorer Bracers}} | ||
}} | | {{Icon|A Pair Of Explorer Leather Boots}} | ||
| {{Icon|An Explorer Spear}} | |||
| {{Icon|An Explorer Yumi}} '''Or''' {{Icon|An Explorer Atlatl}} | |||
| {{Icon|An Explorer Axe}} | |||
|-bgcolor=darkred align=center | |||
! rowspan=2| Rithwic | |||
| N/A | |||
| N/A | |||
| N/A | |||
| {{Icon|A Society Leather Breastplate}} | |||
| {{Icon|A Pair Of Society Pauldrons}} | |||
| {{Icon|A Pair Of Society Leather Sleeves}} | |||
| {{Icon|A Society Katar}} | |||
| {{Icon|A Society Crossbow}} | |||
| {{Icon|A Society Staff}} | |||
|-bgcolor=goldenrod align=center | |||
| N/A | |||
| N/A | |||
| N/A | |||
| {{Icon|An Explorer Leather Breastplate}} | |||
| {{Icon|A Pair Of Explorer Pauldrons}} | |||
| {{Icon|A Pair Of Explorer Leather Sleeves}} | |||
| {{Icon|An Explorer Katar}} | |||
| {{Icon|An Explorer Crossbow}} | |||
| {{Icon|An Explorer Staff}} | |||
|-bgcolor=darkred align=center | |||
! rowspan=2| Al-Arqas | |||
| {{Icon|A Society Leather Basinet}} | |||
| {{Icon|A Society Leather Girth}} | |||
| {{Icon|A Society Leather Breastplate}} | |||
| N/A | |||
| N/A | |||
| N/A | |||
| {{Icon|A Society Bracelet of Strength}} | |||
| {{Icon|A Society Bracelet of Coordination}} | |||
| {{Icon|A Society Ring of Endurance}} | |||
|-bgcolor=goldenrod align=center | |||
| {{Icon|An Explorer Leather Basinet}} | |||
| {{Icon|An Explorer Leather Girth}} | |||
| {{Icon|An Explorer Leather Breastplate}} | |||
| N/A | |||
| N/A | |||
| N/A | |||
| {{Icon|An Explorer Bracelet of Strength}} | |||
| {{Icon|An Explorer Bracelet of Coordination}} | |||
| {{Icon|An Explorer Ring of Endurance}} | |||
|-bgcolor=darkred align=center | |||
! rowspan=2| Samsur | |||
| {{Icon|A Society Buckler}} | |||
| {{Icon|A Pair Of Society Leather Bracers}} | |||
| {{Icon|A Pair Of Society Leather Pauldrons}} | |||
| N/A | |||
| N/A | |||
| N/A | |||
| {{Icon|A Society Ring of Quickness}} | |||
| {{Icon|Society Wand of Frost}} | |||
| {{Icon|Society Wand of Lightning}} | |||
|-bgcolor=goldenrod align=center | |||
| {{Icon|An Explorer Buckler}} | |||
| {{Icon|A Pair Of Explorer Leather Bracers}} | |||
| {{Icon|A Pair Of Explorer Leather Pauldrons}} | |||
| N/A | |||
| N/A | |||
| N/A | |||
| {{Icon|An Explorer Ring of Quickness}} | |||
| {{Icon|Explorer Wand of Frost}} | |||
| {{Icon|Explorer Wand of Lightning}} | |||
|-bgcolor=darkred align=center | |||
! rowspan=2| Yaraq | |||
| {{Icon|A Pair Of Society Leather Leggings}} | |||
| {{Icon|A Pair Of Society Leather Boots}} | |||
| {{Icon|A Pair Of Society Leather Sleeves}} | |||
| N/A | |||
| N/A | |||
| N/A | |||
| {{Icon|A Society Necklace of Focus}} | |||
| {{Icon|Society Wand of Fire}} | |||
| {{Icon|Society Wand of Acid}} | |||
|-bgcolor=goldenrod align=center | |||
| {{Icon|A Pair Of Explorer Leather Leggings}} | |||
| {{Icon|A Pair Of Explorer Leather Boots}} | |||
| {{Icon|A Pair Of Explorer Leather Sleeves}} | |||
| N/A | |||
| N/A | |||
| N/A | |||
| {{Icon|An Explorer Necklace of Focus}} | |||
| {{Icon|Explorer Wand of Fire}} | |||
| {{Icon|Explorer Wand of Acid}} | |||
|-bgcolor=darkred align=center | |||
! rowspan=2| Nanto | |||
| {{Icon|A Society Jitte}} | |||
| {{Icon|A Society Spear}} | |||
| {{Icon|A Society Katar}} | |||
| {{Icon|A Society Bracelet of Strength}} | |||
| {{Icon|Society Wand of Lightning}} | |||
| {{Icon|Society Wand of Fire}} | |||
| N/A | |||
| N/A | |||
| N/A | |||
|-bgcolor=goldenrod align=center | |||
| {{Icon|An Explorer Jitte}} | |||
| {{Icon|An Explorer Spear}} | |||
| {{Icon|An Explorer Katar}} | |||
| {{Icon|An Explorer Bracelet of Strength}} | |||
| {{Icon|Explorer Wand of Lightning}} | |||
| {{Icon|Explorer Wand of Fire}} | |||
| N/A | |||
| N/A | |||
| N/A | |||
|-bgcolor=darkred align=center | |||
! rowspan=2| Shoushi | |||
| {{Icon|A Society Dagger}} | |||
| {{Icon|A Society Yumi}} '''Or''' {{Icon|A Society Atlatl}} | |||
| {{Icon|A Society Crossbow}} | |||
| {{Icon|A Society Bracelet of Coordination}} | |||
| {{Icon|Society Wand of Frost}} | |||
| {{Icon|Society Wand of Acid}} | |||
| N/A | |||
| N/A | |||
| N/A | |||
|-bgcolor=goldenrod align=center | |||
| {{Icon|An Explorer Dagger}} | |||
| {{Icon|An Explorer Yumi}} '''Or''' {{Icon|An Explorer Atlatl}} | |||
| {{Icon|An Explorer Crossbow}} | |||
| {{Icon|An Explorer Bracelet of Coordination}} | |||
| {{Icon|Explorer Wand of Frost}} | |||
| {{Icon|Explorer Wand of Acid}} | |||
| N/A | |||
| N/A | |||
| N/A | |||
|-bgcolor=darkred align=center | |||
! rowspan=2| Yanshi | |||
| {{Icon|A Society Sword}} | |||
| {{Icon|A Society Axe}} | |||
| {{Icon|A Society Staff}} | |||
| {{Icon|A Society Ring of Endurance}} | |||
| {{Icon|A Society Ring of Quickness}} | |||
| {{Icon|A Society Necklace of Focus}} | |||
| N/A | |||
| N/A | |||
| N/A | |||
|-bgcolor=goldenrod align=center | |||
| {{Icon|An Explorer Sword}} | |||
| {{Icon|An Explorer Axe}} | |||
| {{Icon|An Explorer Staff}} | |||
| {{Icon|An Explorer Ring of Endurance}} | |||
| {{Icon|An Explorer Ring of Quickness}} | |||
| {{Icon|An Explorer Necklace of Focus}} | |||
| N/A | |||
| N/A | |||
| N/A | |||
|- | |||
|} | |||
{{Item Table|Caption=Quest Items: Letters & Texts | {{Item Table|Caption=Quest Items: Letters & Texts | ||
| Lucky Gold Letter | | Lucky Gold Letter | ||
| Line 133: | Line 339: | ||
| Stamped Yanshi Lucky Gold Letter | | Stamped Yanshi Lucky Gold Letter | ||
| Stamped Yaraq Lucky Gold Letter | | Stamped Yaraq Lucky Gold Letter | ||
}} | }} | ||
| Line 206: | Line 350: | ||
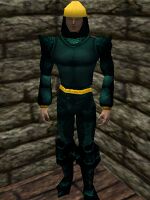
File:Society Leather Armor Live.jpg|Society Leather Armor | File:Society Leather Armor Live.jpg|Society Leather Armor | ||
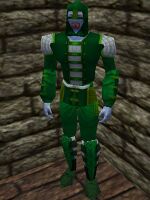
File:Explorer Leather Armor Live.jpg|Explorer Leather Armor | File:Explorer Leather Armor Live.jpg|Explorer Leather Armor | ||
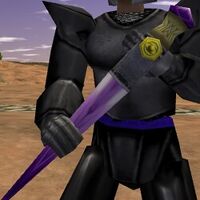
File:Society Wand of | File:Society Wand of Lightning Live.jpg|Society Wand of Lightning | ||
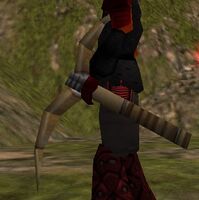
File:Explorer Crossbow Live.jpg|An Explorer Crossbow | File:Explorer Crossbow Live.jpg|An Explorer Crossbow | ||
</gallery> | </gallery> | ||
| Line 223: | Line 367: | ||
<font color=green>Flinrala Ryndmad gives you Nexus Town Information Guide. | <font color=green>Flinrala Ryndmad gives you Nexus Town Information Guide. | ||
---- | ---- | ||
You stamp your Scarlet Red [Town] Letter. It is now ready to take to an Agent of the Society. | |||
You stamp your Lucky Gold [Town] Letter. It is now ready to take to an Agent of the Society. | |||
You stamp your Lucky Gold [Town] Letter. It is now ready to take to an Agent of the Society. | |||
---- | ---- | ||
You give Jilsaya bint Dah Stamped Lytelthorpe Lucky Gold Letter.<br> | You give Jilsaya bint Dah Stamped Lytelthorpe Lucky Gold Letter.<br> | ||
Jilsaya bint Dah gives you An Explorer Leather Girth.</font><br> | Jilsaya bint Dah gives you An Explorer Leather Girth.</font><br> | ||
Jilsaya bint Dah tells you, "Thank you, you must have journeyed far to get here. You are a true Explorer!"</font> | Jilsaya bint Dah tells you, "Thank you, you must have journeyed far to get here. You are a true Explorer!" | ||
---- | |||
Oi-Tong Ye tells you, "Take this--but if you would prefer an atlatl, I have those too. Just hand the bow back to me."<br> | |||
<font color=green>You give Oi-Tong Ye A Society Yumi.</font><br> | |||
Oi-Tong Ye tells you, "Ah, a truly adventurous soul. Here you are!"</font><br> | |||
<font color=green>Oi-Tong Ye gives you A Society Atlatl.</font> | |||
---- | ---- | ||
'''Retired Text'''<br> | '''Retired Text'''<br> | ||
Revision as of 12:08, 10 September 2011
|
Training Academy Quest - Starter Quests - Facility Hub Quests - Exploration Society Letters - 50-100 Contracts Quest - Monthly Explorer Society Quests |
| Walk Through ___ Items ___ Images ___ Lore & Dialog ___ Notes |
| |||||||||||||||||||||||||||||||||||||||
 | |||||||||||||||||||||||||||||||||||||||
Quest Overview
The Explorer Society wants new adventurers to explore the countryside, collect Town Stamps from the starter quest dungeons, and find Red and Gold Letters dropped by creatures to use the stamps upon. The stamped letters can be handed in for starter equipment such as armor, weapons and jewelry.
Walk Through
- To begin, talk to one of the Society Agents found below. They will give you a Nexus Town Information Guide and A Book of Quests for New Explorers that together will outline all of the stamps and rewards as well as the locations of all the agents, dungeons and other quest NPCs found in each of the towns.
- Once you have a Lucky Gold Letter or Scarlet Red Letter, it can be stamped using a town stamp taken from one of the starter quest dungeons near each town.
- Note: See Starter Quests for lists of all the level 1-20 quests, with summaries of each including the xp and item rewards and those that have a town stamp.
- Take the stamped letter back to one of the Society Agents to be rewarded with a piece of equipment. Scarlet letters are rewarded with the lower Society equipment, and stamped Lucky Gold letters will get a more powerful Explorer piece. The item you receive depends on the town stamp that you use and also the town that you take the stamped letter to. See below for a table of rewards.
- Note: The society only rewards exploration; stamped letters cannot be returned to agents in the same town as the name on the stamp.
Society Agents
| Society Agent | Town | Starter Quests | Exact Location |
|---|---|---|---|
| Celcynd the Dour | Rithwic | Rithwic Starter Quests | 10.7N, 58.1E in the Bar |
| Dai Ya the Scholar | Yanshi | Yanshi Starter Quests | 12.0S, 42.6E in the Bar |
| Flinrala Ryndmad | Holtburg | Holtburg Starter Quests | 42.1N, 33.8E in the Bar |
| Jilsaya bint Dah | Al-Arqas | Al-Arqas Starter Quests | 31.3S, 13.5E in the Jeweler's building |
| Lord Aleval | Lytelthorpe | Lytelthorpe Starter Quests | 1.0N, 51.1E in Lytelthorpe Keep tower |
| Mara al-Luq | Yaraq | Yaraq Starter Quests | 21.7S, 1.6W in the Bar |
| Oi-Tong Ye | Shoushi | Shoushi Starter Quests | 33.5S, 73.0E in the Bar |
| Rubid al-Jurma | Samsur | Samsur Starter Quests | 0.0S, 16.3E at Northwest Samsur Outpost |
| Shin Ro | Nanto | Nanto Starter Quests | 52.6S, 82.1E in the Mage Tower |
Items
Key:
- Red = Society Equipment
- Gold = Explorer Equipment
- The Yumi can be given back to an agent for the Atlatl.
| To | Holtburg | Lytelthorpe | Rithwic | Al-Arqas | Samsur | Yaraq | Nanto | Shoushi | Yanshi |
|---|---|---|---|---|---|---|---|---|---|
| From | |||||||||
| Holtburg | N/A | N/A | N/A | ||||||
| N/A | N/A | N/A | |||||||
| Lytelthorpe | N/A | N/A | N/A | File:A Pair Of Society Bracers Icon.png | |||||
| N/A | N/A | N/A | File:A Pair Of Explorer Bracers Icon.png | ||||||
| Rithwic | N/A | N/A | N/A | File:A Pair Of Society Pauldrons Icon.png | |||||
| N/A | N/A | N/A | File:A Pair Of Explorer Pauldrons Icon.png | ||||||
| Al-Arqas | N/A | N/A | N/A | ||||||
| N/A | N/A | N/A | |||||||
| Samsur | N/A | N/A | N/A | ||||||
| N/A | N/A | N/A | |||||||
| Yaraq | N/A | N/A | N/A | ||||||
| N/A | N/A | N/A | |||||||
| Nanto | N/A | N/A | N/A | ||||||
| N/A | N/A | N/A | |||||||
| Shoushi | N/A | N/A | N/A | ||||||
| N/A | N/A | N/A | |||||||
| Yanshi | N/A | N/A | N/A | ||||||
| N/A | N/A | N/A |
| Quest Items: Letters & Texts | ||||||||
| Lucky Gold Letter | Scarlet Red Letter | A Book of Quests for New Explorers | Nexus Town Information Guide | |||||
| Quest Items: Town Stamps | ||||||||
| Al-Arqas Town Stamp | Holtburg Town Stamp | Lytelthorpe Town Stamp | Nanto Town Stamp | |||||
| Rithwic Town Stamp | Samsur Town Stamp | Shoushi Town Stamp | Yanshi Town Stamp | |||||
| Yaraq Town Stamp | ||||||||
| Retired Items | ||||||||
| Exploration Society Token | ||||||||
Images
Click image for full size version.
-
Society Leather Armor
-
Explorer Leather Armor
-
Society Wand of Lightning
-
An Explorer Crossbow
Lore & Dialog
Flinrala Ryndmad tells you, "I have been contracted by the Dereth Exploration Society to help them in their outreach program towards the Isparians who find themselves newly exiled in Dereth. Here is a book that explains their mission. I am also giving you a list describing the locations of the nearest stamp and portals to other towns. If you collect any of the Society's stamped letters, you may bring them back to me for a reward."
Flinrala Ryndmad gives you A Book of Quests for New Explorers.
Flinrala Ryndmad gives you Nexus Town Information Guide.
You allow Flinrala Ryndmad to examine your Scarlet Red Letter.
Flinrala Ryndmad tells you, "Ahha! Thank you for bringing this to me!"
Flinrala Ryndmad tells you, "I have been contracted by the Dereth Exploration Society to help them in their outreach program towards the Isparians who find themselves newly exiled in Dereth. Here is a book that explains their mission."
Flinrala Ryndmad gives you A Book of Quests for New Explorers.
Flinrala Ryndmad tells you, "I will also give you a list describing the locations of the nearest stamp and portals to other towns. If you collect any of the Society's stamped letters, you may bring them back to me for a reward."
Flinrala Ryndmad gives you Nexus Town Information Guide.
You stamp your Scarlet Red [Town] Letter. It is now ready to take to an Agent of the Society.
You stamp your Lucky Gold [Town] Letter. It is now ready to take to an Agent of the Society.
You give Jilsaya bint Dah Stamped Lytelthorpe Lucky Gold Letter.
Jilsaya bint Dah gives you An Explorer Leather Girth.
Jilsaya bint Dah tells you, "Thank you, you must have journeyed far to get here. You are a true Explorer!"
Oi-Tong Ye tells you, "Take this--but if you would prefer an atlatl, I have those too. Just hand the bow back to me."
You give Oi-Tong Ye A Society Yumi.
Oi-Tong Ye tells you, "Ah, a truly adventurous soul. Here you are!"
Oi-Tong Ye gives you A Society Atlatl.
Retired Text
You give Dai Ya the Scholar Stamped Samsur Lucky Gold Letter.
Dai Ya the Scholar tells you, "Thank you, you must have journeyed far to get here. You are a true Explorer!"
Dai Ya the Scholar gives you An Explorer Ring of Quickness.
Dai Ya the Scholar tells you, "We could use more explorers such as yourself here in the Society. Perhaps you could aid Bach Lien, a friend of mine? A few days ago, she wrote that she is investigating rumors of a war spear guarded by Tumeroks in the area near Dryreach. Fantastical story, I'm sure! But nonetheless, I daresay she could use the help. She's stationed in the Explorer Society Outpost on the road from Rithwic to Dryreach. Show her this token and she will know I sent you."
Dai Ya the Scholar gives you Exploration Society Token
Notes
- During the Discoveries event, the society and explorer wands were updated with new icons and stats.
- During the Waking From the Abyss event, all rewards were updated and received new stats and new artwork. The armor in particular lost the old store bought leather look and now has its own unique colors.
- During the From the Darkness Born event, the society and exploration weapons were updated with increased damage, higher Blood Drinker spells and also Biting Strike.
