Gauntlet: Difference between revisions
imported>Drthunder2 |
imported>Drthunder2 |
||
| Line 153: | Line 153: | ||
'''[[Gauntlet Stage 12 (Eldrytch Web)|Stage 12]]''' | '''[[Gauntlet Stage 12 (Eldrytch Web)|Stage 12]]''' | ||
<br>Spawn 1 - [[Blade Lieutenant]]s | <br>Spawn 1 - [[Blade Lieutenant]]s | ||
<br>Spawn 2 - [[Blade Captain]]s | <br>Spawn 2 - [[Blade Lieutenant]]s, [[Blade Captain]]s | ||
<br>Spawn 3 - | <br>Spawn 3 - [[Blade Captain]]s, [[Blade Champion]]s | ||
<br>Spawn 4 - | <br>Spawn 4 - | ||
<br>Kill priotity: [[Blade Lieutenant]]s > [[Blade Captain]]s | <br>Kill priotity: [[Blade Lieutenant]]s > [[Blade Captain]]s > [[Blade Champion]]s | ||
== Portals == | == Portals == | ||
Revision as of 04:49, 23 February 2015
Related topics: Gauntlet Bosses, Societies
| Walk Through ___ Maps ___ Items ___ XP ___ Lore & Dialog ___ |
| |||||||||||||||||||||||||||||||||||||||
Quest Overview
You need to be a member of a Society to participate.
- Enter either the Celestial Hand Gauntlet, Eldrytch Web Gauntlet or Radiant Blood Gauntlet
- Important: Rare gems are not allowed - you will not be able to enter the Gauntlet if you have a Rare gem in your inventory. Any active rares will also be dispelled upon entry (with the exception of item rares). However, you can enter with Spectral Rares, rare potions, and any Tier 3 or higher rare.
- There are three distinct dungeons accessed in front of each society stronghold but you can enter any one of them irrespective of what society you belong to.
- To initiate the event one must be in the society hosting the event rooms.
- Each Society may have two concurrent groups attempting the event at the same time for a total of six possible concurrent groups.
- There are three Gauntlet Bosses that can be accessed after you complete a certain number of stages.
- Required Slayers include Tumerok, Virindi, Mukkir, and appropriate Shadow and Burun wands.
NPCs
Walk Throughs
Here is a rough set of notes. Note that some spawn information is incomplete and so is the detailed breakdown of the spawn waves:
Most stages have 4 waves of spawns. An exception is stage 5. Recommended group composition is as many missile and void hybrids as possible, with secondary consideration to specialized life mages.
Stage 1
Spawn 1 - Hollow Pawns, Corrosive Archer
Spawn 2 - Hollow Pawns, Virindi Rival, Corrosive Archer
Spawn 3 - Virindi Rival, Tumerok Savage
Spawn 4 - Tumerok Savage
Kill priority: Corrosive Archer >Tumerok Savage > Virindi Rival > Hollow Pawns
- Tumerok Savages are extremely vulnerable to lightning and pierce damage. CS melee and missile weapons are very effective but not recommended over slayers.
- Virindi Rivals are vulnerable to lightning and fire.
Stage 2
Spawn 1 - Virindi Rival, Hollow Pawns, Corrosive Archer
Spawn 2 - Lugian Launcher
Spawn 3 - Virindi Rival, Lugian Launcher
Spawn 4 - Hollow Pawns, Lugian Launcher
Kill priority: Lugian Launcher > Virindi Rival > Hollow Pawns
- Lugian Launchers have very high magic resistance. It is recommended all mages use Spectral Crystal of the Life Giver rares, and then imp. Missile/Melees should use a lightning rend.
Stage 3
Spawn 1 - Torment Wisps, Corrosive Archer
Spawn 2 - Torment Wisps
Spawn 3 - Torment Wisps
Spawn 4 - Torment Wisps, Corrosive Archer
Kill priority: Corrosive Archer > Torment Wisps > Hollow Pawns
- Torment Wisps should be imperiled and pierce vulned (slash does comparable damage). Melees and archers should us a slash or pierce AR weapon.
- Adding an acid vuln to increase summoned pets' effectiveness is recommended.
Stage 4
Spawn 1 - Lugian Launcher, Corrosive Archer
Spawn 2 - Tracking Fireball, Vicious Remoran Sapper
Spawn 3 - Hollow Pawns, Vicious Remoran Sapper
Spawn 4 - Vicious Remoran Sapper
Kill priority: Vicious Remoran Sapper > Virindi Rival > Hollow Pawns
- Do not stand in SW corner as a group of Vicious Remoran Sappers spawns there.
- Vicious Remoran Sappers stand still and chain-cast war spells. Bring lots of dispel gems for this room.
- Vicious Remoran Sappers should NOT be vulned; they should be imperiled.
- Melee/Missiles should use a blunt or fire rend. Mages should focus on imperils, and then use arcs (void) or Tusker Fists (war).
Stage 5
Spawn 1 - Pike Grievver, Grievver Darter
Kill priority:Pike Grievver > Grievver Darter
- Upon entering, your group will be split (at random) between two separate rooms. You will only be able to return to the same room you started in if you die or recall so each group is responsible for clearing their own room.
- Pike Grievvers and Grievver Darters should be imperiled and slash vulned. Melee/Missiles should use a slash Armor Rending weapon. War mages should use CS slash.
- The door is triggered by killing all of the Pike Grievvers in each room. When a Pike Grievver dies two Grievver Darters spawn. You can ignore them.
- The room is small, and has a central column. Flame waves shoot along the outer edges of the room so don't stand there.
Stage 6
Spawn 1 - Vibrant Shadow, Virindi Rival
Spawn 2 - Vibrant Shadow, Virindi Rival
Spawn 3 - Vibrant Shadow, Virindi Rival
Spawn 4 - Hollow Pawns, Vibrant Shadow, Virindi Rival
Kill priority: Vibrant Shadow > Virindi Rival
- Void mages should focus on the Vibrant Shadows using slayer the whole time.
- Vibrant Shadows should not be imperiled or vuled as they counter protect. Even so, all damage types besides nether and offensive life magic appear to do little damage.
- War mages, melees and archers should kill the Virindi Rivals and Hollow Pawns, then use shadow slayers wands and offensive life magic on the Vibrant Shadows.
- Void mages should focus on the shadows the entire time.
Stage 7
Spawn 1 - Mukkir Predator, Ruuk Ranger
Spawn 2 - Mukkir Predator, Guruk Grunt
Spawn 3 - 2 Guruk Grunts, 2 Ruuk Ranger
Spawn 4 - 2 Guruk Grunts, 2 Ruuk Ranger
Kill priority: Mukkir Predator > Ruuk Ranger > Guruk Grunt
- Guruk Grunts have extremely high defenses until they become vulnerable, which appears to occur at random. A level up animation plays, there is a green chat message, and all of their defenses significantly drop. Everyone should switch on them at this point and ignore other spawns.
- Ruuk Rangers cast a high damage bludge volley (forward cone attack). It does 250-300 damage. A level up animation is played, and there is a chat warning when this occurs.
- Void mages should focus on the Guruk Grunts and Ruuk Rangers at all times, Ruuk Rangers until Guruk Grunts becomes vulnerable and then switch to Guruk Grunts. Use burun slayer and nether blast.
- Guruk Grunts and Ruuk Rangers are both immune to life vulns and destructive curse.
- Non-mages should use Burun slayer wands and offensive life magic (tugaks and hecatombs) on the Guruk Grunts and Ruuk Rangers. War mages should use Soul Bound (or another rend). Void mages should also use Burun Slayer wands with void blasts/arcs. Designating one void mage to cast Corruption/Corrosion on everything with a green garnet tinked wand (non-slayer) is recommended.
- Due to extremely high health (~150k) the Guruk Grunts and Ruuk Rangers take a very long time to kill. Unclear if there's a better strategy.
Stage 8
Spawn 1 - Crazed Olthoi, Hollow Pawns
Spawn 2 - Crazed Olthoi
Spawn 3 - Crazed Olthoi
Spawn 4 - Crazed Olthoi, Virindi Rivals
Kill priority: Crazed Olthoi > Hollow Pawn
- Mages should Imperil and vuln all Crazed Olthoi. Melee/Missile should Olthoi Slayer weapons.
- All magics do very little damage, and should focus on imperil/vulns and the Virindi Rivals/Hollow Pawns.
Stage 9
Spawn 1 - Baby Snow Tuskers
Spawn 2 - Baby Snow Tuskers, 1 Tundra Tusker, 2 Crystal Shards
Spawn 3 - 2 Tundra Tuskers, 2 Crystal Shards
Spawn 4 - 4 Tundra Tuskers, 2 Crystal Shards
Kill priority: Tundra Tusker > Crystal Shard > Baby Snow Tusker.
- Crystal Shards have 50k HP and cannot be Tusker Fisted
- Tundra Tuskers are vulnerable to void and offensive life magic.
Stage 10
Spawn 1 - Stinging Armoredillos
Spawn 2 - Stinging Armoredillos
Spawn 3 - Stinging Armoredillos, Virindi Rivals
Spawn 4 - Stinging Armoredillos, Virindi Rivals
Kill priority: Stinging Armoredillos > Virindi Rivals
- Stinging Armoredillos have extremely high magic resistance. A Spectral Crystal of the Life Givers rare is recommended for all non archer/melees who should focus all their effort into landing an imperil
- Stinging Armoredillos appear to have a shield-like effect when being hit in the front. Arranging your fellow so half of your archers/melees are always hitting the Stinging Armoredillos in the back is recommended.
Stage 11
Spawn 1 - Wight Sages
Spawn 2 - Wight Sages
Spawn 3 - Wight Sages, Vibrant Shadows
Spawn 4 - Wight Sages, Vibrant Shadows, Stinging Armoredillos, Lugian Launchers, Torment Wisps
Kill priority: Lugian Launchers > Torment Wisps > Vibrant Shadows > Stinging Armoredillos > Wight Sage
- Wight Sages have low-AL shields
Stage 12
Spawn 1 - Blade Lieutenants
Spawn 2 - Blade Lieutenants, Blade Captains
Spawn 3 - Blade Captains, Blade Champions
Spawn 4 -
Kill priotity: Blade Lieutenants > Blade Captains > Blade Champions
Portals
- Surface Portal.
- Gauntlet Arena
Maps
| Dungeon | Coordinates | Wiki Map | ACmaps | Other | Quests |
| Celestial Hand Gauntlet | 39.7S 83.6E | -- | -- | -- | -- |
| Eldrytch Web Gauntlet | 24.7N 49.4E | -- | -- | -- | -- |
| Radiant Blood Gauntlet | 12.8N 0.7E | -- | -- | -- | -- |
Experience Rewards
Reward Chart
- Gauntlet Coins are used to purchase items from Wreen (CH), Zabien (RB) and Vellum (EW).
- The Gauntlet Vault Key unlocks the Gauntlet Vault.
- The Gauntlet Treasure Key is used to open a Gauntlet Magic Chest, Gauntlet Weapon Chest or Gauntlet Armor Chest in either of the society Gauntlets.
| Room | Title | XP | Luminance | Coins | Keys | Mini-Boss Access |
|---|---|---|---|---|---|---|
| 1 | None | ?? (??% up to level ??) |
2,500 | - | ||
| 2 | None | 50,000,000 (??% up to level ??) |
5,000 | - | ||
| 3 | None | 50,000,000 (??% up to level ??) |
7,500 | - | ||
| 4 | None | ?? (??% up to level ??) |
10,000 | ?? | ||
| 5 | Coin Collector | 100,000,000 (??% up to level ??) |
12,500 | 1 x | ||
| 6 | Society Savage | 125,000,000 (??% up to level ??) |
15,000 | 1 x |
1 x | |
| 7 | Brutal Barbarian | 150,000,000 (??% up to level ??) |
17,500 | 2 x |
1 x | |
| 8 | Soldier of Fortune | 200,000,000 (??% up to level ??) |
20,000 | 3 x |
1 x |
Access granted to Gauntlet Boss Tremb'Orh |
| 9 | Wily Warrior | 300,000,000 (??% up to level ??) |
30,000 | 3 x |
2 x | |
| 10 | Gauntlet Gladiator | 350,000,000 (??% up to level ??) |
35,000 | 4 x |
2 x |
Access granted to Gauntlet Boss Holcha |
| 11 | Bloodthirsty | 350,000,000 (??% up to level ??) |
50,000 | 4 x |
3 x | |
| 12 | ?? | ?? (??% up to level ??) |
?? | ? x |
? x |
- Note: You must use the exit door to have completed a room. For example, killing the spawn in room 2 then using the door and entering room 3 counts as having beaten 2.
Quest Items
| Quest Items | ||||||||
| Gauntlet Ticket | Gauntlet Ticket Stub | |||||||
| Rewards | ||||||||
| Gauntlet Coin | Gauntlet Treasure Key | Gauntlet Vault Key | Yellow Society Locket | |||||
| Brown Society Locket | Blue Society Band | Green Society Band | Purple Society Band | |||||
| Red Society Band | ||||||||
| Objects | ||||||||
| Gauntlet Chests | Gauntlet Vault | Gauntlet Arena | Gauntlet Arena One Statue | |||||
Images
Click image for full size version.
-
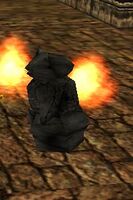
Celestial Hand Society Gauntlet.
-
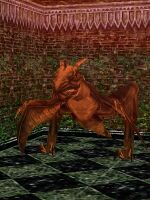
Celestial Hand Gauntlet Arena
-
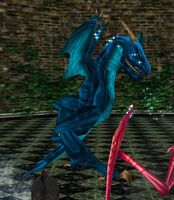
The Lair of Holcha
Lore & Dialog
Master of the Gauntlet says, "Arena One is now available for new warriors!"
The Completion of Stage 7
Master of the Gauntlet gives you Gauntlet Treasure Key.
You've earned 150,000,000 experience.
You've earned 17,500 Luminance.
You have won two Gauntlet Coins!
Master of the Gauntlet gives you 2 Gauntlet Coins.
The Completion of Stage 8
Master of the Gauntlet gives you Gauntlet Treasure Key.
You've earned 200,000,000 experience.
You've earned 20,000 Luminance.
You have won three Gauntlet Coins!
Master of the Gauntlet gives you 3 Gauntlet Coins.
The Completion of Stage 9
Master of the Gauntlet gives you 2 Gauntlet Treasure Keys.
You've earned 300,000,000 experience.
You've earned 30,000 Luminance.
You have won three Gauntlet Coins!
Master of the Gauntlet gives you 3 Gauntlet Coins.
The Completion of Stage 10
Master of the Gauntlet gives you 2 Gauntlet Treasure Keys.
You've earned 350,000,000 experience.
You've earned 35,000 Luminance.
You have won four Gauntlet Coins!
Master of the Gauntlet gives you 4 Gauntlet Coins.
The Completion of Stage 11
Master of the Gauntlet gives you ??? Gauntlet Treasure Keys.
You've earned 350,000,000 experience.
You've earned 50,000 Luminance.
You have won four Gauntlet Coins!
Master of the Gauntlet gives you 4 Gauntlet Coins.


