Sword of Lost Hope Quest: Difference between revisions
imported>Arkalor No edit summary |
imported>Arkalor No edit summary |
||
| Line 1: | Line 1: | ||
{{Quest Summary | {{Quest Summary | ||
| Patch Introduced = [[Now In This Hush]] | | Patch Introduced = [[Now In This Hush]] | ||
| Related Quests = [[ | | Related Quests = [[Sword of Lost Light Quest]],<br>[[Empyrean Cloister Quest]],<br>[[Shadow Captain's Heaume Quest]],<br>[[Virindi Servant's Amulet Quest]],<br>[[Radiant Mana Infusion Quest]] | ||
| Updated = [[Into the Darkness]] | | Updated = [[Into the Darkness]],<br>[[Reforging the Past]],<br>[[Unfinished Business]] | ||
| | | | ||
| Live Image = Sword of Lost Hope Live.jpg | | Live Image = Sword of Lost Hope Quest Live.jpg | ||
| Live Image Caption = The | | Live Image Caption = The mortal remains of Ilservian Palacost (Bael'Zharon) | ||
| Quest Type = Group | | Quest Type = Group | ||
| Kill Task = False | | Kill Task = False | ||
| Start Location = | | Start Location = [[Yaraq]] | ||
| Timer = | | Timer = 27 Days | ||
| Level Restrictions = 36+ | | Level Restrictions = 36+ | ||
| Level Suggestions = | | Level Suggestions = 80+ | ||
| Item Rewards = | | Item Rewards = [[Blood of the Hopeslayer]] | ||
| Max XP Reward = | | Max XP Reward = 10,000,000 | ||
| Titles = | | Titles = | ||
| | | | ||
| Line 21: | Line 21: | ||
| Link XP Rewards = True | | Link XP Rewards = True | ||
| Link Title Rewards = False | | Link Title Rewards = False | ||
| Link Images = | | Link Images = True | ||
| Link Lore & Dialog = True | | Link Lore & Dialog = True | ||
| Link Notes = True | | Link Notes = True | ||
}} | }} | ||
== Quest Overview == | == Quest Overview == | ||
This was originally the quest to banish [[Bael'Zharon]] during [[The Child of Daralet]] event. When the Hopeslayer was defeated, the mortal remains of his former self Ilservian Palacost appeared, along with 6 remnants of the crystals that imprisoned him. There were only 6 per server and could be handed in for unique one time only items (see below). | |||
During the [[Now In This Hush]] event, [[A Shadow of Black Ferah]] took the place of [[Bael'Zharon]] in his lair. When killed, the [[Blood of the Hopeslayer]] appears on the remains of Ilservian that were left behind when he was defeated. The blood can be used on the Sword of Lost Light to create the Sword of Lost Hope. | |||
During the [[Unfinished Business]] event, the [[Radiant Mana Infusion Quest|Radiant Mana Infusion]] was introduced. Using the infusion on the SoLH, turns it into an [[Empowered Sword of Lost Hope]] - a very effective acid rending sword. | |||
== Walk Through == | == Walk Through == | ||
* To | === Part 1: Creating the Portal Gem === | ||
* To create the portal gem, you must first obtain items from several other quests: | |||
# Complete the [[Empyrean Cloister Quest]] to obtain the [[Skull of Avoren Palacost]]. | |||
# Complete the [[Shadow Captain's Heaume Quest]] to obtain the [[Heart of Shadow]]. | |||
# Complete the [[Virindi Servant's Amulet Quest]] to obtain the [[Fragment of the Singularity]]. | |||
# Combine the [[Fragment of the Singularity]] with the [[Heart of Shadow]] to create the [[Dark Singularity]]. | |||
# Combine the [[Dark Singularity]] with the [[Skull of Avoren Palacost]] to make the [[Dark Crucible]]. | |||
# Hand the [[Dark Crucible]] to one of the [[Chosen of Asheron]] to receive the [[Sepulcher of the Hopeslayer Portal Gem]]. | |||
=== Part 2 - Sepulcher of the Hopeslayer === | |||
* '''You will require a lockpicker (max difficulty is 402) and lever pullers for this part of the quest.''' | |||
# Make sure everyone is fully buffed (including banes) before using the portal gem. | |||
#* <font color=red>'''Warning:'''</font> Becareful after entering the dungeon, the surface portal is a few feet from the drop point and if you exit there is no way back without a second portal gem. | |||
# Have the lockpicker unlock the middle door, the other two passages are rigged with mana and stamina blight traps. | |||
# After clearing the section of Grievver and Shadows, you will see a lever in the center of the room, have a group or person stay behind at the lever ready for use when you reach the door - everyone else will continue on west. | |||
# At the split, take the middle passage across a grated floor and down a ramp. Defeat the Grievvers and Shadows in this room and head around to the north passage. | |||
# The next section is made of Shadow-twisted organic material which constantly eats away at your health for 9 points or more. The alcoves in the central corridor are safe zones from the damage, so stand in them whenever you can. | |||
# Stand at the door and have the group that stayed behind pull the lever, when the door opens move into the alcoves beyond the door and wait. | |||
# The lever group now needs to get to the door and take the left corridor north through some rooms to the last lever, pull it and run back and join up with the others (the first door can be reopened from inside the corridor). When the final door is open, everyone should move into the end of the passage before the pit and buff up if necessary. | |||
# Down below is the final room where [[A Shadow of Black Ferah]] is found along with the [[Remnants of Ilservian]] laid out on altar. Once you kill Black Ferah's shadow, the Blood of the Hopeslayer will spawn on Illservian's corpse. | |||
# Once you have killed enough spawns for everyone to get a vial of blood, recall out or use the nearby surface portal. | |||
# After you have infused the [[Sword of Lost Light]] with the blue, white, and red fire infusions you can use the [[Blood of the Hopeslayer]] on it to create the [[Sword of Lost Hope]]. You cannot add further infusions other than the [[Radiant Mana Infusion]] to the sword once you have already used the blood on it. | |||
== Maps == | == Maps == | ||
| Line 43: | Line 62: | ||
{{Dungeon Maps | {{Dungeon Maps | ||
| Dungeon = Sepulcher of the Hopeslayer | | Dungeon = Sepulcher of the Hopeslayer | ||
| Coordinates = | | Coordinates = [[Sepulcher of the Hopeslayer Portal Gem|Portal Gem]] | ||
| Wiki Map File = | | Wiki Map File = | ||
| ACmaps ID = 02B0 | | ACmaps ID = 02B0 | ||
| Line 52: | Line 71: | ||
== Items == | == Items == | ||
{{Item Table | |||
|Caption=Quest Items | {{Item Table Two|Caption=Quest Items | ||
| Asheron's Second Missive | |||
| Instructions (Sepulcher of the Hopeslayer) | | Instructions (Sepulcher of the Hopeslayer) | ||
| Skull of Avoren Palacost | | Skull of Avoren Palacost | ||
| Line 60: | Line 80: | ||
| Dark Singularity | | Dark Singularity | ||
| Dark Crucible | | Dark Crucible | ||
| | | Sepulcher of the Hopeslayer Portal Gem | ||
| Remnants of Ilservian | |||
| Sword of Lost Light | |||
}} | }} | ||
{{Item Table | {{Item Table Two|Caption=Rewards | ||
| Blood of the Hopeslayer | |||
| Sword of Lost Hope | | Sword of Lost Hope | ||
}} | }} | ||
{{Item Table | {{Item Table Two|Caption=Retired Quest Items | ||
| Fenmalain Soul Crystal Shard | | Fenmalain Soul Crystal Shard | ||
| Caulnalain Soul Crystal Shard | | Caulnalain Soul Crystal Shard | ||
| Line 76: | Line 97: | ||
| Herald Soul Crystal Shard | | Herald Soul Crystal Shard | ||
| Great Work Soul Crystal Shard | | Great Work Soul Crystal Shard | ||
}} | |||
{{Item Table Two|Caption=Retired Rewards | |||
| Fenmalain Staff of the Lightbringer | | Fenmalain Staff of the Lightbringer | ||
| Caulnalain Staff of the Lightbringer | | Caulnalain Staff of the Lightbringer | ||
| Line 89: | Line 113: | ||
| Great Work Helm of the Lightbringer | | Great Work Helm of the Lightbringer | ||
}} | }} | ||
== Experience Rewards == | |||
{{Quest Experience Table | |||
| Repeat Differs = False | |||
| Table Rows = | |||
{{Quest Task | |||
| Description = Give the [[Blood of the Hopeslayer]] to [[Lilly of Glenden Wood]] | |||
| Max XP = 10,000,000 | |||
| Percent of Level = Fixed | |||
| Level Cap = Fixed | |||
}} | |||
}} | |||
== Images == | |||
Click image for full size version. | |||
<gallery widths=200px heights=200px perrow=4> | |||
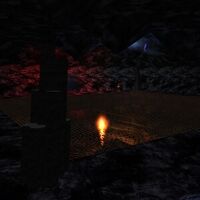
File:Sword of Lost Hope Quest Live 2.jpg|Entrance | |||
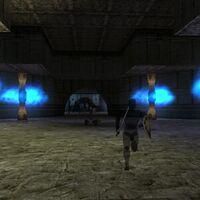
File:Sword of Lost Hope Quest Live 3.jpg|Lever 1 Area | |||
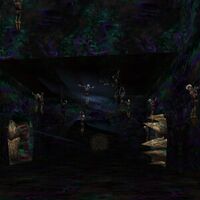
File:Sword of Lost Hope Quest Live 4.jpg|Shadow-twisted passage ways | |||
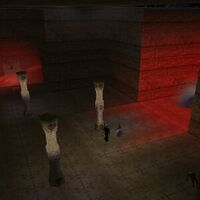
File:Sword of Lost Hope Quest Live 5.jpg|Sepulcher of the Hopeslayer | |||
</gallery> | |||
== Lore & Dialog == | == Lore & Dialog == | ||
<font color=darkgoldenrod>Chosen of Asheron tells you, "My lord conveys his gratitude for the efforts of your people. If you are one of the champions who took part in the defeat of Bael'Zharon, I can take your Soul Crystal Gem and give you a spellcasting staff to commemorate your achievement."<br> | |||
<font color=green>Chosen of Asheron gives you Asheron's Second Missive.</font><br> | |||
Chosen of Asheron tells you, "Also, I have instructions here that will lead you to the site of the Hopeslayer's defeat, should you wish to visit it."</font><br> | |||
<font color=green>Chosen of Asheron gives you Instructions.</font> | |||
---- | |||
<font color=green>You give Chosen of Asheron Dark Crucible.</font><br> | |||
<font color=darkgoldenrod>Chosen of Asheron tells you, "The Hopeslayer has been destroyed, but you may wish to visit his lair nonetheless. This gem will bring you there."</font><br> | |||
<font color=green>Chosen of Asheron gives you Sepulcher of the Hopeslayer Portal Gem.</font><br> | |||
---- | |||
<font color=green>The Shadow-twisted organic floor absorbs 10 points of your flesh as you walk on it! | |||
---- | |||
As Black Ferah falls, you hear a cold, contemptuous voice declare, "Do with the blood as they will, outlander. My true form stays close to my master, who you cannot kill!"</font> | |||
---- | |||
<font color=green>You give Lilly of Glenden Wood Blood of the Hopeslayer.</font><br> | |||
<font color=darkgoldenrod>Lilly of Glenden Wood tells you, "Egad! What a disgusting mess! I'll just destroy this right now!"</font><br> | |||
<font color=green>You've earned 10,000,000 experience.</font> | |||
---- | |||
* [[Asheron's Missive]] | |||
* [[AC:DM CD Lore/Historical Overview/Portal Year 11 - The Fourth Sending of Darkness|The Fourth Sending of Darkness]] | |||
* [[Pack Bael'Zharon]] | |||
== Notes == | == Notes == | ||
During the [[Into the Darkness]] event, the [[Sepulcher of the Hopeslayer]] dungeon was updated with more difficult creatures and became non recallable. | * During the [[Into the Darkness]] event, the [[Sepulcher of the Hopeslayer]] dungeon was updated with more difficult creatures and became non recallable. | ||
* During the [[Reforging the Past]] event, the quest timer was standardized to 27 days (originally 30). | |||
[[ | |||
Revision as of 01:51, 11 March 2010
| Walk Through ___ Maps ___ Items ___ XP ___ Images ___ Lore & Dialog ___ Notes |
| |||||||||||||||||||||||||||||||||||||||
 | |||||||||||||||||||||||||||||||||||||||
Quest Overview
This was originally the quest to banish Bael'Zharon during The Child of Daralet event. When the Hopeslayer was defeated, the mortal remains of his former self Ilservian Palacost appeared, along with 6 remnants of the crystals that imprisoned him. There were only 6 per server and could be handed in for unique one time only items (see below).
During the Now In This Hush event, A Shadow of Black Ferah took the place of Bael'Zharon in his lair. When killed, the Blood of the Hopeslayer appears on the remains of Ilservian that were left behind when he was defeated. The blood can be used on the Sword of Lost Light to create the Sword of Lost Hope.
During the Unfinished Business event, the Radiant Mana Infusion was introduced. Using the infusion on the SoLH, turns it into an Empowered Sword of Lost Hope - a very effective acid rending sword.
Walk Through
Part 1: Creating the Portal Gem
- To create the portal gem, you must first obtain items from several other quests:
- Complete the Empyrean Cloister Quest to obtain the Skull of Avoren Palacost.
- Complete the Shadow Captain's Heaume Quest to obtain the Heart of Shadow.
- Complete the Virindi Servant's Amulet Quest to obtain the Fragment of the Singularity.
- Combine the Fragment of the Singularity with the Heart of Shadow to create the Dark Singularity.
- Combine the Dark Singularity with the Skull of Avoren Palacost to make the Dark Crucible.
- Hand the Dark Crucible to one of the Chosen of Asheron to receive the Sepulcher of the Hopeslayer Portal Gem.
Part 2 - Sepulcher of the Hopeslayer
- You will require a lockpicker (max difficulty is 402) and lever pullers for this part of the quest.
- Make sure everyone is fully buffed (including banes) before using the portal gem.
- Warning: Becareful after entering the dungeon, the surface portal is a few feet from the drop point and if you exit there is no way back without a second portal gem.
- Have the lockpicker unlock the middle door, the other two passages are rigged with mana and stamina blight traps.
- After clearing the section of Grievver and Shadows, you will see a lever in the center of the room, have a group or person stay behind at the lever ready for use when you reach the door - everyone else will continue on west.
- At the split, take the middle passage across a grated floor and down a ramp. Defeat the Grievvers and Shadows in this room and head around to the north passage.
- The next section is made of Shadow-twisted organic material which constantly eats away at your health for 9 points or more. The alcoves in the central corridor are safe zones from the damage, so stand in them whenever you can.
- Stand at the door and have the group that stayed behind pull the lever, when the door opens move into the alcoves beyond the door and wait.
- The lever group now needs to get to the door and take the left corridor north through some rooms to the last lever, pull it and run back and join up with the others (the first door can be reopened from inside the corridor). When the final door is open, everyone should move into the end of the passage before the pit and buff up if necessary.
- Down below is the final room where A Shadow of Black Ferah is found along with the Remnants of Ilservian laid out on altar. Once you kill Black Ferah's shadow, the Blood of the Hopeslayer will spawn on Illservian's corpse.
- Once you have killed enough spawns for everyone to get a vial of blood, recall out or use the nearby surface portal.
- After you have infused the Sword of Lost Light with the blue, white, and red fire infusions you can use the Blood of the Hopeslayer on it to create the Sword of Lost Hope. You cannot add further infusions other than the Radiant Mana Infusion to the sword once you have already used the blood on it.
Maps
| Dungeon | Coordinates | Wiki Map | ACmaps | Other | Quests |
| Sepulcher of the Hopeslayer | Portal Gem | -- | 02B0 | -- | -- |
Items
| Rewards | ||||||||
| Blood of the Hopeslayer | Sword of Lost Hope | |||||||
| Retired Quest Items | ||||||||
| Fenmalain Soul Crystal Shard | Caulnalain Soul Crystal Shard | |||||||
| Shendolain Soul Crystal Shard | Nexus Soul Crystal Shard | |||||||
| Herald Soul Crystal Shard | Great Work Soul Crystal Shard | |||||||
Experience Rewards
| Task Required | Max Experience | Percentage & Level Cap | |||
| Give the Blood of the Hopeslayer to Lilly of Glenden Wood | 10,000,000xp |
Fixed XP | |||
|
| |||||
| See Level Costs for per level information. | |||||
Images
Click image for full size version.
-
Entrance
-
Lever 1 Area
-
Shadow-twisted passage ways
-
Sepulcher of the Hopeslayer
Lore & Dialog
Chosen of Asheron tells you, "My lord conveys his gratitude for the efforts of your people. If you are one of the champions who took part in the defeat of Bael'Zharon, I can take your Soul Crystal Gem and give you a spellcasting staff to commemorate your achievement."
Chosen of Asheron gives you Asheron's Second Missive.
Chosen of Asheron tells you, "Also, I have instructions here that will lead you to the site of the Hopeslayer's defeat, should you wish to visit it."
Chosen of Asheron gives you Instructions.
You give Chosen of Asheron Dark Crucible.
Chosen of Asheron tells you, "The Hopeslayer has been destroyed, but you may wish to visit his lair nonetheless. This gem will bring you there."
Chosen of Asheron gives you Sepulcher of the Hopeslayer Portal Gem.
The Shadow-twisted organic floor absorbs 10 points of your flesh as you walk on it!
As Black Ferah falls, you hear a cold, contemptuous voice declare, "Do with the blood as they will, outlander. My true form stays close to my master, who you cannot kill!"
You give Lilly of Glenden Wood Blood of the Hopeslayer.
Lilly of Glenden Wood tells you, "Egad! What a disgusting mess! I'll just destroy this right now!"
You've earned 10,000,000 experience.
Notes
- During the Into the Darkness event, the Sepulcher of the Hopeslayer dungeon was updated with more difficult creatures and became non recallable.
- During the Reforging the Past event, the quest timer was standardized to 27 days (originally 30).


