Stone Tool Quest: Difference between revisions
Jump to navigation
Jump to search
imported>Arkalor m →Items |
imported>Arkalor mNo edit summary |
||
| Line 5: | Line 5: | ||
| Live Image = Stone Tool (Quest) Live.jpg | | Live Image = Stone Tool (Quest) Live.jpg | ||
| Live Image Caption = Final Room with Stone Tool | | Live Image Caption = Final Room with Stone Tool | ||
| Quest Type = | | Quest Type = Solo | ||
| Kill Task = False | | Kill Task = False | ||
| Start Location = Samsur | | Start Location = Samsur | ||
| Line 30: | Line 30: | ||
=== Getting to the Artifex Vault === | === Getting to the Artifex Vault === | ||
# The quest was updated in [[Heart of Woe]] when a second portal to the vault appeared at 24.5N 8.0E (see new rumor). | |||
# '''<font color=green><nowiki>[</nowiki>OPTIONAL<nowiki>]</nowiki></font>''' Purchase the rumor: [[Duplicated Portals]] from certain [[:Special:Whatlinkshere/Duplicated Portals|shopkeepers]] to find the coordinates to the [[Artifex Vault]]. | # '''<font color=green><nowiki>[</nowiki>OPTIONAL<nowiki>]</nowiki></font>''' Purchase the rumor: [[Duplicated Portals]] from certain [[:Special:Whatlinkshere/Duplicated Portals|shopkeepers]] to find the coordinates to the [[Artifex Vault]]. | ||
# To reach the duplicate portal take the Dovetail Valley Villas portal from [[Samsur]] at 0.8S, 18.9E. | |||
# To reach | |||
=== Inside the Vault === | === Inside the Vault === | ||
# From the drop run down to the bottom of the slope where you will be met by | # From the drop, run down to the bottom of the slope where you will be met by four [[Tumerok Officer]]s and two ramps. | ||
# Take either of the ramps and then take the west corridor | # Take either of the ramps down and then take the west corridor. | ||
# Follow the corridor | # Follow the corridor around and then take the ramp down. Ignore the lever activated doors to your left instead run west through the hall of crystals. | ||
# At the end is a room with another level activated door and a lever which opens the doors doors back to the east. | # At the end is a room with another level activated door and a lever which opens the doors doors back to the east. | ||
# Pull the level and run back through the hall and pull the lever that is now accessible - run back to the previous doors. | # Pull the level and run back through the hall and pull the lever that is now accessible - run back to the previous doors. | ||
# Continue on, ignore the first crossway instead going to the section ahead with the barrels. Notice the lever activated door a little to the west. | # Continue on, ignore the first crossway instead going to the section ahead with the barrels. Notice the lever activated door a little to the west. | ||
# From the barrels take a right going east. | # From the barrels take a right going east. | ||
# Take the first right | # Take the first right into another room with blue crystals. Run to the doors at the end of the room and pull the lever. | ||
# '''<font color=green><nowiki>[</nowiki>OPTIONAL<nowiki>]</nowiki></font>''' Alternatively, if you have the lockpick skill, go east at the first crossway and unlock the door (resistance: 402) to access the next lever. | # '''<font color=green><nowiki>[</nowiki>OPTIONAL<nowiki>]</nowiki></font>''' Alternatively, if you have the lockpick skill, go east at the first crossway and unlock the door (resistance: 402) to access the next lever. | ||
# Now run back to where the barrels are and go through the now open doors | # Now run back to where the barrels are and go through the now open doors into another room of crystals. | ||
# Run to end | # Run to end and jump down into the pit. Follow the corridor along to an large open chamber with huge barrel like platforms. | ||
# Jump across the barrels to the east, taking extra care on the last platform | # Jump across the barrels to the east, taking extra care on the last platform (If you fall into the pit below a surface portal is the only exit). | ||
# Go east and you will come to a long | # Go east and you will come to a long mist filled pit with platforms on all sides. If you don't have the health or skill for the fall, carefully jump to each platform until you reach the bottom. | ||
# At the bottom | # At the bottom use the button on the west wall to open the metal doors to the final hallway. | ||
# | # This next section has many side rooms each filled with blue crystals and [[Tumerok Gladiator]]s. Run to the end ignoring the side rooms. | ||
# At the end of the hallway go south through two sets of metal doors until you come to a lever room filled with more [[Tumerok Gladiator|Gladiators]]. Pull the lever in the northeast corner and run back to the hallway taking the middle south corridor | # At the end of the hallway go south through two sets of metal doors until you come to a lever room filled with more [[Tumerok Gladiator|Gladiators]]. The pressure points on the floor here open doors releasing more Gladiators from above. | ||
# Run back to the | # Pull the lever in the northeast corner and run back to the hallway taking the middle south corridor - pull the final lever. | ||
# Run back to the Gladiator room and through the doors with the portal. Just infront of the portal lies the [[Stone Tool]] and [[textbook]]s. | |||
== Maps == | == Maps == | ||
Revision as of 19:57, 31 March 2009
| Walk Through ___ Maps ___ Items ___ XP ___ Lore & Dialog ___ |
| |||||||||||||||||||||||||||||||||||||||
 | |||||||||||||||||||||||||||||||||||||||
General
- The Stone Tool is used to remove Atlan Stones from Atlan Weapons and Shadow Armor.
Walkthrough
Getting to the Artifex Vault
- The quest was updated in Heart of Woe when a second portal to the vault appeared at 24.5N 8.0E (see new rumor).
- [OPTIONAL] Purchase the rumor: Duplicated Portals from certain shopkeepers to find the coordinates to the Artifex Vault.
- To reach the duplicate portal take the Dovetail Valley Villas portal from Samsur at 0.8S, 18.9E.
Inside the Vault
- From the drop, run down to the bottom of the slope where you will be met by four Tumerok Officers and two ramps.
- Take either of the ramps down and then take the west corridor.
- Follow the corridor around and then take the ramp down. Ignore the lever activated doors to your left instead run west through the hall of crystals.
- At the end is a room with another level activated door and a lever which opens the doors doors back to the east.
- Pull the level and run back through the hall and pull the lever that is now accessible - run back to the previous doors.
- Continue on, ignore the first crossway instead going to the section ahead with the barrels. Notice the lever activated door a little to the west.
- From the barrels take a right going east.
- Take the first right into another room with blue crystals. Run to the doors at the end of the room and pull the lever.
- [OPTIONAL] Alternatively, if you have the lockpick skill, go east at the first crossway and unlock the door (resistance: 402) to access the next lever.
- Now run back to where the barrels are and go through the now open doors into another room of crystals.
- Run to end and jump down into the pit. Follow the corridor along to an large open chamber with huge barrel like platforms.
- Jump across the barrels to the east, taking extra care on the last platform (If you fall into the pit below a surface portal is the only exit).
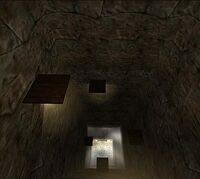
- Go east and you will come to a long mist filled pit with platforms on all sides. If you don't have the health or skill for the fall, carefully jump to each platform until you reach the bottom.
- At the bottom use the button on the west wall to open the metal doors to the final hallway.
- This next section has many side rooms each filled with blue crystals and Tumerok Gladiators. Run to the end ignoring the side rooms.
- At the end of the hallway go south through two sets of metal doors until you come to a lever room filled with more Gladiators. The pressure points on the floor here open doors releasing more Gladiators from above.
- Pull the lever in the northeast corner and run back to the hallway taking the middle south corridor - pull the final lever.
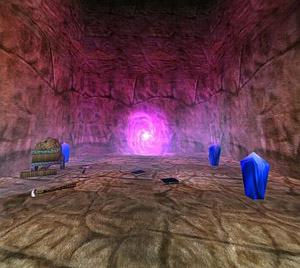
- Run back to the Gladiator room and through the doors with the portal. Just infront of the portal lies the Stone Tool and textbooks.
Maps
| Dungeon | Coordinates | Wiki Map | ACmaps | Other | Quests |
| Artifex Vault | -- | -- | 0137 | -- | -- |
Items
| Rewards | |||||||
| Stone Tool | 2 Textbooks | ||||||
Images
-
Hall of Crystals
-
Barrel Platform Chamber
-
Misty Pit


