Sword of Lost Light Quest: Difference between revisions
Jump to navigation
Jump to search
imported>Dr Doom |
imported>Dr Doom |
||
| Line 145: | Line 145: | ||
}} | }} | ||
{{Dungeon Maps | {{Dungeon Maps | ||
| Dungeon = Carved | | Dungeon = Carved Cave | ||
| Coordinates = 7.5N, 0.6E | | Coordinates = 7.5N, 0.6E | ||
| Wiki Map File = | | Wiki Map File = | ||
| Line 153: | Line 153: | ||
}} | }} | ||
{{Dungeon Maps | {{Dungeon Maps | ||
| Dungeon = | | Dungeon = Halls of the Lost Light | ||
| Coordinates = 76.5S, 74.9W | | Coordinates = 76.5S, 74.9W | ||
| Wiki Map File = | | Wiki Map File = | ||
Revision as of 05:44, 22 May 2009
| Walk Through ___ Maps ___ Items ___ XP ___ Lore & Dialog ___ |
| |||||||||||||||||||||||||||||||||||||||
 | |||||||||||||||||||||||||||||||||||||||
General
Walk Through
Key #1: Worn Small Key (Holtburg)
- From Holtburg, enter the Holtburg Dungeon at 43.6N, 33.0E
- From the drop, hug the left wall until you reach a down ramp.
- At the bottom of the ramp, enter the first room on your right and kill the Swamp Rats inside.
- Loot a Worn Small Key from the corpse of one of the rats.
Key #2: Worn Strange Key (Yaraq)
- From Yaraq, enter the Yaraq Tunnels at 24.6S, 1.4W.
- From the drop, go straight through the first two doors, leading to a large curving room.
- Take the south exit and hug the wall left until you reach a down ramp.
- At the bottom of the ramp, take your first right, and then your first left, which leads to another down ramp.
- At the bottom of the ramp, hug the wall right until you reach a 5-way intersection. Take the 2nd hall from the left.
- From here, head straight until you reach a dead end, where you'll find a few Drudge Slaves.
- Kill the slaves and loot the Worn Strange Key from one of their corpses.
Key #3: Worn Plain Key (Yanshi)
- From Yanshi, enter the Yanshi Tunnels at 12.2S, 45.5E,
- From the drop, hug the left wall until you reach a diamond shaped room, with a locked gate to the North, and several Drudge Slaves.
- Kill the Drudge Slaves and loot the Worn Plain Key from one of their corpses.
Key #4: Worn Old Key (Shoushi)
- From Shoushi, enter the Shoushi Grotto at 34.5S, 72.8E.
- From the drop, head straight, and take the ramp down into a larger rectangular room.
- Take the West exit, and then take the hallway on the right. Follow it until you descend a ramp.
- Hug the left wall until you reach a large room with some empty life stone foundations.
- From here, exit the room to the right, and continue straight ahead until you reach a Throne Room.
- Kill Drudge Slaves in this room until you find a Worn Old Key on one of their corpses.
Key #5: Worn Rusty Key (Samsur)
- From Samsur, enter the Dungeon Manor at 1.9S, 19.8E.
- From the drop, take the first right, and then left at the split. Continue down the ramp, into an open area.
- From here, hug the wall left, until you descend down a ramp into a larger room that contains a small chamber that houses a pedistle and floating gem.
- Kill Drudge Slaves until you find the Worn Rusty Key on one of their corpses.
Key #6: Worn Odd Key (Rithwic)
- From Rithwic, enter the Rithwic Crypt at 14.0N, 59.1E.
- From the drop, take your first right, enter the third door on the left, and go down the ramp.
- At the bottom, take a left and enter the room with three Desert Rats.
- Kill the rats and loot the Worn Odd Key from one of their corpses.
Key #7: A silvery, mysterious key (Al-Jalima)
- From Al-Jalima, enter the Carved Cave at 7.4N, 0.6E.
- From the drop, take the east hallway and then head straight into a large room.
- Loot the Carved Key from a chest in one of the smaller rooms to the left.
- Return to the drop, and this time take the west hallway until you reach a locked door.
- Use the Carved Key to unlock the door, head north on to the platform, and then jump across the to the north.
- Note: Do not jump into the pit directly front of you, jump across it on to the ledge.
- Loot the Small Carved Key from a chest in a small room to the east.
- Take the west ramp up, and hug the right wall until you reach a locked door.
- Use the Small Carved Key to open the door and head move to the ledge that extends from the east side.
- Jump diagonally to the adjacent ledge to the Southeast (tap jump).
- Note: If you fall, just take the ramp up to the West, and try again.
- Once across the jump, take the South ramp down, and follow the hallway until you reach a room with several stone pillars and a few Shadows.
- Loot A silvery, mysterious key from the Oak Chest on the south wall of this room.
- Use the Halls of the Lost Light portal to enter the final dungeon.
Part 8: Halls of the Lost Light
- If you didn't take the portal from Carved Cave, enter the Halls of the Lost Light at 76.5s, 74.9W near Candeth Keep.
- From the drop, take the left door on the south wall and hug the wall left, using the keys you obtained to open the appropriate doors as you go (If you take the right door, hug the right wall). The order of key use is as follows:
- Note: Order of key use is as follows: Worn Strange Key, Worn Small Key, Worn Old Key, Worn Plain Key, Worn Rusty Key, Worn Odd Key, A silvery, mysterious key.
- After using the Worn Odd Key, jump down, and as you head north, you'll reach a wooden door on the North wall with an old cloth banner hanging above it.
- Use A silvery, mysterious key to open the door and enter the final room and the end of the hallway.
- Kill the Guardian of the Lost Light, and loot the Sword of Lost Light and Superior Shield from its corpse!
- Note: The guardian drops 1 set per spawn. Respawn is 5 minutes.
Maps
| Dungeon | Coordinates | Wiki Map | ACmaps | Other | Quests |
| Holtburg Dungeon | 43.5N, 33.0E | -- | 01F6 | -- | -- |
| Yaraq Tunnels | 24.8S, 1.4W | -- | 01FB | -- | -- |
| Yanshi Tunnels | 12.1S, 45.6E | -- | 01D0 | -- | -- |
| Shoushi Grotto | 34.4S, 72.8E | -- | 01F7 | -- | -- |
| Dungeon Manor | 2.0S, 19.8E | -- | 01E8 | -- | -- |
| Rithwic Crypt | 14.0N, 59.1E | -- | 01CD | -- | -- |
| Carved Cave | 7.5N, 0.6E | -- | 018F | -- | -- |
| Halls of the Lost Light | 76.5S, 74.9W | -- | 01CE | -- | -- |
Items
| Rumors and Clues | ||||||||
| A note from Iquba | A Note from Tibri | A torn note | An odd note | |||||
| An old note | Crumpled Note | Rumor | ||||||
| Quest Items | ||||||||
| Worn Odd Key | Worn Old Key | Worn Plain Key | Worn Rusty Key | |||||
| Worn Small Key | Worn Strange Key | Small Carved Key | A silvery, mysterious key | |||||
| Quest Rewards | ||||||||
| Superior Shield | Sword of Lost Light | |||||||
Images
-
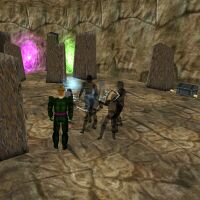
Entrance to the Halls of the Lost Light (Carved Cave)
-
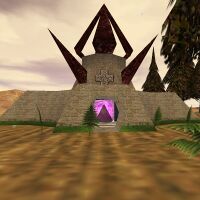
Entrance to the Halls of the Lost Light
-
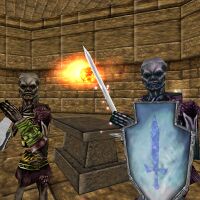
Guardian of the Lost Light


