Undead Temple: Difference between revisions
Jump to navigation
Jump to search
imported>Widgeon No edit summary |
imported>Arkalor No edit summary |
||
| Line 13: | Line 13: | ||
| Route = Run from [[Fiun Outpost]] | | Route = Run from [[Fiun Outpost]] | ||
| | | | ||
| Level Restrictions = | | Level Restrictions = None | ||
| Tieable = True | | Tieable = True | ||
| Recallable = True | | Recallable = True | ||
| Line 19: | Line 19: | ||
| Quest Flag = | | Quest Flag = | ||
| | | | ||
| Live Image = | | Live Image = Undead Temple Live.jpg | ||
| Live Image Caption = | | Live Image Caption = Portal to Undead Temple | ||
| | | | ||
| Link Map = True | | Link Map = True | ||
| Line 77: | Line 77: | ||
Click image for full size version. | Click image for full size version. | ||
<gallery heights=200px widths=200px perrow=3> | <gallery heights=200px widths=200px perrow=3> | ||
File:Undead Temple Live.jpg| | File:Undead Temple Live 2.jpg|Portal location is at the base of the Eastwatch mountain. | ||
File:Runic Door Guardian Live.jpg|Runic Door Guardian | File:Runic Door Guardian Live.jpg|Runic Door Guardian | ||
</gallery> | </gallery> | ||
Revision as of 22:32, 10 June 2012
| Maps NPCs Creatures Items and Objects Portals Images Update History |
|
 |
| |||||||||||||||||||||||||||||||||


General
To get to the final room with the Healing Machine Orb, you need to hand the Runic Skull from the Greater K'nath Lair to the Runic Door Guardian.
Maps
- Map available at ACMaps.com
- Wiki Map:
NPCs
- None
Creatures
Items and Objects
 Runic Door Guardian - see map
 Old Chest - see map
 Healing Machine Orb - in Old Chest see map
Portals
- Surface - near drop and at the end (see map)
Images
Click image for full size version.
-
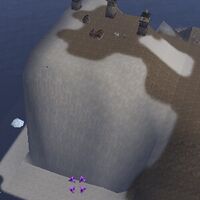 Portal location is at the base of the Eastwatch mountain.
 -
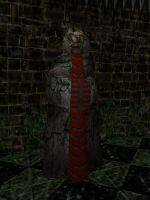 Runic Door Guardian

