Falatacot Medallion: Difference between revisions
imported>Tlosk m Text replace - " | Max XP Reward = " to " | Luminance Reward = | Max XP Reward = " |
imported>Arkalor No edit summary |
||
| Line 10: | Line 10: | ||
| Start Location = [[Kor-Gursha]] | | Start Location = [[Kor-Gursha]] | ||
| Timer = 6 days | | Timer = 6 days | ||
| Level Restrictions = 1-40 | | Level Restrictions = 1-40<br>41-80<br>81-120<br>120+ | ||
| Level Suggestions = | | Level Suggestions = | ||
| Item Rewards = | | Item Rewards = | ||
| Line 21: | Line 21: | ||
| Link Items = True | | Link Items = True | ||
| Link XP Rewards = True | | Link XP Rewards = True | ||
| Link Title Rewards = | | Link Title Rewards = True | ||
| Link Images = | | Link Images = True | ||
| Link Lore & Dialog = True | | Link Lore & Dialog = True | ||
| Link Notes = False | | Link Notes = False | ||
| Line 82: | Line 82: | ||
Go down, and take the corridor to the east, and keep going east (the corridor will circle), you will get another curve, and are facing westward into another big room. <br> | Go down, and take the corridor to the east, and keep going east (the corridor will circle), you will get another curve, and are facing westward into another big room. <br> | ||
This is were it can get nasty. Best is to try to try to lure the other creatures one by one to your corridor, until you get the boss lady herself for your group. | This is were it can get nasty. Best is to try to try to lure the other creatures one by one to your corridor, until you get the boss lady herself for your group. | ||
The Falatacot Madames are located deep deep in the Caverns and guarded by different minions. <br> | The Falatacot Madames are located deep deep in the Caverns and guarded by different minions. <br> | ||
| Line 89: | Line 88: | ||
81-120 has [[Tormented Consort]] and [[Tormented Patriarch]]; | 81-120 has [[Tormented Consort]] and [[Tormented Patriarch]]; | ||
120+ has [[Tormented Imperial Consort]] | 120+ has [[Tormented Imperial Consort]] | ||
== Maps == | |||
{{Dungeon Table | |||
| Table Rows = | |||
{{Dungeon Maps | |||
| Dungeon = Muggy Guruk Caverns | |||
| Coordinates = | |||
| Wiki Map File = | |||
| ACmaps ID = | |||
| Other Site Name = | |||
| Other Site Link = http://cdn.themis-media.com/media/sites/ac/images/maps/Muggy_Guruk_Caverns.jpg | |||
}} | |||
{{Dungeon Maps | |||
| Dungeon = Humid Guruk Caverns | |||
| Coordinates = | |||
| Wiki Map File = | |||
| ACmaps ID = | |||
| Other Site Name = | |||
| Other Site Link = http://cdn.themis-media.com/media/sites/ac/images/maps/Humid_Guruk_Caverns.jpg | |||
}} | |||
{{Dungeon Maps | |||
| Dungeon = Steamy Guruk Caverns | |||
| Coordinates = | |||
| Wiki Map File = | |||
| ACmaps ID = | |||
| Other Site Name = | |||
| Other Site Link = http://cdn.themis-media.com/media/sites/ac/images/maps/Steamy_Guruk_Caverns.jpg | |||
}} | |||
{{Dungeon Maps | |||
| Dungeon = Deep Guruk Caverns | |||
| Coordinates = | |||
| Wiki Map File = | |||
| ACmaps ID = | |||
| Other Site Name = | |||
| Other Site Link = | |||
}} | |||
}} | |||
== Items == | == Items == | ||
{{Item Table|Caption=Quest Items|Decorated Falatacot Medallion|Enameled Falatacot Medallion|Engraved Falatacot Medallion|Ornate Falatacot Medallion}} | {{Item Table|Caption=Quest Items|Decorated Falatacot Medallion|Enameled Falatacot Medallion|Engraved Falatacot Medallion|Ornate Falatacot Medallion}} | ||
== Experience Rewards == | == Experience Rewards == | ||
| Line 134: | Line 169: | ||
}} | }} | ||
== Images == | |||
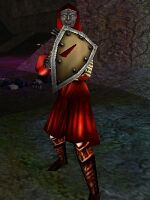
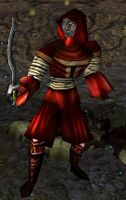
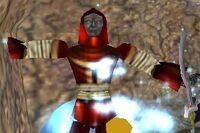
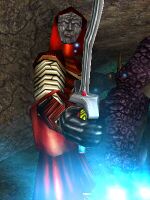
Click image for full size version. | |||
<gallery widths=200px heights=200px perrow=4> | |||
File:Abbess Kivit Live.jpg|Abbess Kivit | |||
File:Abbess Tir'Livik Live.jpg|Abbess Tir'Livik | |||
File:Matriarch Vik'Liri Di Live.jpg|Matriarch Vik'Liri Di | |||
File:Matriarch Mirta'kir Live.jpg|Matriarch Mirta'kir | |||
</gallery> | |||
== Lore & Dialog == | == Lore & Dialog == | ||
| Line 165: | Line 208: | ||
===Retired Interactions=== | ===Retired Interactions=== | ||
---- | |||
'''Showing him the [[Illuminated Falatacot Scroll]] gives:<br>''' | '''Showing him the [[Illuminated Falatacot Scroll]] gives:<br>''' | ||
<font color=green>You allow Gruuk'lar to examine your Illuminated Falatcot Scroll.<br></font> | <font color=green>You allow Gruuk'lar to examine your Illuminated Falatcot Scroll.<br></font> | ||
Revision as of 16:40, 24 September 2011
| Walk Through ___ Maps ___ Items ___ XP ___ Titles ___ Images ___ Lore & Dialog ___ |
| |||||||||||||||||||||||||||||||||||||||
Walk Through
Starting point
Talk to Gruuk'lar in Kor-Gursha. He'll tell you about the disappearance of Asheron and Torgluuk, and the Falatacot deep down in the Cavern appropriate to your level.
Levels and how to find the right dungeon
Travel to:
| Level | Catacomb | Cavern | to find |
| 1-40 | directly | Muggy Guruk Caverns | Abbess Kivit |
| 41-80 | Northern Catacombs | Humid Guruk Caverns | Abbess Tir'Livik |
| 81-120 | Eastern Catacombs | Steamy Guruk Caverns | Matriarch Vik'Liri Di |
| 120+ | Southern Catacombs | Deep Guruk Caverns | Matriarch Mirta'kir |
Navigation
To find the caverns: proceed as followed: The dungeon consists of organically shaped, circling huge rooms, which are connected by twisting corridors. Easy to lose your sense of direction here. However, except a room with a portal and a room to which I refer to as the "10 exit" room, most rooms have only one way in, and one way out. General idea is.. down is good.
Portal in. Behind you are exit portals, in front you can either go left or right. It doesn't matter which way, since the dungeon is symmetrical, but to keep it easy, go right first.
Run through the corridor, till you exit from the N into the first room. Hug the left wall, soon to your left (W) is the next corridor. It twists, and you exit from the W into the next room. Hug left again, and soon to the S is the next corridor. It twists, and you exit in a room where you see a portal exit. If you want to go on to the Cavern, go further down. Do not take the corridor on the other side of the portal, or you will indeed run in a circle.
Run half a circle N, till you see 3 trees. Opposite these trees are 2 corridors going S and down. It doesn't matter which one you take. The corridor goes down and up again, and you exit in the next circular room from the N. Run S in half a circle, take one of the 2 N going corridors.
You'll be in a corridor with pillars, which winds first N, then to the E. At a certain moment, you see a ramp to the S. This will turn quickly till you face N again, and exit in a huge circular room again, with a total of 10 exits.
Run half a circle again, till you see one of the 2 exits N, close to 2 exits S. Go down, and you'll be in a room with a ramp in the middle.
Go down ramp and in a corridor with pillars, a bit straight is portal to the Cavern of your level. Two exit portals here too.
The other exits in the "10 exit room": The E and W one twist till they split off. Go further S (and down) and it twists and you end back in room, go further E or W and you run through 2 rooms, second one has an exit portal. Two of the S exits have single, dead end rooms.
Navigating the Caverns and killing the Falatacot
General idea is: east.. east.. east and a bit north
From drop, head east and follow the corridor. At the first intersection, go left (N) into a big room with two ramps.
Go East down the ramp and keep going east till you can go into a corridor to the east. Follow this corridor with more ramps down, into another bigger room.
Go N, and at the end, go right into the corridor to the East (for the 120+, to the left, west, is one of the rooms where Bosh Bosh can spawn).
Hug the right wall, and another bigger room.
Go down, and take the corridor to the east, and keep going east (the corridor will circle), you will get another curve, and are facing westward into another big room.
This is were it can get nasty. Best is to try to try to lure the other creatures one by one to your corridor, until you get the boss lady herself for your group.
The Falatacot Madames are located deep deep in the Caverns and guarded by different minions.
1-40 has Tormented Servant;
41-80 has Tormented Attendant;
81-120 has Tormented Consort and Tormented Patriarch;
120+ has Tormented Imperial Consort
Maps
| Dungeon | Coordinates | Wiki Map | ACmaps | Other | Quests |
| Muggy Guruk Caverns | -- | -- | -- | [1] | -- |
| Humid Guruk Caverns | -- | -- | -- | [2] | -- |
| Steamy Guruk Caverns | -- | -- | -- | [3] | -- |
| Deep Guruk Caverns | -- | -- | -- | -- | -- |
Items
| Quest Items | ||||||||
| Decorated Falatacot Medallion | Enameled Falatacot Medallion | Engraved Falatacot Medallion | Ornate Falatacot Medallion | |||||
Experience Rewards
| Task Required | Max Experience | Percentage & Level Cap | |||
| Turn in Decorated Falatacot Medallion (1-40) | 350,000xp |
??% up to level ?? | |||
|
| |||||
| Turn in Enameled Falatacot Medallion (41-80) | 4,000,000xp |
??% up to level ?? | |||
|
| |||||
| Turn in Engraved Falatacot Medallion (81-120) | 20,000,000xp |
??% up to level ?? | |||
|
| |||||
| Turn in Ornate Falatacot Medallion (120+) | 60,000,000xp |
??% up to level ?? | |||
|
| |||||
| See Level Costs for per level information. | |||||
Title Rewards
| Task Required | Title Reward |
| Turn in a Falatacot Medallion to Gruuk'lar | Ruuk Ally |
|
| |
| See Titles for a list of all available titles. | |
Images
Click image for full size version.
-
Abbess Kivit
-
Abbess Tir'Livik
-
Matriarch Vik'Liri Di
-
Matriarch Mirta'kir
Lore & Dialog
Gruuk'lar tells you, "Greetings, traveler from Dereth."
Gruuk'lar tells you, "Don't look too surprised that I know your language. We've had one of your people here for some time, teaching us of your ways. Teaching us of this metal you call 'Pyreal' and of how to engage in 'Commerce'."
Gruuk'lar tells you, "But I digress. I'm no gatherer or 'merchant' to trade in such things. I'm a guardian of this small Tribe, and my Clutch helps protect and hide this place from the others."
Gruuk'lar tells you, "There are four caverns which have become connected to this cavern via magic, "Portals" I have heard them called. They appeared the same time Torgluuk and Asheron disappeared, and occasionally Guruk come through them to attack us. I have sent hunters from my Clutch, but none have returned, and I can't afford to send more, as we must be ready to defend the village."
Gruuk'lar tells you, "These Guruk who attack us seem to be being controlled by those your people call Falatacot. The False Gods of our hated Fiazhat enemies. Travel into these 'Portals', destroy these False Gods, and bring proof of their demise to me, and I will reward you."
Gruuk'lar looks you over.
Gruuk'lar tells you, "There is a portal to the Southern Catacombs, down the tunnel to the Northeast of here. In the depths of those catacombs, you will find the portal to the Deep Guruk Caverns."
Gruuk'lar tells you, "Have you had any success in destroying the Falatacot who seek to control our world?"
Gruuk'lar tells you, "There is a portal to the Southern Catacombs, down the tunnel to the Northeast of here. In the depths of those catacombs, you will find the portal to the Deep Guruk Caverns."
Turning in a Decorated Falatacot Medallion
You give Gruuk'lar Decorated Falatacot Medallion.
Gruuk'lar looks the medallion over, sniffing at it.
Gruuk'lar tells you, "There is strange magic on this. I will send it to our Shaman, and see what they can learn from it. Thank you. It is a clue, and with it, we may be able to track down more information."
Gruuk'lar tells you, "Take this."
You've earned 363,999 experience.
Gruuk'lar declares you an ally of the Ruuk.
Turning in a Ornate Falatacot Medallion
You give Gruuk'lar Ornate Falatacot Medallion.
Gruuk'lar looks the medallion over, sniffing at it.
Gruuk'lar tells you, "There is strange magic on this. I will send it to our Shaman, and see what they can learn from it. Thank you. It is a clue, and with it, we may be able to track down more information."
Gruuk'lar tells you, "Take this."
You've earned 60,000,000 experience.
Gruuk'lar declares you an ally of the Ruuk.
Retired Interactions
Showing him the Illuminated Falatacot Scroll gives:
You allow Gruuk'lar to examine your Illuminated Falatcot Scroll.
Gruuk'lar tells you, "I cannot read these strange Fiazhat symbols, and looking at it brings pain to my eyes. Do you know any of your people that can translate such old and forbidden runes? I believe your people refer to the Fiazhat 'Gods' as Falatacot."
Gruuk'lar tells you, "If this scroll you have found can aid us in finding Torgluuk and his companion, Asheron, My people will honor and reward you for a translation of it."
After translating it by Fanzen San in Hebian-To, he tells you to either bring it to Gruuk'lar or to Hasin Lin in Sawato:
You give Fanzen San the Translator Illuminated Scroll.
Fanzen San the Translator tells you, "Oh my! Where did you get this?"
You explain to Fanzen San about your travels to Bur, and about the Ruuk Village."
Fanzen San the Translator tells you, "This note is very disturbing. If you took it from one to whom it was addressed, then you have repaid one small revenge for Asheron."
Fanzen San the Translator tells you, "I will not tell you what to do with this translation, but I'd like to suggest that Hasin Lin, in Sawato, may be able to make use of this information to find Asheron."
Fanzen San the Translator tells you, "Take it to Hasin Lin, or that Ruuk Village Guardian, Gruuk'lar. The choice is up to you."
Though now retired, this scroll gave you the title of "Seeker of Torgluuk" (giving it to Gruuk'lar) or "Seeker of Asheron" (handing in to Hasin Lin):
You give Gruuk'lar Translated Falatacot Scroll.
Gruuk'lar looks over the translated scroll.
Gruuk'lar tells you, "You are resourceful traveler from Dereth. Very resourceful.
Gruuk'lar tells you, "With this, and what clue others have bought in, we should be able to track down Torgluuk's location, and set him free. Either we will find your Asheron there as well, or Torgluuk will know more. Take this, as a reward for your aid."
You've earned 30,000,000 experience.
Gruuk'lar declares to the village that you have aided in the seeking of Torgluuk, and are to be remembered for it.
You give Hasin Lin Translated Falatacot Scroll.
Hasin Lin looks over the translated scroll.
Hasin Lin tells you, "You found this on Bur?"
You tell Hasin Lin about your dealing on Bur, and of the Ruuk, Gruuk'lar.
Hasin Lin tells you, "A grand tale. I will take this and look into it. Perhaps, with some investigation, I can use this to find Asheron's location on Bur. Allow me to reward you."
You've earned 30,000,000 experience.
Hasin Lin awards you the title, Seeker of Asheron.


