Quest Overview
Complete 4 seperate dungeons, the Charged Niche, Fiery Alcove, Frozen Recess and the Stinging Corner and defeat the boss at the end of each to collent 4 seperate Signet Fragment pieces.
Walk Through
- The Fiery Alcove is locted The 91.6n, 46.8e, located on Aerlinthe island.
- Loot a Signet Fragment (Charged Niche) piece and head to the next dungeon.
- The Fiery Alcove is locted The 79.1s, 90.1e, a short run from Kryst.
- The drop iside the dungeon is safe.
- The dungeon is not long but has a Elevated Platform room that requires you to navigate from one side all the way around to an elevated doorway the other side by jumping.
- If you happen to fall, use either of the exit halls to run back up to the top, all paths leads directly back to same area at the top.
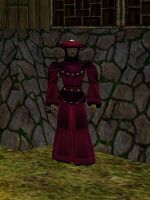
- Once you have successfully jumped across the room and landed inside the doorway on the other side you will see the Bak'tshay Keeper in the nest room.
- Talk to the Bak'tshay Keeper and a he becomes attackable, the door into the room will lock behind you and 3 Infectious Rats will also spawn.
- Defeat the Bak'tshay Keeper and once killed will drop a Bak'tshay Keepers Treasure containing several Signet Fragment (Fiery Alcove) pieces.
- Loot a Signet Fragment (Fiery Alcove) piece and head to the next dungeon.
- The Frozen Recess is locted The 95.0n, 39.1w, a short run from Eastwatch.
- Loot a Signet Fragment (Frozen Recess) piece and head to the next dungeon.
- The Stinging Corner is locted The 95.3s, 89.7w, located on Singularity Caul.
- Loot a Signet Fragment (Stinging Corner) piece and head to the next dungeon.
Maps
Items
Experience Rewards
| Task Required
|
First Run Max Experience
|
Percentage & Level Cap
|
Repeated Run Max XP
|
Repeated Run Percentage & Level Cap
|
|
|
400,000,000xp
|
??% up to level ??
|
|
| See Level Costs for per level information.
|
| Task Required
|
Max Experience
|
Percentage & Level Cap
|
|
|
??
|
??% up to level ??
|
|
| See Level Costs for per level information.
|
Title Rewards
| Task Required
|
Title Reward
|
|
|
'
|
|
| See Titles for a list of all available titles.
|
Images
Click image for full size version.
Lore & Dialog
Notes
 Fiery Alcove Jumping Room


