Slave Master Quest
| Walk Through ___ Maps ___ Items ___ XP ___ Lore & Dialog ___ |
| |||||||||||||||||||||||||||||||||||||||
Quest Overview
This quest is the original quest at the Lost City of Neftet. It features the prominent temple up on the cliffs for the final dungeon. Due to having to repeat the flagging portion each time, this quest tends to not be very popular.
Walkthrough
Part 1: Sand Caves Flagging
- Go to the Encampment near Neftet at 22.2S, 6.2E. Speak to Nephthys inside the tent to get the Scrying Rod.
- Route: Run east from Yaraq or use City of Neftet Recall.
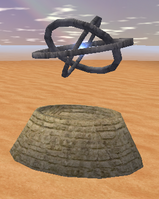
- Use the Scrying Rod on top of the cliffs. This will cause a Mu-miyah Device to spawn, and when it does, use the device to flag for the next stage of the quest. You will get a message about it shocking you. The device moves around, and can be found at 1 of 4 locations. When you use the rod near one of the possible areas, if it is the wrong area you will get a green message saying"You hear the wind blow through the canyons... and then nothing." If it is the correct one, no message will show but the device will spawn (potentially behind you).
- 21.7S 8.0E
- 20.0S 7.1E
- 21.7S 7.4E
- 19.8S 8.0E
- Here is a very handy map (created by Rhesus I believe) which highlights the Device spawing locations Neftet Potential Device Sites
- Important Note: A common pitfall on this quest is not being able to find the device up on the cliffs. Note that the message about the "wind whipping through the chasms" is given at each of the possible locations where the device can spawn. Many people get the message and believe they are in the correct location when they really are not. A good strategy is to go the exact coordinates shown above and use the Scrying Rod 2-3 times within those coordinates. If the device does not spawn, move on to the next coordinate location.
- Return to the tent and talk to Nephthys to receive the first reward (160,000,000 xp and 10,000 Luminance).
Part 2: Temple Flagging
- Now you need to go into the Sand Caves dungeon. There are multiple portals found on top of the cliffs along the western edge that all drop at the same place (safe drop).
- There are multiple portals which drop at different locations within the dungeon. This appears somewhat random, but has been stated by the devs that it is not fully random. The exact mechanics of how the portals work is unconfirmed.
- Run around the dungeon until you find a room with a Mu-miyah Soothsayer and Mu-miyah Channeller. There are 5 possible rooms where they can spawn and the dungeon is a maze with rocks that randomly spawn to block passages. The dungeon is filled with Mu-miyah, Armoredillos, A'nekshay, and Golems. The dungeon portal is recallable if you die.
- Loot Red Destabilizing Crystal and Yellow Destabilizing Crystal off the Soothsayer and Channeller. There are 9 of each crystal per spawn.
- Leave the dungeon and find the Mu-miyah Device again using the Scrying Rod. It may or may not be in the same location as previously.
- Hand the crystals to the device and it will give you the second reward (160,000,000 xp, 10,000 luminance) and flag you for Temple entrance. Nephthys will spawn next the device and direct you to enter the temple. Speaking to her is not required.
Part 3: Inside the Temple
- Now go to the Temple dungeon portal (Portal is recallable) on top of one of the cliffs (the ramp is at 20.6S, 7.9E).
- Kill every creature on the lower levels in order to open the doors to the wings at the top of the stairs above the huge statue. The only creatures in the dungeon are Mu-miyah and A'nekshay.
- Note: The doors will only stay open for 20 minutes.
- Once you reach the upstairs area, kill every creature in the wings. Notice that all the creatures in the wings drop keys to tier 7 loot chests also located in the wings. Loot 4 different keys: Mixed, Magic, Weapons, and Armor.(6 day timer)
- Note: You do not need to collect the keys. They do nothing but open the loot chests.
- Once the creatures in the wings are all dead the doors to the next level will open.
- Note: It appears that only the Mu-miyah Grand Vizier and Bak'tshay Lady trigger the final set of doors. There is no need to clear the upper wings completely if these creatures can be killed. However, it is very difficult to kill them without killing everything else.
- Go back to the top of the main stairway, enter the final set of doors, and kill the Mu-miyah Slave Master. When you attack him a bunch of guards will spawn but focus on the Slave Master because the guards disappear when the Slave Master dies. The doors to the room close when you attack him, but will open again when he dies.
- Use the bookcase in the room on the left to spawn the reward NPC in the room on the right. Note that the NPC does not appear on the radar.
- Talk to him for the final reward (160,000,000 xp, 10k Luminance and a 4 use Legendary Key.
- Quickly run to the beginning of the dungeon and take the right hallway (from the entrance) on the first floor. You'll find a path that was previously blocked by books. Now that it's cleared, run down the hall to pick up a Large Tome which is part of the Strathelar Royal Cloak Quest.
Maps
| Dungeon | Coordinates | Wiki Map | ACmaps | Other | Quests |
| Sand Caves | 21.7S 7.8E or 20.0S 7.1E or 21.7S 7.4E | -- | -- | -- | -- |
| Temple | 20.7S, 07.8E | -- | -- | -- | -- |
Items
| Quest Items | ||||||||
|
|
Scrying Rod |
|
Mu-miyah Device |
|
Red Destabilizing Crystal |
|
Yellow Destabilizing Crystal | |
|
|
Large Tome | |||||||
| Chest Keys | ||||||||
|
|
Sandstone Mixed Key |
|
Sandstone Armor Key |
|
Sandstone Weapon Key |
|
Sandstone Magic Key | |
| Rewards | ||||||||
|
|
Legendary Key | Book 4: Further Manipulations of Time | ||||||
| Objects | ||||||||
|
|
Mixed Equipment Chest (Sand Temple) |
|
Armor Chest (Sand Temple) |
|
Weapon Chest (Sand Temple) |
|
Magic Chest (Sand Temple) | |
| Items | ||||||||
|
|
Chorizite Chest | |||||||
Experience Rewards
| Task Required | Max Experience | Percentage & Level Cap | |||
| Find the Device | 160,000,000xp |
Fixed XP | |||
|
| |||||
| Turn in the red and yellow crystals to the device | 160,000,000xp |
Fixed XP | |||
|
| |||||
| Kill the Slave Master | 160,000,000xp |
Fixed XP | |||
|
| |||||
| See Level Costs for per level information. | |||||
Images
Click image for full size version.
-
-
 Entrance to the Temple Dungeon
 -
 Room with the tier 7 loot chests
 -
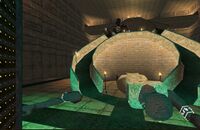 Main room in the Temple Dungeon


Lore & Dialog
Nephthys tells you, "The Sand Kings took control of our temple and began enslaving our people inside. Those of us who have managed to stay out of their grasp have not been able to gain access. Our hopes of freeing them have slowly turned to despair."
Nephthys gives you Scrying Rod.
Nephthys tells you, "My research has led me to believe that the Mumiyah have a hidden device somewhere in these cliffs that is blocking our entry."
Nephthys tells you, "I have been working on a Scrying Rod which may allow us to discover the device in hopes of figuring out a way to disable it. Unfortunately, I have yet to be able to locate their device as I fear they move it regularly."
Nephthys tells you, "Please, take this Scrying Rod and see if you can find that device and hopefully bring us one step closer to our freedom."
You hear the wind blow through the canyons... and then nothing.
As you reach out and touch the device a small shock strikes your hand.
Nephthys tells you, "The device has been discovered? Excellent. Now I must discover a way to disable it."
Nephthys gives you Mana Forge Key.
You've earned 5,000 Luminance.
You've earned 80,000,000 experience.
Nephthys tells you, "We have discovered some caves at the western cliffs. I am hoping that there may be something useful in those caves that will allow us to better understand the device or even show us how to disable it."
Nephthys tells you, "If you do discover something that may allow you to disable it do not waste time coming back here. Instead disable the device immediately."
You allow Mu-miyah Device to examine your Yellow Destabilizing Crystal.
Using both pieces of the destabalizer you manage to interupt the energy field within the device.
You hand over all of your Red Destabilizing Crystals.
You hand over all of your Yellow Destabilizing Crystals.
You hand over all of your Scrying Rods.
You've earned 5,000 Luminance.
You've earned 80,000,000 experience.
Nephthys tells you, "Excellent work on destabilizing the device. Now we must find a way into the temple."
Nephthys tells you, "We have figured out a way into the temple at last."
Nephthys tells you, "There is no telling what awaits in there. Proceed with extreme caution."
Hatshepsut tells you, "I am not sure where you came from but I certainly appreciate you freeing me from this place."
Hatshepsut tells you, "Those Mumiyah simply came out of no where without any warning and enslaved so many of my people."
Hatshepsut tells you, "I can't thank you enough."
Hatshepsut gives you Mana Forge Key.
You've earned 5,000 Luminance.
You've earned 80,000,000 experience.
Hatshepsut tells you, "Thank you for freeing me from this prison. I am truly grateful."
Nephthys tells you, "Thank you for defeating the Slave Master. Maybe this will be the beginning of peace for our people."
You must wait 5d 23h 55m 31s to complete this quest again.
Update History
- During Balance of Power event the Braced Mana Forge Key was upgraded to a 4 use Legendary Key.
- During The Risen Princess event the Neftet Sand Temple quests' reset timer, as well as its rewards were doubled.
- Part 1 - The Sand Caves Flagging rewards were increased as follows;
- XP was increased to 160,000,000 from 80,000,000.
- Luminance was increased to 10.5k from 5k.
- A Braced Mana Forge Key is now the reward instead Mana Forge Key.
- Part 1 - The Sand Caves Flagging rewards were increased as follows;
- During the Stirrings in the Dark event the Stairs in the Temple had a texture update.
- As part for the Spring 2014 update complete this quest then talk to Summercrown to acquire the Luminous Amber of the 8th Tier Paragon.