Aerbax's Prodigal Harbinger: Difference between revisions
imported>Arkalor |
imported>Darkmurkrow No edit summary |
||
| (27 intermediate revisions by 4 users not shown) | |||
| Line 1: | Line 1: | ||
{{ | {{Related|Harbinger Quest}} | ||
{{Aerbax's Prodigal Quest Links}} | |||
{{Quest Summary | {{Quest Summary | ||
| Patch Introduced = [[Dark Materials]] | | Patch Introduced = [[Dark Materials]] | ||
| Related Quests = [[Harbinger Quest]] | | Related Quests = [[Harbinger Quest]] | ||
| Updated = | | Updated = [[Risks and Rewards]] | ||
| | | | ||
| Live Image = Prodigal Harbinger Live.jpg | | Live Image = Prodigal Harbinger Live.jpg | ||
| Line 10: | Line 11: | ||
| Kill Task = False | | Kill Task = False | ||
| Start Location = [[Singularity Caul]] | | Start Location = [[Singularity Caul]] | ||
| Timer = | | Timer = 20 hours | ||
| Level Restrictions = None | | Level Restrictions = None | ||
| Level Suggestions = 150+ | | Level Suggestions = 150+ | ||
| Contracts = | |||
| Item Rewards = [[Harbinger's Foci]]<br>[[Harbinger Blood Infusion]]<br>[[Gem of Harbinger's Acid Barrier]]<br>[[Gem of Harbinger's Flame Barrier]]<br>[[Gem of Harbinger's Lightning Barrier]]<br>[[Gem of Harbinger's Frost Barrier]]<br>[[Braced Mana Forge Key]] | | Item Rewards = [[Harbinger's Foci]]<br>[[Harbinger Blood Infusion]]<br>[[Gem of Harbinger's Acid Barrier]]<br>[[Gem of Harbinger's Flame Barrier]]<br>[[Gem of Harbinger's Lightning Barrier]]<br>[[Gem of Harbinger's Frost Barrier]]<br>[[Braced Mana Forge Key]] | ||
| Luminance Reward = 15,000 | |||
| MMD Reward = 6 | |||
| Max XP Reward = 504,519,100 | | Max XP Reward = 504,519,100 | ||
| Titles = Prodigal Harbinger Slayer (Killer Only)<br>Storm Rider<br>Blood Seeker<br>Vile Betrayer<br>Meddler<br>Spy | | Titles = Prodigal Harbinger Slayer (Killer Only)<br>Storm Rider<br>Blood Seeker<br>Vile Betrayer<br>Meddler<br>Spy | ||
| Line 27: | Line 31: | ||
}} | }} | ||
== Quest Overview == | == Quest Overview == | ||
# If you have ''never'' done any version of the original [[Harbinger Quest]], you will need a [[Harbinger Item]] to gain access to the Tunnels to the Harbinger. | # If you have ''never'' done any version of the original [[Harbinger Quest]], you will need a [[Harbinger Item]] to gain access to the Tunnels to the Harbinger. | ||
# | # The [[Harbinger Item]] you turn in makes no difference, because unlike the original quest, no XP is earned based which item you turn in. | ||
# Prodigal Harbinger does not share a timer with the other Harbinger quests. | |||
== Walk Through == | == Walk Through == | ||
=== Part 1: Retrieving the Elemental Talisman === | |||
# Everyone needs an [[Elemental Talisman]] in order to access the Prodigal Harbinger's lair. | |||
# The Talisman is found in the [[Artifex Collegium]] dungeon located on the north part of the [[Singularity Caul]] at 91.9S, 93.7W. You will only need to do this once, as you can use the same talisman for repeat runs. | |||
# Once inside the collegium, head north and take the east passage from the first large room you enter. From there, it's a linear path to the room with the [[Artifex of the Elements]] and the talisman (found on the floor). The Artifex drops the text [[Message to the Elemental Artifex]]. | |||
=== Part | === Part 2: Tunnels to the Harbinger === | ||
# Just like the | # Just like the other [[Harbinger Quest]]s, start by entering the [[Tunnels to the Harbinger]], located next to [[Issk]] at 12.9S, 46.5E or [[Vincadi]] at 12.6S 46.7E. | ||
#* '''Note:''' If you enter the Issk side, you are restricted from entering the Vincadi side and vice versa. Make sure everyone in your fellowship hands their item to the same NPC. | #* '''Note:''' If you enter the Issk side, you are restricted from entering the Vincadi side and vice versa. Make sure everyone in your fellowship hands their item to the same NPC. | ||
# Once inside, the dungeon is linear to the bottom (keep heading down). The only obstacles are a series of 5 jumps that must be made. | # Once inside, the dungeon is linear to the bottom (keep heading down). The only obstacles are a series of 5 jumps that must be made. | ||
| Line 40: | Line 48: | ||
#* '''Jump 2: Lava Pit''' - Jump into the pit and take the hallway to the North | #* '''Jump 2: Lava Pit''' - Jump into the pit and take the hallway to the North | ||
#* '''Jump 3: Ice Shelf ''' - Shift-jump down onto the platform above the ice shelf, clear the spawn, and wait for your group. | #* '''Jump 3: Ice Shelf ''' - Shift-jump down onto the platform above the ice shelf, clear the spawn, and wait for your group. | ||
#* '''Jump 4: Ice/Acid Pit Combo''' - | #* '''Jump 4: Ice/Acid Pit Combo''' - Dispel, then shift Jump down onto the ice shelf and '''quicky''' run to the edge and full jump across the acid pit (land on invisible platform). The ice ''hurts'', so be quick. | ||
#* '''Jump 5: Staging Area''' - Shift jump down and quickly move to the south (near the portals). | #* '''Jump 5: Staging Area''' - Shift jump down and quickly move to the south (near the portals). | ||
# This is a good place to rebuff if needed; if not use the [[Essence Chambers]]. | # This is a good place to rebuff if needed; if not use the [[Essence Chambers]] portal. | ||
#* '''Warning:''' Do NOT accidentally use the other portal! | |||
# After using the portal it is imperative that you look behind you and find a [[Hollow]] on the wall. | # After using the portal it is imperative that you look behind you and find a [[Hollow]] on the wall. | ||
#* '''Important:''' It cannot be selected by using Next/Closest Item keys; it can only be seen by hovering over it with your mouse, using a program that enables Dungeon Light will make this easier. | #* '''Important:''' It cannot be selected by using Next/Closest Item keys; it can only be seen by hovering over it with your mouse, using a program that enables Dungeon Light will make this easier. | ||
# After everyone has found the [[Hollow]], and can easily recognize and find it again, everyone needs to take their [[Elemental Talisman]] and give it to four [[Hollow]]s. Each of these four are located behind each of the four Essences. If you give it to the hollow successfully there will be a message in green verifying as much. | # After everyone has found the [[Hollow]], and can easily recognize and find it again, everyone needs to take their [[Elemental Talisman]] and give it to four [[Hollow]]s. Each of these four are located behind each of the four Essences. If you give it to the hollow successfully there will be a message in green verifying as much. | ||
#* '''Note:''' It is a good idea to tell your group NOT to use any portals in this area. It's possible that portals from a previous group will still be spawned. The portals also spawn after killing all 4 essences. These portals are NOT for the Prodigal Harbinger! | |||
#:<font color=green>You allow Hollow to examine your Elemental Talisman.</font><br> | #:<font color=green>You allow Hollow to examine your Elemental Talisman.</font><br> | ||
#:<font color=green>You place the Elemental Talisman in the hollow and its blue gem shines with cold blue light.</font><br> | #:<font color=green>You place the Elemental Talisman in the hollow and its blue gem shines with cold blue light.</font><br> | ||
| Line 54: | Line 64: | ||
#:<font color=green>You allow Hollow to examine your Elemental Talisman.</font><br> | #:<font color=green>You allow Hollow to examine your Elemental Talisman.</font><br> | ||
#:<font color=green>You place the Elemental Talisman in the hollow and its green gem glows with caustic green light.</font><br> | #:<font color=green>You place the Elemental Talisman in the hollow and its green gem glows with caustic green light.</font><br> | ||
# Ignore the portals which appear after all 4 essences have been killed. These portals are for the Essenceless Harbinger, not Prodigal! | |||
# Return to the drop and hand the last talisman to the wall right right behind you. You will be portaled into [[Prodigal Harbinger's Antechamber]]. | # Return to the drop and hand the last talisman to the wall right right behind you. You will be portaled into [[Prodigal Harbinger's Antechamber]]. | ||
#:<font color=green>You allow Hollow to examine your Elemental Talisman.</font><br> | #:<font color=green>You allow Hollow to examine your Elemental Talisman.</font><br> | ||
#:<font color=green>As you place the Elemental Talisman into the hollow you hear a distant unearthly cry. The wall quakes gelatinously and you are suddenly pulled through its horrible fleshy surface.</font><br> | #:<font color=green>As you place the Elemental Talisman into the hollow you hear a distant unearthly cry. The wall quakes gelatinously and you are suddenly pulled through its horrible fleshy surface.</font><br> | ||
=== Part | === Part 3: Prodigal Harbinger's Antechamber === | ||
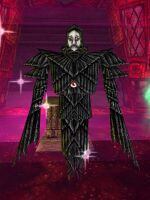
# You will be teleported to one of four alcoves, overlooking [[Harbinger#Prodigal Version|Harbinger]] and several of his Elemental minions. | # You will be teleported to one of four alcoves, overlooking [[Harbinger#Prodigal Version|Harbinger]] and several of his Elemental minions. | ||
#* '''Note:''' Be careful, it is possible to take damage from the frozen cold when standing here. | #* '''Note:''' Be careful, it is possible to take damage from the frozen cold when standing here. | ||
# From here, its best to debuff everything in the room before jumping down. | # From here, its best to debuff everything in the room before jumping down. | ||
#* '''Note:''' Once Harbinger is attacked, anyone who enters [[Prodigal Harbinger's Antechamber]] will be portaled directly into the pit with Harbinger. | #* '''Note:''' Once Harbinger is attacked, anyone who enters [[Prodigal Harbinger's Antechamber]] will be portaled directly into the pit with Harbinger. | ||
# Once you kill [[Harbinger]], loot | # The Prodigal Harbinger battle is slightly different than the other Harbinger battles. | ||
#* Archers and mages should kill any Pillars that spawn immediately! These are dangerous. | |||
# | #* Melees should kill any elementals that spawn. They spawn off and on during the battle. | ||
# | #* Use physical damage types on the Harbinger (bludge/pierce/slash) or an elemental slayer Atlan/Isparian weapon if you have one. | ||
#* Do not stand in the pools that randomly spawn in the room as you will take damage. | |||
#* Watch out for rolling balls of death! They can spawn randomly and roll through the room. | |||
# '''Important:''' If anyone dies while fighting the Harbinger, portal recall and then run back to whatever portal you used to get into the Harbinger's Lair (near either Issk or Vincadi). Use the portal and answer 'Yes' when it prompts you to return to the boss room. | |||
# Once you kill [[Harbinger]], loot a [[Corrupted Harbinger Blood]] from the floor and use the surface portal that spawns nearby. You MUST use the surface portal to flag for the rewards. | |||
==== Rewards ==== | |||
# <font color="green">[Optional]</font> Hand the Corrupted Harbinger Blood to [[Vincadi]] to receive a random chance of 3 different titles (Vile Betrayer, Spy or Meddler) and a drop to [[Fort Tethana]]. He also gives you the blood back so you can turn it in to either [[Emissary of Asheron]] or [[Issk]] (see below). You can portal recall after landing in Fort Teth to quickly get back to the Emissary and Issk. | |||
# There are 2 options for getting rewards for turning in the Blood. Both give the same amount of experience and luminance. The possible item rewards and titles differ. | |||
# <font color="green">[Option 1]</font> Hand the Corrupted Harbinger Blood to the [[Emissary of Asheron]], located at 12.7S, 46.4E, next to the [[Stone of Yanshi]], for a gem, experience, luminance, key, the title ''"Storm Rider"'' and a [[Harbinger's Foci]]. You can hand the foci back for an additional 10% xp. | |||
# <font color="green">[Option 2]</font> Alternatively, you can hand your Corrupted Harbinger Blood to [[Issk]] at 12.9S, 46.5E to receive a gem, experience, luminance, key, the title ''"Blood Seeker"'', and a [[Harbinger Blood Infusion]]. You can hand the infusion back for an additional 10% xp. | |||
# Whoever landed the killing blow on the Harbinger will also automatically receive the title ''"Prodigal Harbinger Slayer"''. | |||
== Maps == | == Maps == | ||
| Line 90: | Line 112: | ||
== Items == | == Items == | ||
{{Item Table | {{Item Table|Caption=Quest Items | ||
|Caption=Quest Items | | Elemental Talisman | ||
| Corrupted Harbinger Blood | |||
|Elemental Talisman | |||
|Corrupted Harbinger Blood | |||
}} | }} | ||
{{Item Table | {{Item Table|Caption=Rewards | ||
|Caption=Rewards | | Gem of Harbinger's Acid Barrier | ||
| Gem of Harbinger's Flame Barrier | |||
|Gem of Harbinger's Acid Barrier | | Gem of Harbinger's Frost Barrier | ||
|Gem of Harbinger's Flame Barrier | | Gem of Harbinger's Lightning Barrier | ||
|Gem of Harbinger's Frost Barrier | | Harbinger Blood Infusion | ||
|Gem of Harbinger's Lightning Barrier | | Harbinger's Foci | ||
|Harbinger Blood Infusion | | Braced Mana Forge Key | ||
|Harbinger's Foci | |||
| | |||
}} | }} | ||
| Line 171: | Line 176: | ||
== Images == | == Images == | ||
<gallery widths=200px heights=200px perrow=3> | <gallery widths=200px heights=200px perrow=3> | ||
File:Artifex of the Elements Live.jpg|Artifex of the Elements | |||
File:Harbinger's Foci Live.jpg|Harbinger's Foci | |||
</gallery> | </gallery> | ||
| Line 185: | Line 190: | ||
<font color=green>You allow Vincadi to examine your Elemental Talisman.</font><br> | <font color=green>You allow Vincadi to examine your Elemental Talisman.</font><br> | ||
<font color=darkgoldenrod>Vincadi tells you, "This device... looks like an item I saw that Sclavus giving the Blood Witch. Perhaps you should investigate Issk further."</font><br> | <font color=darkgoldenrod>Vincadi tells you, "This device... looks like an item I saw that Sclavus giving the Blood Witch. Perhaps you should investigate Issk further."</font><br> | ||
---- | ---- | ||
| Line 219: | Line 215: | ||
<font color=darkgoldenrod>Vincadi tells you, "How did you obtain this substance? Have you been sneaking around the Essence Chambers?"<br> | <font color=darkgoldenrod>Vincadi tells you, "How did you obtain this substance? Have you been sneaking around the Essence Chambers?"<br> | ||
Vincadi tells you, "Has the Blood Witch sent you to disrupt our experiments? Begone "Spy"!"</font> | Vincadi tells you, "Has the Blood Witch sent you to disrupt our experiments? Begone "Spy"!"</font> | ||
---- | |||
<font color=green>You allow Vincadi to examine your Corrupted Harbinger Blood.</font><br> | |||
<font color=darkgoldenrod>Vincadi tells you, "How did you obtain this substance? Have you been sneaking around the Essence Chambers?"<br> | |||
Vincadi tells you, "Has the Blood Witch sent you to disrupt our experiments? Begone "Meddler"!"</font> | |||
---- | ---- | ||
| Line 227: | Line 229: | ||
<font color=darkgoldenrod>Emissary of Asheron tells you, "Lord Asheron must be informed of this immediately. Here take these trinkets I have gathered from the brave people who have fought the Harbinger and may those you meet know that you are a "Storm Rider.""</font><br> | <font color=darkgoldenrod>Emissary of Asheron tells you, "Lord Asheron must be informed of this immediately. Here take these trinkets I have gathered from the brave people who have fought the Harbinger and may those you meet know that you are a "Storm Rider.""</font><br> | ||
<font color=green>Emissary of Asheron gives you Harbinger's Foci.</font><br> | <font color=green>Emissary of Asheron gives you Harbinger's Foci.</font><br> | ||
<font color=green>You've earned 140,127,753 experience. | <font color=green>You've earned 140,127,753 experience.</font><br> | ||
<font color=green>You've earned 302,711,100 experience. | <font color=green>You've earned 302,711,100 experience.</font><br> | ||
<font color=green>Emissary of Asheron gives you Gem of Harbinger's Acid Barrier.</font><br> | <font color=green>Emissary of Asheron gives you Gem of Harbinger's Acid Barrier.</font><br> | ||
<font color=green>Emissary of Asheron gives you Braced Mana Forge Key.</font><br> | <font color=green>Emissary of Asheron gives you Braced Mana Forge Key.</font><br> | ||
---- | ---- | ||
| Line 273: | Line 244: | ||
<font color=green>Issk gives you Gem of Harbinger's Frost Barrier.</font><br> | <font color=green>Issk gives you Gem of Harbinger's Frost Barrier.</font><br> | ||
<font color=green>Issk gives you Braced Mana Forge Key.</font><br> | <font color=green>Issk gives you Braced Mana Forge Key.</font><br> | ||
<font color=green>You allow Issk to examine your Harbinger Blood Infusion.</font><br> | |||
<font color=darkgoldenrod>Issk tells you, "You do not wish to partake of the Harbinger's Blood?"</font><br> | |||
<font color=green>Issk's eye slits expand in surprise. In an eager voice he speaks almost to quickly to understand.</font><br> | |||
<font color=darkgoldenrod>Issk tells you, "I would gladly exchange sssome ssecret knowledge with you for the blood."</font><br> | |||
<font color=green>Issk's yellow eyes contract.</font><br> | |||
<font color=darkgoldenrod>Issk tells you, "Very well, perhaps another time."</font><br> | |||
---- | ---- | ||
| Line 281: | Line 259: | ||
<font color=darkgoldenrod>Emissary of Asheron tells you, "Where to begin... Oh, yes, It was long ago in a land far from here..."</font><br> | <font color=darkgoldenrod>Emissary of Asheron tells you, "Where to begin... Oh, yes, It was long ago in a land far from here..."</font><br> | ||
<font color=darkgoldenrod>The Emissary drones on and on and while you do learn quite a bit you realize there must be a better way to acquire experience.</font><br> | <font color=darkgoldenrod>The Emissary drones on and on and while you do learn quite a bit you realize there must be a better way to acquire experience.</font><br> | ||
<font color=green>You've earned 201,808,000 experience. | <font color=green>You've earned 201,808,000 experience.</font><br> | ||
[[ | |||
[[ | == Notes == | ||
* During the [[Risks and Rewards]] event, a [[Braced Mana Forge Key]] was added as a reward. | |||
Latest revision as of 04:00, 20 December 2013
Related topics: Harbinger Quest
|
Banderling - Drudge - Harbinger - Human - Lugian - Monouga - Mosswart - Olthoi - Shadow - Tumerok - Tusker |
| Walk Through ___ Maps ___ Items ___ XP ___ Titles ___ Images ___ Lore & Dialog ___ |
| |||||||||||||||||||||||||||||||||||||||
 | |||||||||||||||||||||||||||||||||||||||
Quest Overview
- If you have never done any version of the original Harbinger Quest, you will need a Harbinger Item to gain access to the Tunnels to the Harbinger.
- The Harbinger Item you turn in makes no difference, because unlike the original quest, no XP is earned based which item you turn in.
- Prodigal Harbinger does not share a timer with the other Harbinger quests.
Walk Through
Part 1: Retrieving the Elemental Talisman
- Everyone needs an Elemental Talisman in order to access the Prodigal Harbinger's lair.
- The Talisman is found in the Artifex Collegium dungeon located on the north part of the Singularity Caul at 91.9S, 93.7W. You will only need to do this once, as you can use the same talisman for repeat runs.
- Once inside the collegium, head north and take the east passage from the first large room you enter. From there, it's a linear path to the room with the Artifex of the Elements and the talisman (found on the floor). The Artifex drops the text Message to the Elemental Artifex.
Part 2: Tunnels to the Harbinger
- Just like the other Harbinger Quests, start by entering the Tunnels to the Harbinger, located next to Issk at 12.9S, 46.5E or Vincadi at 12.6S 46.7E.
- Note: If you enter the Issk side, you are restricted from entering the Vincadi side and vice versa. Make sure everyone in your fellowship hands their item to the same NPC.
- Once inside, the dungeon is linear to the bottom (keep heading down). The only obstacles are a series of 5 jumps that must be made.
- Jump 1: Acid Pit - Full jump ahead (land on invisible platform)
- Jump 2: Lava Pit - Jump into the pit and take the hallway to the North
- Jump 3: Ice Shelf - Shift-jump down onto the platform above the ice shelf, clear the spawn, and wait for your group.
- Jump 4: Ice/Acid Pit Combo - Dispel, then shift Jump down onto the ice shelf and quicky run to the edge and full jump across the acid pit (land on invisible platform). The ice hurts, so be quick.
- Jump 5: Staging Area - Shift jump down and quickly move to the south (near the portals).
- This is a good place to rebuff if needed; if not use the Essence Chambers portal.
- Warning: Do NOT accidentally use the other portal!
- After using the portal it is imperative that you look behind you and find a Hollow on the wall.
- Important: It cannot be selected by using Next/Closest Item keys; it can only be seen by hovering over it with your mouse, using a program that enables Dungeon Light will make this easier.
- After everyone has found the Hollow, and can easily recognize and find it again, everyone needs to take their Elemental Talisman and give it to four Hollows. Each of these four are located behind each of the four Essences. If you give it to the hollow successfully there will be a message in green verifying as much.
- Note: It is a good idea to tell your group NOT to use any portals in this area. It's possible that portals from a previous group will still be spawned. The portals also spawn after killing all 4 essences. These portals are NOT for the Prodigal Harbinger!
- You allow Hollow to examine your Elemental Talisman.
- You place the Elemental Talisman in the hollow and its blue gem shines with cold blue light.
- You allow Hollow to examine your Elemental Talisman.
- You place the Elemental Talisman in the hollow and its red gem burns with fiery light.
- You allow Hollow to examine your Elemental Talisman.
- You place the Elemental Talisman in the hollow and its purple gem flickers with arcs of electric light.
- You allow Hollow to examine your Elemental Talisman.
- You place the Elemental Talisman in the hollow and its green gem glows with caustic green light.
- Ignore the portals which appear after all 4 essences have been killed. These portals are for the Essenceless Harbinger, not Prodigal!
- Return to the drop and hand the last talisman to the wall right right behind you. You will be portaled into Prodigal Harbinger's Antechamber.
- You allow Hollow to examine your Elemental Talisman.
- As you place the Elemental Talisman into the hollow you hear a distant unearthly cry. The wall quakes gelatinously and you are suddenly pulled through its horrible fleshy surface.
- You allow Hollow to examine your Elemental Talisman.
Part 3: Prodigal Harbinger's Antechamber
- You will be teleported to one of four alcoves, overlooking Harbinger and several of his Elemental minions.
- Note: Be careful, it is possible to take damage from the frozen cold when standing here.
- From here, its best to debuff everything in the room before jumping down.
- Note: Once Harbinger is attacked, anyone who enters Prodigal Harbinger's Antechamber will be portaled directly into the pit with Harbinger.
- The Prodigal Harbinger battle is slightly different than the other Harbinger battles.
- Archers and mages should kill any Pillars that spawn immediately! These are dangerous.
- Melees should kill any elementals that spawn. They spawn off and on during the battle.
- Use physical damage types on the Harbinger (bludge/pierce/slash) or an elemental slayer Atlan/Isparian weapon if you have one.
- Do not stand in the pools that randomly spawn in the room as you will take damage.
- Watch out for rolling balls of death! They can spawn randomly and roll through the room.
- Important: If anyone dies while fighting the Harbinger, portal recall and then run back to whatever portal you used to get into the Harbinger's Lair (near either Issk or Vincadi). Use the portal and answer 'Yes' when it prompts you to return to the boss room.
- Once you kill Harbinger, loot a Corrupted Harbinger Blood from the floor and use the surface portal that spawns nearby. You MUST use the surface portal to flag for the rewards.
Rewards
- [Optional] Hand the Corrupted Harbinger Blood to Vincadi to receive a random chance of 3 different titles (Vile Betrayer, Spy or Meddler) and a drop to Fort Tethana. He also gives you the blood back so you can turn it in to either Emissary of Asheron or Issk (see below). You can portal recall after landing in Fort Teth to quickly get back to the Emissary and Issk.
- There are 2 options for getting rewards for turning in the Blood. Both give the same amount of experience and luminance. The possible item rewards and titles differ.
- [Option 1] Hand the Corrupted Harbinger Blood to the Emissary of Asheron, located at 12.7S, 46.4E, next to the Stone of Yanshi, for a gem, experience, luminance, key, the title "Storm Rider" and a Harbinger's Foci. You can hand the foci back for an additional 10% xp.
- [Option 2] Alternatively, you can hand your Corrupted Harbinger Blood to Issk at 12.9S, 46.5E to receive a gem, experience, luminance, key, the title "Blood Seeker", and a Harbinger Blood Infusion. You can hand the infusion back for an additional 10% xp.
- Whoever landed the killing blow on the Harbinger will also automatically receive the title "Prodigal Harbinger Slayer".
Maps
| Dungeon | Coordinates | Wiki Map | ACmaps | Other | Quests |
| Tunnels to the Harbinger (Issk) | 12.9S 46.5E | -- | 6447 | -- | -- |
| Tunnels to the Harbinger (Vincadi) | 12.6S 46.7E | -- | 6446 | -- | -- |
Items
| Quest Items | ||||||||
|
|
Elemental Talisman |
|
Corrupted Harbinger Blood | |||||
Experience Rewards
| Task Required | Max Experience | Percentage & Level Cap | |||
| Give the Corrupted Harbinger Blood to Issk | 302,711,100xp |
15% up to level 240 | |||
|
| |||||
| Hand in 1 Harbinger's Foci | 201,808,000xp |
10% up to level 240 | |||
|
| |||||
| See Level Costs for per level information. | |||||
Title Rewards
| Task Required | Title Reward |
| Gain the killing shot to the Harbinger and hand in the Blood to Issk | Prodigal Harbinger Slayer |
|
| |
| Give Emissary of Asheron the Corrupted Harbinger Blood | Storm Rider |
|
| |
| Give Issk the Corrupted Harbinger Blood | Blood Seeker |
|
| |
| Give Vincadi the Corrupted Harbinger Blood | Vile Betrayer |
|
| |
| Give Vincadi the Corrupted Harbinger Blood | Meddler |
|
| |
| Give Vincadi the Corrupted Harbinger Blood | Spy |
|
| |
| See Titles for a list of all available titles. | |
Images
-
 Artifex of the Elements
 -
 Harbinger's Foci


Lore & Dialog
Vincadi tells you, "Greetings Isparian, I welcome you to my current location. I wish to convey certain fragments of information to you. The information contained within these fragments offers our assistance in the removal of a grave danger to your ilk."
Vincadi tells you, "We wish to aid you so that you are spared a most horrific death at the hands of a thing that, "should not be"."
Vincadi tells you, "Accept this small treatise and read the words of Aerbax to comprehend the stipulation of our proposal."
Vincadi gives you Experimentation.
You allow Vincadi to examine your Elemental Talisman.
Vincadi tells you, "This device... looks like an item I saw that Sclavus giving the Blood Witch. Perhaps you should investigate Issk further."
As you place the Elemental Talisman into the hollow you hear a distant unearthly cry. The wall quakes gelatinously and you are suddenly pulled through its horrible fleshy surface.
Inhuman eyes stare at you from the blackness. An impossibly cold hand grips your heart and squeezes. Your being fills with pain, there is nothing else. Suddenly it stops and you are falling toward your lifestone.
The Prodigal Harbinger's death cry shakes the walls of the chamber, threatening to cave it in.
<Killer> has destroyed the Prodigal Harbinger!
You allow Vincadi to examine your Corrupted Harbinger Blood.
Vincadi tells you, "How did you obtain this substance? Have you been sneaking around the Essence Chambers?"
Vincadi tells you, "Tell no one of what you found beneath the Essence Chambers or you shall suffer far worse than this "Meddler"!"
You allow Vincadi to examine your Corrupted Harbinger Blood.
Vincadi tells you, "How did you obtain this substance? Have you been sneaking around the Essence Chambers?"
Vincadi tells you, "Has the Blood Witch sent you to disrupt our experiments? Begone "Spy"!"
You allow Vincadi to examine your Corrupted Harbinger Blood.
Vincadi tells you, "How did you obtain this substance? Have you been sneaking around the Essence Chambers?"
Vincadi tells you, "Has the Blood Witch sent you to disrupt our experiments? Begone "Meddler"!"
You give Emissary of Asheron Corrupted Harbinger Blood.
Emissary of Asheron tells you, "Goodness, this befouled ichor came from the Harbinger?"
Emissary of Asheron tells you, "A different Harbinger you say? Beneath the Essence Chambers?"
Emissary of Asheron tells you, "Lord Asheron must be informed of this immediately. Here take these trinkets I have gathered from the brave people who have fought the Harbinger and may those you meet know that you are a "Storm Rider.""
Emissary of Asheron gives you Harbinger's Foci.
You've earned 140,127,753 experience.
You've earned 302,711,100 experience.
Emissary of Asheron gives you Gem of Harbinger's Acid Barrier.
Emissary of Asheron gives you Braced Mana Forge Key.
You give Issk Corrupted Harbinger Blood.
Issk tells you, "Exceedingly well done "Blood Seeker"... She who ssings to the world may find a use for this strange Harbinger's blood."
Issk tells you, "Our Mistress tells us that Aerbax has begun his experiments anew. Perhaps you have seen ssome of his children? The Harbinger has long evaded his attempts to uncover its secretss, but he may have discovered a way to control its energies. I must inform my Mistress of this new manifestation."
Issk tells you, "Here take this infusion and protective gem my Mistresss devised from the Harbinger's many gifts."
Issk gives you Harbinger Blood Infusion.
You've earned 302,711,100 experience.
Issk gives you Gem of Harbinger's Frost Barrier.
Issk gives you Braced Mana Forge Key.
You allow Issk to examine your Harbinger Blood Infusion.
Issk tells you, "You do not wish to partake of the Harbinger's Blood?"
Issk's eye slits expand in surprise. In an eager voice he speaks almost to quickly to understand.
Issk tells you, "I would gladly exchange sssome ssecret knowledge with you for the blood."
Issk's yellow eyes contract.
Issk tells you, "Very well, perhaps another time."
You allow Emissary of Asheron to examine your Harbinger's Foci.
Emissary of Asheron tells you, "I see. Perhaps you would prefer some information instead?"
You hand over 1 of your Harbinger's Focis.
Emissary of Asheron tells you, "Where to begin... Oh, yes, It was long ago in a land far from here..."
The Emissary drones on and on and while you do learn quite a bit you realize there must be a better way to acquire experience.
You've earned 201,808,000 experience.
Notes
- During the Risks and Rewards event, a Braced Mana Forge Key was added as a reward.