Aerbax's Prodigal Shadow: Difference between revisions
imported>Arkalor No edit summary |
imported>Arkalor m Text replace - " | Item Rewards = " to " | Contracts = | Item Rewards = " |
||
| (39 intermediate revisions by 6 users not shown) | |||
| Line 1: | Line 1: | ||
{{Aerbax's Prodigal Quest Links}} | |||
{{Quest Summary | {{Quest Summary | ||
| Patch Introduced = [[Dark Materials]] | | Patch Introduced = [[Dark Materials]] | ||
| Related Quests = | | Related Quests = | ||
| Updated = | | Updated = [[Risks and Rewards]], [[Filling in the Blanks]] | ||
| | | | ||
| Live Image = | | Live Image = Aerbax's Prodigal Shadow Live.jpg | ||
| Live Image Caption = | | Live Image Caption = Aerbax's Prodigal Shadow, Kirienne Palacost | ||
| Quest Type = Group | | Quest Type = Group | ||
| Kill Task = False | | Kill Task = False | ||
| Line 17: | Line 13: | ||
| Level Restrictions = 140+ | | Level Restrictions = 140+ | ||
| Level Suggestions = 140+ | | Level Suggestions = 140+ | ||
| Item Rewards = [[Aegis of the Golden Flame]]<br>[[ | | Contracts = | ||
| Max XP Reward = 346,775,164 | | Item Rewards = [[Aegis of the Golden Flame]]<br>[[Strengthened Mana Forge Key]] | ||
| Luminance Reward = 15,000 | |||
| Max XP Reward = 346,775,164 | |||
| Titles = Prodigal Shadow Slayer | | Titles = Prodigal Shadow Slayer | ||
| | | | ||
| Line 33: | Line 31: | ||
* To run this quest, everyone must have a [[Translation of the Pulsating Bony Lump|Pulsating Bony Lump]], which is found on the floor at the bottom of the North wing of the [[Artifex Collegium]] at 91.9S 93.7W on [[Singularity Caul]]. | * To run this quest, everyone must have a [[Translation of the Pulsating Bony Lump|Pulsating Bony Lump]], which is found on the floor at the bottom of the North wing of the [[Artifex Collegium]] at 91.9S 93.7W on [[Singularity Caul]]. | ||
** '''Tip:''' There is no pick-up timer on [[Translation of the Pulsating Bony Lump|Pulsating Bony Lump]]s and they are givable, so its easiest if one person gets them for everyone before the quest starts. | ** '''Tip:''' There is no pick-up timer on [[Translation of the Pulsating Bony Lump|Pulsating Bony Lump]]s and they are givable, so its easiest if one person gets them for everyone before the quest starts. | ||
* Before starting, | * Before starting, it's easiest if you have a [[Pandemic Key]] to open the locked door in the [[Orphanage]]. | ||
** '''Tip:''' There is no pick-up timer on [[Pandemic Key]]s and they are givable, so someone should get one | ** '''Tip:''' There is no pick-up timer on [[Pandemic Key]]s and they are givable, so someone should get one before the quest starts (pick up a couple in case you have to run people back down that die on the flagging portion). | ||
* The final part of this quest typically causes a lot of deaths, so its a good idea to have several vitae items in your pack so you can return to the fight as quickly as possible. | * The final part of this quest typically causes a lot of deaths, so its a good idea to have several vitae items in your pack so you can return to the fight as quickly as possible. | ||
| Line 42: | Line 40: | ||
'''Important:''' Make sure everyone in your party has a [[Translation of the Pulsating Bony Lump|Pulsating Bony Lump]] before starting this quest. | '''Important:''' Make sure everyone in your party has a [[Translation of the Pulsating Bony Lump|Pulsating Bony Lump]] before starting this quest. | ||
# To begin, locate a randomly spawning [[The Orphanage]] portal on [[Singularity Caul]], or alternatively use an [[Orphanage Portal Gem]] if you have one. | # To begin, locate a randomly spawning [[The Orphanage]] portal on [[Singularity Caul]], or alternatively use an [[The Orphanage (Portal Gem)|Orphanage Portal Gem]] if you have one. | ||
#* '''Tip:''' Once you locate [[The Orphanage]] portal, someone should stand outside to hold the land block while everyone gets there. | #* '''Tip:''' Once you locate [[The Orphanage]] portal, someone should stand outside to hold the land block while everyone gets there. | ||
# Once everyone is inside [[The Orphanage]], head down the ramp in the North East corner (North, then East). Follow the ramp down and take a Right at the bottom of the ramp. You'll see a locked door on your left. | # Once everyone is inside [[The Orphanage]], head down the ramp in the North East corner (North, then East). Follow the ramp down and take a Right at the bottom of the ramp. You'll see a locked door on your left. | ||
| Line 67: | Line 65: | ||
#* '''Note:''' There are several strategies that people use, but typically its a good idea to have several healers in your group. | #* '''Note:''' There are several strategies that people use, but typically its a good idea to have several healers in your group. | ||
#* '''Tip:''' Try to kill the [[Shadow Eddy]]s first, they trigger the spawn of the mobs. | #* '''Tip:''' Try to kill the [[Shadow Eddy]]s first, they trigger the spawn of the mobs. | ||
# Once everything is dead, you'll need to kill the final boss, [[Kirienne Palacost]], who for most of the fight appears as | # Once everything is dead, you'll need to kill the final boss, [[Kirienne Palacost]], who for most of the fight appears as a protected NPC in the North West corner of the dungeon. | ||
#* '''<font color="red">Warning:</font>''' Do not attempt to ''use'' or ''talk'' to [[Kirienne Palacost]] while he is surrounded by his protective bubble. You will be smited. | #* '''<font color="red">Warning:</font>''' Do not attempt to ''use'' or ''talk'' to [[Kirienne Palacost]] while he is surrounded by his protective bubble. You will be smited. | ||
# Once defeated, everyone must loot a [[Scrap of Shadow Essence]] from [[Kirienne Palacost]]'s corpse (he drops 20 scraps). | # Once defeated, everyone must loot a [[Scrap of Shadow Essence]] from [[Kirienne Palacost]]'s corpse (he drops 20 scraps). | ||
| Line 114: | Line 112: | ||
|Caption=Rewards | |Caption=Rewards | ||
|Aegis of the Golden Flame | |Aegis of the Golden Flame | ||
| | |Strengthened Mana Forge Key | ||
}} | }} | ||
== Experience Rewards == | == Experience Rewards == | ||
{{Quest Experience Table | {{Quest Experience Table | ||
| Repeat Differs = | | Repeat Differs = False | ||
| Table Rows = | | Table Rows = | ||
{{Quest Task | {{Quest Task | ||
| | | Description = Give the [[Scrap of Shadow Essence]] to [[Riordin Nightbane]] | ||
| | | Max XP = 297,235,855 | ||
| | | Percent of Level = 30 | ||
| Level Cap = 200 | |||
| | |||
}} | }} | ||
{{Quest Task | {{Quest Task | ||
| | | Description = Give the [[Aegis of the Golden Flame]] to [[Riordin Nightbane]] | ||
| Max XP = 49,539,309 | |||
| Percent of Level = 5 | |||
| Level Cap = 200 | |||
| | |||
| | |||
| | |||
}} | }} | ||
}} | }} | ||
| Line 152: | Line 144: | ||
== Images == | == Images == | ||
<gallery widths=200px heights=200px perrow=3> | <gallery widths=200px heights=200px perrow=3> | ||
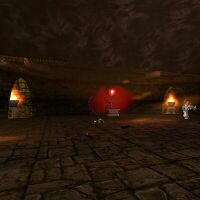
Image:Live.jpg| | Image:Aerbax's Prodigal Shadow Live 1.jpg| | ||
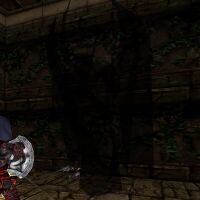
Image:Live.jpg| | Image:Aerbax's Prodigal Shadow Live 2.jpg| | ||
Image:Aerbax's Prodigal Shadow Live 3.jpg| | |||
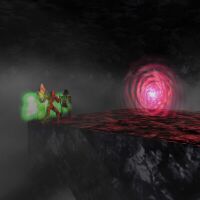
Image:Aerbax's Prodigal Shadow Live 4.jpg| | |||
Image:Aerbax's Prodigal Shadow Live 5.jpg| | |||
</gallery> | </gallery> | ||
| Line 178: | Line 173: | ||
<br><font color=green>As Black Ferah falls, you hear a cold, contemptuous voice declare, "Pathetic wretch, you have but slain a small sending of my true self!"</font> | <br><font color=green>As Black Ferah falls, you hear a cold, contemptuous voice declare, "Pathetic wretch, you have but slain a small sending of my true self!"</font> | ||
---- | |||
<font color=green>Kirienne Palacost stirs, as if lost in the throws of a fitful sleep.</font> | |||
<font color=green>As <Player Name> strikes the final blow against Kirienne Palacost, the Shadow Child screams out in agony! A voice echoes throughout the land, carrying along with it a searing pain in your mind, "I hate you <Player Name>!!! I'm telling my uncle and he's going to get you!!"</font> | |||
---- | ---- | ||
<font color=green>You give Riordin Nightbane Scrap of Shadow Essence.</font> | <font color=green>You give Riordin Nightbane Scrap of Shadow Essence.</font> | ||
| Line 202: | Line 201: | ||
== Notes == | == Notes == | ||
* During the [[Risks and Rewards]] event, the quest rewards were upgraded to include a [[Braced Mana Forge Key]]. | * During the [[Risks and Rewards]] event, the quest rewards were upgraded to include a [[Braced Mana Forge Key]]. | ||
- | * During the [[Filling in the Blanks]] event, the quest experience was updated. Repeated runs were increased from 49,539,309xp (5% up to level 200) to 297,235,855 (30% up to level 200) - the same as the first run reward. | ||
[[Category:Quest]] | [[Category:Quest]] | ||
[[Category:Title Reward]] | [[Category:Title Reward]] | ||
Latest revision as of 16:05, 23 March 2012
|
Banderling - Drudge - Harbinger - Human - Lugian - Monouga - Mosswart - Olthoi - Shadow - Tumerok - Tusker |
| Walk Through ___ Maps ___ Items ___ XP ___ Titles ___ Images ___ Lore & Dialog ___ Notes |
| |||||||||||||||||||||||||||||||||||||||
 | |||||||||||||||||||||||||||||||||||||||
Quest Overview
- To run this quest, everyone must have a Pulsating Bony Lump, which is found on the floor at the bottom of the North wing of the Artifex Collegium at 91.9S 93.7W on Singularity Caul.
- Tip: There is no pick-up timer on Pulsating Bony Lumps and they are givable, so its easiest if one person gets them for everyone before the quest starts.
- Before starting, it's easiest if you have a Pandemic Key to open the locked door in the Orphanage.
- Tip: There is no pick-up timer on Pandemic Keys and they are givable, so someone should get one before the quest starts (pick up a couple in case you have to run people back down that die on the flagging portion).
- The final part of this quest typically causes a lot of deaths, so its a good idea to have several vitae items in your pack so you can return to the fight as quickly as possible.
Walkthrough
Part 1: The Orphanage
Important: Make sure everyone in your party has a Pulsating Bony Lump before starting this quest.
- To begin, locate a randomly spawning The Orphanage portal on Singularity Caul, or alternatively use an Orphanage Portal Gem if you have one.
- Tip: Once you locate The Orphanage portal, someone should stand outside to hold the land block while everyone gets there.
- Once everyone is inside The Orphanage, head down the ramp in the North East corner (North, then East). Follow the ramp down and take a Right at the bottom of the ramp. You'll see a locked door on your left.
- Tip: Use the map of The Orphanage (see above) if you need help navigating the dungeon.
- Use your Pandemic Key to open the door, and jump down three times to the bottom of the pit.
- From here, take the North exit and follow the hallway to a large room, where you'll take either the East or West ramps up (both lead to the same place).
- At the top of the ramp, you'll see a room with a surface portal and a Statue of Bael'Zharon.
- Everyone must hand their Pulsating Bony Lump to the Statue of Bael'Zharon to be portaled to the Orphanage Wing.
- Warning: Do not use the Statue of Bael'Zharon, it will give you 5% vitae each time you use it.
Part 2: The Orphanage Wing
Tip: The Orphanage Wing is somewhat of a maze, take a look at the map (see above) before navigating the dungeon.
- From the drop, head North and hug the left wall, down the ramp, until you've passed through two larger rooms.
- At the next intersection, take a Right, and follow the long linear path (ignoring all cut-backs) until you reach two-way split.
- From here, take a Left and then take your First Right and follow the linear path to the final dungeon, the Prodigal Shadow Child's Lair, which is an intense hot drop.
- Tip: The Prodigal Shadow Child's Lair will require a download for most people, so the best strategy is to have everyone immediately run across the dungeon and hit the surface portal in the North East corner of the dungeon (there is an easy way back). This way everyone will portal in together on the next attempt.
Part 3: Prodigal Shadow Child's Lair
Important: If you die inside the Prodigal Shadow Child's Lair, you can easily get back by using the Statue of Bael'Zharon, the Hopeslayer, just North of the Caul Recall drop.
- Everyone should rebuff at the Caul Recall drop, and when ready, use the Statue of Bael'Zharon, the Hopeslayer to re-enter the Prodigal Shadow Child's Lair.
- You must survive three waves of Shadows and Penumbral Terrors to eventually reach the bosses (A Shadow of Ler Rhan and A Shadow of Black Ferah).
- Note: There are several strategies that people use, but typically its a good idea to have several healers in your group.
- Tip: Try to kill the Shadow Eddys first, they trigger the spawn of the mobs.
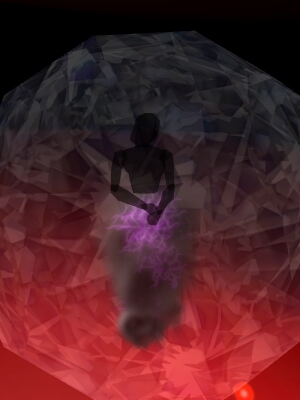
- Once everything is dead, you'll need to kill the final boss, Kirienne Palacost, who for most of the fight appears as a protected NPC in the North West corner of the dungeon.
- Warning: Do not attempt to use or talk to Kirienne Palacost while he is surrounded by his protective bubble. You will be smited.
- Once defeated, everyone must loot a Scrap of Shadow Essence from Kirienne Palacost's corpse (he drops 20 scraps).
- Take the Scrap of Shadow Essence to Riordin Nightbane in Wai Jhou at 61.9S 51.4W for your title and rewards.
Maps
| Dungeon | Coordinates | Wiki Map | ACmaps | Other | Quests |
| The Orphanage | Random Spawn | -- | 6548 | -- | -- |
| Orphanage Wing | -- | 00E6 | -- | -- | |
| Prodigal Shadow Child's Lair | -- | -- | 00E6 | -- | -- |
Items
| Quest Items | ||||||||
| Translated Shadow Artifex Shard | Pulsating Bony Lump | Pandemic Key | Statue of Bael'Zharon, the Hopeslayer | |||||
| Scrap of Shadow Essence | ||||||||
| Rewards | ||||||||
| Aegis of the Golden Flame | Strengthened Mana Forge Key | |||||||
Experience Rewards
| Task Required | Max Experience | Percentage & Level Cap | |||
| Give the Scrap of Shadow Essence to Riordin Nightbane | 297,235,855xp |
30% up to level 200 | |||
|
| |||||
| Give the Aegis of the Golden Flame to Riordin Nightbane | 49,539,309xp |
5% up to level 200 | |||
|
| |||||
| See Level Costs for per level information. | |||||
Title Rewards
| Task Required | Title Reward |
| Give the Scrap of Shadow Essence to Riordin Nightbane | Prodigal Shadow Slayer |
|
| |
| See Titles for a list of all available titles. | |
Images
Lore & Dialog
There is an active Shadow library in part of the Orphanage Wing where Uninscribed Fleshy Lumps are being bred and where several old and new lore items can be found:
You give Statue of Bael'Zharon, the Hopeslayer Pulsating Bony Lump.
As you fit the lump into the keyhole, you feel a bone-numbing chill pass through your very soul. A pulling sensation forms in the core of your being, but before it becomes unbearable, you see the "key" shrivel and die. Almost immediately thereafter, the chill fades and then you feel a familiar pulling sensation.
As Ler Rhan falls, you hear a soft, contemptuous voice declare, "You may've shattered his echo of my true self, but you have not defeated me, nor my children. We will return."
As Black Ferah falls, you hear a cold, contemptuous voice declare, "Pathetic wretch, you have but slain a small sending of my true self!"
Kirienne Palacost stirs, as if lost in the throws of a fitful sleep.
As <Player Name> strikes the final blow against Kirienne Palacost, the Shadow Child screams out in agony! A voice echoes throughout the land, carrying along with it a searing pain in your mind, "I hate you <Player Name>!!! I'm telling my uncle and he's going to get you!!"
You give Riordin Nightbane Scrap of Shadow Essence.
Riordin Nightbane tells you, "What is this?"
You explain where and how you came to have the Essence to Riordin Nightbane.
Riordin Nightbane tells you, "This creature must've been truly powerful to have its essence survive its death..."
You've earned 297,235,855 experience.
Riordin Nightbane tells you, "You have done us all a great service, in aiding in the death of a Shadow such as this one. Please, it would honor me if you would accept these humble rewards for your noble and courageous act."
Riordin Nightbane gives you Aegis of the Golden Flame.
Riordin Nightbane gives you Braced Mana Forge Key.
Riordin Nightbane grants you the title, "Prodigal Shadow Slayer".
Riordin Nightbane tells you, "Know that the Aegis I have given you is a rare symbol amongst our Order, and that to carry and display one is considered a great honor."
You give Riordin Nightbane Scrap of Shadow Essence.
Riordin Nightbane tells you, "Once again, you have stepped up where few others would and protected Dereth from the rise of a creature who could spell the end of all of us. Please, accept these rewards."
You've earned 99,078,619 experience. (Level 275)
Riordin Nightbane gives you Aegis of the Golden Flame.
Riordin Nightbane tells you, "Remember, the Aegis I have given you is a rare symbol amongst our Order, and that to carry and display one is considered a great honor."
You give Riordin Nightbane Aegis of the Golden Flame.
Riordin Nightbane tells you, "You do not wish this as a reward? Very well, but remember that its ownership and display infers a certain level of respect in our Order. But the decision is yours. Please, accept this in exchange for the aegis."
You've earned 49,539,309 experience.(level 265)
Notes
- During the Risks and Rewards event, the quest rewards were upgraded to include a Braced Mana Forge Key.
- During the Filling in the Blanks event, the quest experience was updated. Repeated runs were increased from 49,539,309xp (5% up to level 200) to 297,235,855 (30% up to level 200) - the same as the first run reward.
