Graveyard: Difference between revisions
imported>Widgeon →Quests & Shopkeepers: Added links to two new quests. |
imported>Sucamarto No edit summary |
||
| (127 intermediate revisions by 17 users not shown) | |||
| Line 1: | Line 1: | ||
[[ | {{Intro | ||
-- | | Patch Introduced = [[Ancient Enemies]] | ||
| Related Quests = [[{{PAGENAME}}#Related_Quests|See Below]] | |||
| Updated = [[Strange Sightings]], [[Dark Materials]], [[Corrupted Sovereigns]], [[Prodigal Sons]], [[Foolish Ambition]], [[Upping the Ante]], [[Introductions]], [[Dispatch]], [[Shattered Lines]], [[Ancient Powers]], [[Risks and Rewards]], [[Retributions]], [[Lessons from the Past]], [[The Quest for Freedom]] and [[Fowl Play]] | |||
}} | |||
{|align=right | |||
|[[File:graveyard Live.jpg|300px|thumb|The Graveyard of Despair]] | |||
|- | |||
|align=center|__TOC__ | |||
|} | |||
=== Description === | |||
The Graveyard is an area in the [[South Direlands|Southeastern Direlands]] designed for high-level small group hunting. The graveyard has been updated with new content during many events. Graveyard was updated to be a [[Loot/Tier 8|tier 8 loot]] area during the [[Balance of Power]] event. | |||
[[Mhoire Castle]], another tier 8 area, is only accessible from the Graveyard. The [[Mhoire Castle Courtyard]] area of the Graveyard is only accessible after doing the flagging portion of the [[Castle of Lord Mhoire]] quest. The courtyard originally was suspended in the air over the Graveyard, but was destroyed on the hills below during the [[Retributions]] event. The courtyard still provides access to Mhoire Castle. Mhoire Castle is considered an extension of the Graveyard as it features many of the same creatures. | |||
==Unique Design== | ==== Unique Design ==== | ||
The Graveyard was the first place to see a lot of new tech being developed. | The Graveyard was the first place to see a lot of new tech being developed. | ||
*The spawns in the graveyard change depending on the time displayed on the map panel. The spawns switch to the easier "day" creatures at Dawnsong and to the harder "night" creatures at Evensong. (See [[Time]] for more details.) | * The spawns in the graveyard change depending on the time displayed on the map panel. The spawns switch to the easier "day" creatures at Dawnsong and to the harder "night" creatures at Evensong. (See [[Time]] for more details.) | ||
*The Graveyard was the first place to use the [[Alternative Currency]] tech, where NPCs will accept some other item instead of Pyreals for payment. In the case of the Graveyard, this currency is the [[Ancient Mhoire Coin]]. | * Also unique to the Graveyard is its ominous, swirling black sky that is present during the daytime and disappears as you leave the area. See [[Media:Upping the Ante Graveyard Sky.gif|here]] for a animated screenshot of the Graveyard's sky. | ||
*There are a few collection quests which use the NPC item detection tech, where an NPC will search your bags for an item or items and take it directly out, so you do not have to give the items to the NPC yourself - a very helpful feature in the deadly environment of the Graveyard. | * The Graveyard was the first place to use the [[Alternative Currency]] tech, where NPCs will accept some other item instead of Pyreals for payment. In the case of the Graveyard, this currency is the [[Ancient Mhoire Coin]]. | ||
* There are a few collection quests which use the NPC item detection tech, where an NPC will search your bags for an item or items and take it directly out, so you do not have to give the items to the NPC yourself - a very helpful feature in the deadly environment of the Graveyard. | |||
== | === Lore === | ||
It would seem that in the distant past [[Rytheran]] under the direction of, [[Geraine]], His Eternal Splendor, destroyed the House Mhoire using the [[Book of Eibhil]]. It is unclear why, but in [[Rytheran's Letter]] he refers to the House Mhoire as the traitor house. It is presumed that the House of Mhoire left because they objected to becoming undead like Geraine and many of the other Dericost nobles. For millennia the House Mhoire was buried beneath the ground, but recently, as written in his letter, Rytheran left the [[Mage Academy]] in search of a mysterious magical book, the [[Book of Eibhil]]. He found the book and began to read from it to restore his memories and power. By reading from this book, dark magic rose the Graveyard to the surface once more. | |||
'''Texts Related to the Graveyard:''' | |||
[[ | *[[Ancient Journal Page #1]] | ||
*[[Ancient Journal Page #2]] | |||
*[[Rytheran's Letter]] | |||
*[[Rytheran's Journal]] | |||
*[[Laylana's Love Letter]] | |||
*[[Pleading Letter]] | |||
*[[Foolish_Ambition#Teaser_-_Link|Foolish Ambition Teaser]] | |||
*[[The Jester's Revelations]] | |||
[[ | === Route === | ||
* From the Wai Jhou [[Halls of Metos]] dungeon, run to 65.1S 43.3W and jump down to the [[Arcanum Lookout]]. | |||
** '''Route:''' From [[Yanshi]] (east hall of [[Town Network]]), head to the [[Imuth Maer Cottages]] settlement portal at 10.4S 45.6E , and then run to [[Imuth Maer Doquin]] (portal behind fake wall) at 11.6S, 57.9E for a portal to the halls. | |||
* Use a [[Black Spawn Den Portal Device]] from your guild's mansion until you reach the Obsidian Plains [[Black Spawn Den|BSD]] at 60.0S, 57.7W. From there, run southeast to the Graveyard. | |||
* Alternatively, if you have 5 [[Mhoire Coin]]s, you can purchase the [[Scroll of Ancient Graveyard Recall|Graveyard Recall]] scroll from [[Hurnmel the Smith]] to recall straight to a bunker in the middle of the Graveyard. | |||
[[ | === Areas of the Graveyard === | ||
* [[Burning Wood]] | |||
* [[Mhoire Castle Courtyard]] | |||
* [[Mhoire Castle]] | |||
[[ | === Related [[Quests]] === | ||
{|class="wikitable" | |||
!Quest | |||
!Restriction | |||
!Rewards | |||
|- | |||
| [[Amelia's Lost Toys]] || 150+ || 30 Million xp, [[Amelia's Pet Gargoyle]], Title, and 1 [[Ancient Mhoire Coin]] | |||
|- | |||
| [[DeathTail Quest]] || None ||100 Million xp, Title, and 1-5 [[Ancient Mhoire Coins]] | |||
|- | |||
|[[Disturbance in the Ley Lines]] || 150+ || 300 Million and [[Visage of Menilesh]] | |||
|- | |||
| [[Grave Rat Kill Task]] || 100+ || 50 Million xp and [[Lo Shoen's Rat Bait]] | |||
|- | |||
| [[Jester's Cards]] || None || [[Deck of Eyes]] and [[Deck of Hands]] | |||
|- | |||
| [[Jester's Lost Marbles]] || 160+ || 130 Million, 2 Titles, [[Jester's Cards|Jester's Card]], [[Spectral Weapons]], and maybe an [[Ancient Mhoire Coin]] | |||
|- | |||
| [[Lady Mhoire Quest]] || None || 3-5 Coins, Title, and a [[Mana Forge Key]] | |||
|- | |||
| [[Jester Focuses]] || 160+ ||710 Million xp, Title, [[Jester's Cards|Jester's Card]], and [[Braced Mana Forge Key]] | |||
|- | |||
| [[Lord Mhoire Quest]] || None || 3-5 [[Ancient Mhoire Coin]]s, Title, and [[Mana Forge Key]] | |||
|- | |||
| [[Lord Rytheran's Journal]] || None || First Time: 248 Million xp, Repeat Runs: 123 Millions xp | |||
|- | |||
| [[Ranger Lord Mhoire]] || None || 3-5 [[Ancient Mhoire Coin]]s, Title, and a [[Mana Forge Key]] | |||
|- | |||
| [[The Jester]] || 160+ || Xp, 3 Titles, [[Dark Scarab]], [[Arcane Pyramid (Spell)]], and a [[Jester's Cards|Jester's Card]] | |||
|- | |||
| [[Castle of Lord Mhoire Quest]] || Unknown || Xp, 4 Titles, [[Mhoire Castle Treasury Key]]s, [[Ancient Mhoire Coin]]s | |||
|- | |||
| [[Corrupted Gravestone Kill Task]] || 180+ || 115,000,000 Exp, 3,000 Luminance, 5 x [[MMD]]'s or 20 x [[MMD]]'s or [[Gem of Knowledge (20M)]] or [[Gem of Lesser Luminance]] or [[Gem of Greater Luminance]] or 2 x [[Rage of Grael Gem]]s or 2 x [[Burning Coal]]s or 2 x [[Coral Fragment]]s or [[Exquisite Casino Key]] | |||
|- | |||
| [[Kidnapped Handmaiden]] | |||
|- | |||
| [[Oubliette of Mhoire Castle Quest]] | |||
|- | |||
| [[Noble Remains Kill Task]] | |||
|- | |||
| [[Guardian Statue Kill Task]] | |||
|- | |||
| [[Count Phainor's Amulet]] | |||
|- | |||
| [[Graveyard Wisp Kill Task]] | |||
|- | |||
| [[Graveyard Skeleton Kill Task]] | |||
|- | |||
| [[Graveyard Spirit Kill Task]] | |||
|- | |||
| [[Graveyard Wight Kill Task]] | |||
|} | |||
== | ==== [[Society Tasks|Graveyard Society Tasks]] ==== | ||
{|class="wikitable" | |||
!Quest | |||
!Rank Required | |||
|- | |||
| [[Investigate the Factions]] || Before Joining a Society | |||
|- | |||
| [[Shambling Archivist Destroyer]] || Initiate | |||
|- | |||
| [[Undead Jaw Collection]] || Initiate | |||
|- | |||
| [[Wight Blade Sorcerer Kill Task]] || Initiate | |||
|- | |||
| [[Graveyard Delivery]] || Adept | |||
|- | |||
| [[Tracing The Stone]] || Adept | |||
|- | |||
|} | |||
=== [[NPCs]] === | |||
{{NPC Table | |||
| Table Rows = | |||
{{NPC Row | |||
| NPC Name = Amelia | |||
| Location = 64.8S 43.8W | |||
| Type = Quest NPC | |||
| Details = [[Amelia's Lost Toys]] | |||
}} | |||
{{NPC Row | |||
| NPC Name = Apep-tek the Tolerant | |||
| Location = 65.3S, 44.0W (near the recall bunker) | |||
| Type = Collector | |||
| Details = Gives 15 Million xp for 10 [[Pyre Shroud]]s (must be level 100+) | |||
}} | |||
{{NPC Row | |||
| NPC Name = Candrus Steady-Hand | |||
| Location = 65.8S, 45.3W (outside the Graveyard in the valley to the west) | |||
| Type = Quest NPC | |||
| Details = [[Investigate the Factions]] | |||
}} | |||
{{NPC Row | |||
| NPC Name = Jawaq ibn Janath | |||
| Location = 64.2S, 44.0W (outside the Graveyard in the valley to the southeast) | |||
| Type = Quest NPC | |||
| Details = [[Investigate the Factions]] | |||
}} | |||
{{NPC Row | |||
| NPC Name = Kousu Temo | |||
| Location = 65.3S, 42.3W (just outside the northern edge Graveyard) | |||
| Type = Quest NPC | |||
| Details = [[Investigate the Factions]] | |||
}} | |||
{{NPC Row | |||
| NPC Name = Lo Shoen | |||
| Location = 65.3S, 43.4W (Just outside the Graveyard to the southeast on the [[Arcanum Lookout]]) | |||
| Type = Quest NPC | |||
| Details = [[Grave Rat Kill Task]] and [[DeathTail Quest]] | |||
}} | |||
{{NPC Row | |||
| NPC Name = Hurnmel the Smith | |||
| Location = 65.4S 44.0W (spawns only at night at the bottom of the recall bunker) | |||
| Type = Shopkeeper | |||
| Details = Sells a variety of items in exchange for [[Ancient Mhoire Coin]]s | |||
}} | |||
{{NPC Row | |||
| NPC Name = Jester (NPC) | |||
| Location = 64.6S 43.8W (use the northern [[Summoning Stone]] to summon him) | |||
| Type = Quest NPC | |||
| Details = [[Jester Focuses]] | |||
}} | |||
{{NPC Row | |||
| NPC Name = Jester (NPC) | |||
| Location = 65.8S 43.8W (use the southern [[Summoning Stone]] to summon him) | |||
| Type = Quest NPC | |||
| Details = [[Jester's Lost Marbles]] | |||
}} | |||
{{NPC Row | |||
| NPC Name = Shade of Parieth | |||
| Location = 65.6S 43.9W (Spawns only at night at the south end of the Graveyard) | |||
| Type = Collector | |||
| Details = 6 Million xp per 10 [[Exhumed Bones]] | |||
}} | |||
{{NPC Row | |||
| NPC Name = Sharia Blackmist | |||
| Location = 65.3S 43.3W (Just outside the Graveyard to the southeast on the [[Arcanum Lookout]]) | |||
| Type = Quest NPC | |||
| Details = [[Ghost Hunter Quest]] | |||
}} | |||
{{NPC Row | |||
| NPC Name = Skettek the Wanderer | |||
| Location = 65.3S, 43.4W (Just outside the Graveyard to the southeast on the [[Arcanum Lookout]]) | |||
| Type = Shopkeeper | |||
| Details = Vendor with regular supplies (spell comps, fletching supplies, alchemy supplies, etc.) | |||
}} | |||
{{NPC Row | |||
| NPC Name = Slubbley | |||
| Location = 65.3S, 43.3W (Just outside the Graveyard to the southeast on the [[Arcanum Lookout]]) | |||
| Type = Quest NPC | |||
| Details = [[Corrupted Gravestone Kill Task]] | |||
}} | |||
}} | |||
(need NPCs for kill tasks and NPCS in Mhoire Castle courtyard) | |||
[[ | === [[Items]] === | ||
[[Ancient Journal Page | {{Item Table Three|Caption=[[Trophies]] | ||
| Ancient Journal Page | |||
| Ancient Mhoire Coin | |||
| Exhumed Bones | |||
| Jester's Token | |||
| Ornate Bone Key | |||
| Shattered Legendary Key | |||
| Pyre Shroud | |||
| Pyre Skeleton Jaw | |||
| Jester's Cards | |||
}} | |||
{{Item Table Three|Caption=Landscape Items | |||
| Ancient Chest (Graveyard) | |||
| Burnt and Twisted Stump | |||
| Corrupted Gravestone | |||
| Guardian Statue | |||
| Lady Tairla Mhoire's Key | |||
| Lord Grymar Mhoire's Key | |||
| Lo Shoen's Pack | |||
| Rat Burrow | |||
| Rytheran's Master Seal | |||
| Sealed Vault | |||
| Summoning Stone | |||
}} | |||
== | === [[Points of Interest]] === | ||
{|border=0 cellpadding=3 | |||
| | |||
* [[Arcanum Lookout]] | |||
| | |||
* [[Knathtead Excavation]] | |||
| | |||
|} | |||
=== [[Portal]]s === | |||
* 65.3S, 43.3W - [[Up to Arcanum Lookout]] | |||
* [[Arcanum Lookout|65.3S, 43.3W]] - [[Down to Surface]] | |||
=== [[Dungeons]] === | |||
{{Dungeon Table | |||
| Table Rows = | |||
{{Dungeon Maps | |||
| Dungeon = Gardens of Menilesh | |||
| Coordinates = 64.7S, 43.8W | |||
| Wiki Map File = 00E7.gif | |||
| ACmaps ID = | |||
| Related Quests = [[Disturbance in the Ley Lines]], [[Jester Focuses]] | |||
}} | |||
{{Dungeon Maps | |||
| Dungeon = Jester's Prison | |||
| Coordinates = 64.9S, 44.1W | |||
| Wiki Map File = 00D7.gif | |||
| ACmaps ID = | |||
| Related Quests = [[The Jester]] | |||
}} | |||
{{Dungeon Maps | |||
| Dungeon = Massilor's Crypt | |||
| Coordinates = 65.4S, 43.6W | |||
| Wiki Map File = 472D.gif | |||
| ACmaps ID = | |||
| Related Quests = [[Graveyard Delivery]] | |||
}} | |||
{{Dungeon Maps | |||
| Dungeon = Mhoire Armory | |||
| Coordinates = 64.8S, 44.3W | |||
| Wiki Map File = 00EA.gif | |||
| ACmaps ID = | |||
| Related Quests = [[Jester's Lost Marbles]], [[Spectral Weapons]] | |||
}} | |||
{{Dungeon Maps | |||
| Dungeon = Mhoire Castle Courtyard | |||
| Coordinates = 64.6S, 44.1W | |||
| Wiki Map File = 462D.png | |||
| ACmaps ID = | |||
| Related Quests = [[Mhoire Castle|Mhoire Castle Quests]] | |||
}} | |||
}} | |||
=== [[Creatures]] === | |||
{|cellpadding=10 | |||
|-valign=top | |||
| | |||
{{Creature Class|Fire Elemental | |||
| Location = Landscape | |||
| Corrupted Pyre Spark | |||
}} | |||
{{Creature Class|Frost Elemental | |||
| Location = Landscape | |||
| Corrupted Grave Frost | |||
}} | |||
{{Creature Class|Ghost | |||
| Location = Landscape | |||
| Corrupted Dread | |||
| Lady Saliane | |||
| Lady Tairla Mhoire | |||
| Spectral Dread | |||
| Spectral Handmaiden | |||
}} | |||
{{Creature Class|Golem | |||
| Location = Landscape | |||
| Corrupted Pyre Oak | |||
}} | |||
{{Creature Class|Rat | |||
| Location = Landscape | |||
| Blight Rat | |||
| Blood Curse Rat | |||
| DeathTail | |||
}} | |||
| | |||
{{Creature Class|Skeleton | |||
| Location = Landscape | |||
| Lord Trimere | |||
| Pyre Minion | |||
| Pyre Skeleton | |||
| Pyre Champion | |||
}} | |||
{{Creature Class|Undead | |||
| Location = Landscape | |||
| Lord Hendrel | |||
| Shambling Archivist | |||
| Wight | |||
| Wight Captain | |||
| Wight Blade Sorcerer | |||
}} | |||
{{Creature Class|Wisp | |||
| Location = Landscape | |||
| Despair Wisp | |||
| Hatred Wisp | |||
| Sorrow Wisp | |||
}} | |||
|} | |||
=== Images === | |||
<gallery widths=200px heights=200px perrow=4> | |||
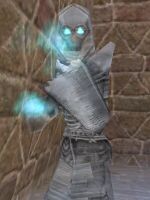
File:Jester (NPC) Live 2.jpg|Jester | |||
File:Mhoire Castle Courtyard Live.jpg|Mhoire Castle in the sky above the Graveyard | |||
File:Burning Wood Live.jpg|The Burning Wood | |||
File:Corrupted Pyre Oak Live.jpg|Corrupted Pyre Oak | |||
File:Lady Tairla Mhoire Live.jpg|Lady Tairla Mhoire | |||
File:DeathTail Live.jpg|DeathTail | |||
File:Apep-tek the Tolerant Live.jpg|Apep-tek the Tolerant | |||
File:Hurnmel the Smith Live.jpg|Hurnmel the Smith | |||
File:Skettek the Wanderer Live.jpg|Skettek the Wanderer | |||
File:Corrupted Gravestone Live.jpg|[[Corrupted Gravestone]] | |||
</gallery> | |||
===Player Guides=== | |||
* [[User:Taomagicdragon/Guides/Graveyard Tactics and Equipment|Taomagicdragon's Guide to Graveyard Tactics and Equipment]] | |||
===Updates=== | |||
* Luminance creatures which appear at night during [[Lessons from the Past]] event. | |||
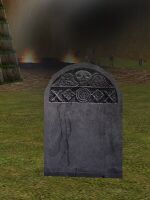
* As part of the [[Fowl Play]] event [[Corrupted Gravestone]] were introcuded into the [[Graveyard]]. | |||
[[Category:Geographic Area]] | |||
Latest revision as of 06:05, 19 November 2013
|
 |
Description
The Graveyard is an area in the Southeastern Direlands designed for high-level small group hunting. The graveyard has been updated with new content during many events. Graveyard was updated to be a tier 8 loot area during the Balance of Power event.
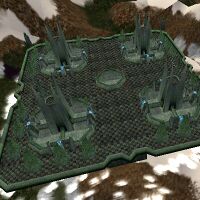
Mhoire Castle, another tier 8 area, is only accessible from the Graveyard. The Mhoire Castle Courtyard area of the Graveyard is only accessible after doing the flagging portion of the Castle of Lord Mhoire quest. The courtyard originally was suspended in the air over the Graveyard, but was destroyed on the hills below during the Retributions event. The courtyard still provides access to Mhoire Castle. Mhoire Castle is considered an extension of the Graveyard as it features many of the same creatures.
Unique Design
The Graveyard was the first place to see a lot of new tech being developed.
- The spawns in the graveyard change depending on the time displayed on the map panel. The spawns switch to the easier "day" creatures at Dawnsong and to the harder "night" creatures at Evensong. (See Time for more details.)
- Also unique to the Graveyard is its ominous, swirling black sky that is present during the daytime and disappears as you leave the area. See here for a animated screenshot of the Graveyard's sky.
- The Graveyard was the first place to use the Alternative Currency tech, where NPCs will accept some other item instead of Pyreals for payment. In the case of the Graveyard, this currency is the Ancient Mhoire Coin.
- There are a few collection quests which use the NPC item detection tech, where an NPC will search your bags for an item or items and take it directly out, so you do not have to give the items to the NPC yourself - a very helpful feature in the deadly environment of the Graveyard.
Lore
It would seem that in the distant past Rytheran under the direction of, Geraine, His Eternal Splendor, destroyed the House Mhoire using the Book of Eibhil. It is unclear why, but in Rytheran's Letter he refers to the House Mhoire as the traitor house. It is presumed that the House of Mhoire left because they objected to becoming undead like Geraine and many of the other Dericost nobles. For millennia the House Mhoire was buried beneath the ground, but recently, as written in his letter, Rytheran left the Mage Academy in search of a mysterious magical book, the Book of Eibhil. He found the book and began to read from it to restore his memories and power. By reading from this book, dark magic rose the Graveyard to the surface once more.
Texts Related to the Graveyard:
- Ancient Journal Page #1
- Ancient Journal Page #2
- Rytheran's Letter
- Rytheran's Journal
- Laylana's Love Letter
- Pleading Letter
- Foolish Ambition Teaser
- The Jester's Revelations
Route
- From the Wai Jhou Halls of Metos dungeon, run to 65.1S 43.3W and jump down to the Arcanum Lookout.
- Route: From Yanshi (east hall of Town Network), head to the Imuth Maer Cottages settlement portal at 10.4S 45.6E , and then run to Imuth Maer Doquin (portal behind fake wall) at 11.6S, 57.9E for a portal to the halls.
- Use a Black Spawn Den Portal Device from your guild's mansion until you reach the Obsidian Plains BSD at 60.0S, 57.7W. From there, run southeast to the Graveyard.
- Alternatively, if you have 5 Mhoire Coins, you can purchase the Graveyard Recall scroll from Hurnmel the Smith to recall straight to a bunker in the middle of the Graveyard.
Areas of the Graveyard
Related Quests
| Quest | Rank Required |
|---|---|
| Investigate the Factions | Before Joining a Society |
| Shambling Archivist Destroyer | Initiate |
| Undead Jaw Collection | Initiate |
| Wight Blade Sorcerer Kill Task | Initiate |
| Graveyard Delivery | Adept |
| Tracing The Stone | Adept |
| NPC Name | Location | Type | Details |
| Amelia | 64.8S 43.8W | Quest NPC | Amelia's Lost Toys |
| Apep-tek the Tolerant | 65.3S, 44.0W (near the recall bunker) | Collector | Gives 15 Million xp for 10 Pyre Shrouds (must be level 100+) |
| Candrus Steady-Hand | 65.8S, 45.3W (outside the Graveyard in the valley to the west) | Quest NPC | Investigate the Factions |
| Jawaq ibn Janath | 64.2S, 44.0W (outside the Graveyard in the valley to the southeast) | Quest NPC | Investigate the Factions |
| Kousu Temo | 65.3S, 42.3W (just outside the northern edge Graveyard) | Quest NPC | Investigate the Factions |
| Lo Shoen | 65.3S, 43.4W (Just outside the Graveyard to the southeast on the Arcanum Lookout) | Quest NPC | Grave Rat Kill Task and DeathTail Quest |
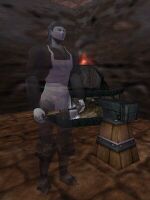
| Hurnmel the Smith | 65.4S 44.0W (spawns only at night at the bottom of the recall bunker) | Shopkeeper | Sells a variety of items in exchange for Ancient Mhoire Coins |
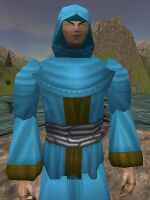
| Jester (NPC) | 64.6S 43.8W (use the northern Summoning Stone to summon him) | Quest NPC | Jester Focuses |
| Jester (NPC) | 65.8S 43.8W (use the southern Summoning Stone to summon him) | Quest NPC | Jester's Lost Marbles |
| Shade of Parieth | 65.6S 43.9W (Spawns only at night at the south end of the Graveyard) | Collector | 6 Million xp per 10 Exhumed Bones |
| Sharia Blackmist | 65.3S 43.3W (Just outside the Graveyard to the southeast on the Arcanum Lookout) | Quest NPC | Ghost Hunter Quest |
| Skettek the Wanderer | 65.3S, 43.4W (Just outside the Graveyard to the southeast on the Arcanum Lookout) | Shopkeeper | Vendor with regular supplies (spell comps, fletching supplies, alchemy supplies, etc.) |
| Slubbley | 65.3S, 43.3W (Just outside the Graveyard to the southeast on the Arcanum Lookout) | Quest NPC | Corrupted Gravestone Kill Task |
(need NPCs for kill tasks and NPCS in Mhoire Castle courtyard)
| Trophies | ||||||||
| Ancient Journal Page | Ancient Mhoire Coin | Exhumed Bones | ||||||
| Jester's Token | Ornate Bone Key | Shattered Legendary Key | ||||||
| Pyre Shroud | Pyre Skeleton Jaw | Jester's Cards | ||||||
- 65.3S, 43.3W - Up to Arcanum Lookout
- 65.3S, 43.3W - Down to Surface
| Dungeon | Coordinates | Wiki Map | ACmaps | Other | Quests |
| Gardens of Menilesh | 64.7S, 43.8W | -- | -- | Disturbance in the Ley Lines, Jester Focuses | |
| Jester's Prison | 64.9S, 44.1W | -- | -- | The Jester | |
| Massilor's Crypt | 65.4S, 43.6W | -- | -- | Graveyard Delivery | |
| Mhoire Armory | 64.8S, 44.3W | -- | -- | Jester's Lost Marbles, Spectral Weapons | |
| Mhoire Castle Courtyard | 64.6S, 44.1W | -- | -- | Mhoire Castle Quests |
Images
-
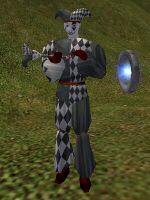
Jester
-
Mhoire Castle in the sky above the Graveyard
-
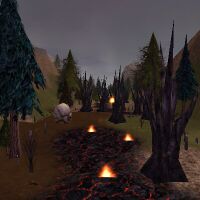
The Burning Wood
-
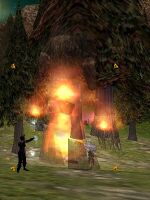
Corrupted Pyre Oak
-
Lady Tairla Mhoire
-
DeathTail
-
Apep-tek the Tolerant
-
Hurnmel the Smith
-
Skettek the Wanderer
Player Guides
Updates
- Luminance creatures which appear at night during Lessons from the Past event.
- As part of the Fowl Play event Corrupted Gravestone were introcuded into the Graveyard.
