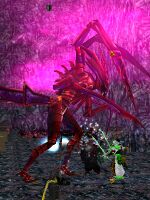
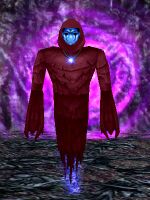
Hive Queen Assault
| Walk Through ___ Maps ___ Items ___ XP ___ Titles ___ Images ___ Lore & Dialog ___ |
| |||||||||||||||||||||||||||||||||||||||
Quest Overview
Uncover and destroy the Curator of Torment's experiments to enhance Olthoi on Marae Lassel.
This quest is a parallel to the original Olthoi Queen Quest with a more current difficulty level. Players must again destroy the 5 Menhir Rings, and be "sprayed" by killing specific Olthoi to gain access to the queens lair. Players will be facing Olthoi that breath lightning instead of acid, and high level Virindi, as well as void-casting Olthoi grubs.
This quest NOT limited to a single fellowship of 9 players. There are at least 19 carapaces on the Olthoi Hive Queen.
Walk Through
[Optional] Begin this quest by speaking to the Virindi Delegate at 43.3N, 66.7W in Greenspire.
Part 1: Crafting the Tuning Forks
Note: One person with Lockpick is required to complete this part of the quest. You will also need to bring one or two Astyrrian's Jewels to protect yourself from the Galvanic Chest, which casts a devastating Galvanic Bomb when opened.
- Head to the Chiming Portal at 45.0N, 73.5W, located on Marae Lassel.
- Inside the dungeon you will need to collect the parts to assemble 5 Tuning Forks. The dungeon is full of Virindi Clandestine, Olthoi Hive Noble, Olthoi Hive Soldier, and Olthoi Hive Piercer that use lightning damage.
- The dungeon is a giant circle with an inner and outer circle. The outer circle has two Galvanic Chests to the east and west. Keep hugging the left wall until you reach each particular Galvanic Chest.
- WARNING: When these chests open, they cast Galvanic Bomb; a ring spell that does 200-1000 points of electric damage. A lightning protection rare is highly recommended.
- You must loot 5 Bars of Curved Metal from the Galvanic Chest in the west room. And 5 Metal Pipes from the Galvanic Chest in the east room. The chests refill every 30 seconds.
- Once you have five of each item, combine each one to create 5 Tuning Forks.
- The metal pipe attaches easily to the bar of curved metal...almost too easily.
- If desired, you can collect more items from each chest to use for future quest runs.
Part 2: Breaking the Rings
Note: These are the same 5 rings that are used with the Pyreal Bells for the original Olthoi Queen.
- Give 5 different people 1 of the Tuning Forks, and assign them a Menhir Ring (listed below).
- Hand a Tuning Fork to the Aun Drummer to break the Menhir Rings.
- Each ring must be broken in order as follows:
- Ring #1 - 53.0N, 73.3W - Aun Kahmaula
- Ring #2 - 49.2N, 74.6W - Aun Gehaua
- Ring #3 - 46.5N, 75.8W - Aun Tanaua
- Ring #4 - 44.7N, 80.9W - Aun Laiaua
- Ring #5 - 50.1N, 80.4W - Aun Aanaua
- It will take five minutes after dropping a fork before the next drummer spawns.
- Similar to the old quest, if one player attempts to drop more than one fork, they will obtain a special title ("Out of Tune"). In addition, any character that drops a fork will not have access to Timaru for 20 hours(?).
- Important Note: The original Olthoi Queen Quest and this quest cannot be run simultaneously. If one quest has been started by the dropping of the first item (either bell or fork), then that quest must be fully completed before the Menhir Rings will reset again. The quest will also be reset on each patch day automatically.
Part 3: West Fork Dam Hive (Getting Sprayed)
- While others are dropping the forks, have the rest of your group head to the West Fork Dam Hive at 49.1N, 80.0W.
- Note: From here onward, the Olthoi have Recklessness and Sneak Attack. Watch your back!
- Once everyone is inside the dungeon, work your way down until you find the Western Royal Hive portal. There are multiple routes to the bottom where the portal is.
- Clear out the room until everyone has received a message about the Olthoi exploding and being covered in goo. Once you have gotten this message, you are flagged to enter the Western Royal Hive.
- You run Olthoi Hive Eviscerator through!
- The Hive Eviscerator explodes in a geyser of acid, spraying you from head to toe! You currently reek of Olthoi secretions. Fortunately, this will fade away in about two hours.
- You run Olthoi Hive Eviscerator through!
- Those who have been flagged should stop fighting and heal others while they fight and get flagged. This will speed the process of flagging. You may need to wait for a respawn to get everyone flagged. Not all of the Olthoi flag you when they die.
- The flagging lasts for 2 hours. You have this much time to kill the Queen. Typically it is more than enough time.
Part 4: Western Royal Hive
- This dungeon contains 3 tests. These tests are optional, but completing them means less creatures spawn with the Olthoi Hive Queen during the boss fight. The tests can be completely in any order or at the same time, if desired. If you wish to skip the tests, advance to the Queen's Quarters section.
- Note: Should anyone die in this dungeon, they can portal recall and run back to the West Fork Dam Hive. They will need to make their way back down to the bottom and use the Western Royal Hive portal. This can be difficult alone. A good strategy can be to complete all 3 tests first, then have the entire group portal recall and bring back with anyone that died, if necessary.
- Note: It is HIGHLY recommended you complete each test. Without completing the tests the queen room is packed full of Olthoi with many Virindi high above casting lightning bolts. It is not anticipated that a full fellow could survive in there without multiple rares.
- A common strategy for this portion of the quest is to use a melee wall. At the end of each passage is a short hallway. Have one player run ahead of the group and distract the mobs while the others move into the hallway. Set up 2 players to be the "wall" and have all the others attack behind them for protection. This can be done for each of the 4 passages in this dungeon.
- Origins Test: Head east and then north until you come to a larger room with 2 Hive Guardians (one is Virindi, the other is an Olthoi Hive Guardian). Kill the Olthoi Hive Guardian and loot the Guardian Warrior's Key. Use it to open the door and jump across to the Origins Portal.
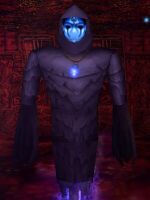
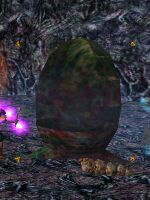
- Inside the Origins Portal you will find a Hive Olthoi Egg and some Olthoi Hive Crawlers. Kill the Hive Olthoi Egg and you will receive a message about the queen screaming in anger. Take the exit portal and it will return you to the drop of the Western Royal Hive.
- Grub Test: Head west until you come to another large room with a Virindi and an Olthoi Hive Guardian. Again, kill the Olthoi Hive Guardian and loot the Guardian Soldier's Key. Open the door and jump across to the Grubs Portal.
- The grubs test puts you in a room with a multitude of high level void-casting Olthoi Hive Crawlers. It can be safer to stay in the initial room and have the missile, mage, and summoner players attack from a distance. Simply kill the Olthoi Hive Crawlers until a Hive Maggot Giant spawns. Then kill the Hive Maggot Giant and you will get a message about them exploding in a burst of acid and guts. Take the exit portal to return to the Western Royal Hive drop point.
- Virindi Test: Head west again, but instead of going all the way west, head north when possible until you come to another large room. Again kill the Olthoi Hive Guardian, and loot the Guardian Soldier's Key. Open the door, and jump across to the portal. Wait to enter the portal with your whole group!
- The Virindi test consists of a large open room filled with Virindi Clandestines and a Virindi Sentinel. It is very easy for the first person who entered to die, due to being targeted by all the Virindi at once. Try to enter the portal at the same time to prevent this.
- Kill the Virindi Sentinel to trigger another green message. After the Virindi Sentinel dies, take the Western Royal Hive portal back to the initial drop point.
- At this point you should re-group and get everyone back to the drop point. You will not be returning here again.
- Queen's Quarters: Head east again, but this time turn south, until you come to another room with 2 Olthoi Hive Guardian. Kill the Olthoi one and loot the Guardian Soldier's Key. Then jump across to the portal.
Part 5: Queen's Quarters
- The Queen's Quarters is a series of T intersections, some of which lead further into the dungeon, but the majority of which lead simply to dead end rooms. Make your way forward, going down whenever possible.
- Route to Portal: West > North > West > West > North and down the ramp > East > South to the end of the hall > West and down ramp > North > East > North then take the 1st right (East) down the ramp > The gates will be ahead.
- Beyond these gates is a room with a portal to the room with the queen. This is the last safe spot to buff. The portal is fairly non-descript. Do not accidentally run into it!
- Note: The drop is hot. Once you go in, there is no easy way to get back.
Part 6: Olthoi Hive Queen
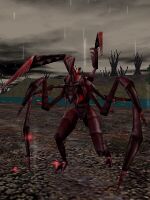
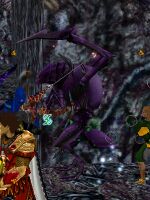
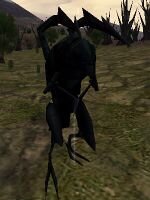
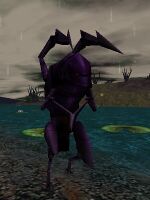
- Upon entering you will be swarmed by Olthoi Hive Warrior, Olthoi Hive Piercer, Olthoi Hive Soldier, and Olthoi Hive Eviscerator. Kill them all at the drop.
- In the middle of the room is a fake queen, similar to the old Olthoi Queen quest. She is stuck in place and cannot attack you. Before killing her, determined your battle strategy for the real queen. If you are using a melee wall, get everyone in place now.
- When the fake queen dies, a green message will appear, and the real Olthoi Hive Queen will spawn.
- Kill the queen and use Olthoi Hive Queen's Remains to receive the Olthoi Hive Queen Carapace.
- Deep within the winding tunnels of the Marescent Plateau, the party of the brave <Player Name> has slaughtered the Olthoi Hive Queen. As one, the Olthoi Hive swarms recoil from her final burst of terror, and slowly begin to withdraw back into their hives.
- Note: The mechanics for getting a carapace are different than normal looting. Using the queen's remains automatically places the carapace in your pack.
- Title Note: There is no head to be looted! If you did the most damage to the queen, you will be given the title of "Hive Queenslayer" when getting the carapace. There is no message or notification for this.
- When everyone has a carapace, take the Queen's Treasury portal and give the item to the Virindi Delegate for experience, luminance, MMDs, and a 5 use Legendary Key. Use the key on the Legendary Chests nearby.
Maps
| Dungeon | Coordinates | Wiki Map | ACmaps | Other | Quests |
| Chiming Portal | 45.0N, 73.5W | -- | -- | -- | |
| West Fork Dam Hive | 49.1N, 80.0W | -- | -- | -- | -- |
| Western Royal Hive | -- | -- | -- | -- | -- |
| Grubs Portal | -- | -- | -- | -- | -- |
| Origins Portal | -- | -- | -- | -- | -- |
| Virindi Portal | -- | -- | -- | -- | -- |
| Portal (Olthoi Hive Queen) | -- | -- | -- | -- | -- |
| Queen's Treasury | -- | -- | -- | -- | -- |
Items
| Quest Items | ||||||||
| Bar of Curved Metal | Metal Pipe | Tuning Fork | Guardian Soldier's Key | |||||
| Guardian Warrior's Key | Olthoi Hive Queen Carapace | |||||||
| Rewards | ||||||||
| Legendary Key | ||||||||
| Objects | ||||||||
| Chorizite Chest | ||||||||
Experience Rewards
| Task Required | Max Experience | Percentage & Level Cap | |||
| Give the Olthoi Hive Queen Carapace to the Virindi Delegate | 1,300,000,000xp |
Fixed XP | |||
|
| |||||
| See Level Costs for per level information. | |||||
Title Rewards
| Task Required | Title Reward |
| Get the kill on the Olthoi Hive Queen | Hive Queenslayer |
|
| |
| Attempt to hand in a second Tuning Fork | Out of Tune |
|
| |
| See Titles for a list of all available titles. | |
Images
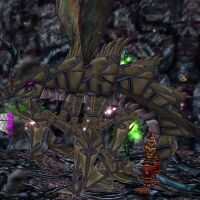
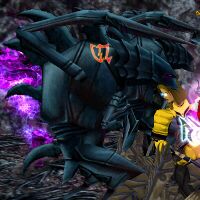
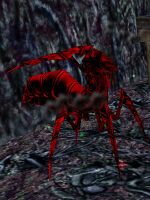
Click image for full size version.
Lore & Dialog
Breaking the Rings
You give Aun Kahmaula Tuning Fork.
Aun Kahmaula tells you, "How curious. This is an instrument used by your people to assure the highest quality of tones?"
Aun Kahmaula strikes the Tuning Fork against the stones and a low pitched tone resonates outward. The menhir stones crack and break!
Aun Kahmaula tells you, "What trickery is this...?"
A blank look suddenly washes over Aun Kahmaula's face. A gentle blue glow eminates from his eyes.
Aun Kahmaula tells you, "The awakening has begun. Predictable meatbags..."
Attempting to hand in a 2nd Fork
You give Aun Gehaua Tuning Fork.
Aun Gehaua tells you, "How foolish do you think us, Diabolism? We know your evil name, yes, we do. You have done your damage to our efforts just recently!"
You have been awarded the title of "Out of Tune"
"Begone, and take your hideous instrument with you."
Aun Gehaua gives you Tuning Fork.
Getting Sprayed in West Fork Dam Hive
You run Olthoi Hive Eviscerator through!
The Hive Eviscerator explodes in a geyser of acid, spraying you from head to toe! You currently reek of Olthoi secretions. Fortunately, this will fade away in about two hours.
Completing the Virindi(?) Test
A booming voice reverberates throughout the chamber..."This failure means little! My success is inevitable you foolish fleshlings!"
Completing the Grubs Test
Completing the Origins Test
Slaying the Fake Queen
As the Olthoi Hive Queen collapses to the ground, a familiar voice echoes through the chamber. "Your constant meddling ends this day meatbags! Twisting, shaping, and bending the wills of those simpleton Tumeroks was an amusing task. Meet the real queen! She will show you who is vermin and who is royalty!"
Slaying the Olthoi Hive Queen
Deep within the winding tunnels of the Marescent Plateau, the party of the brave <player name> has slaughtered the Olthoi Hive Queen. As one, the Olthoi Hive swarms recoil from her final burst of terror, and slowly begin to withdraw back into their hives.
Talking to Virindi Delegate in the Queen's Treasury
Virindi Delegate tells you, "Excellent work! Slaying that abomination of a creature will certainly disrupt the plans of the Curator of Torment."
Handing the Olthoi Hive Queen Carapace to Virindi Delegate
Virindi Delegate tells you, "The Reaver of Dreams sends gratitude for your assistance. Observing your unmatched skill in the art of battle was most impressive."
Virindi Delegate gives you Legendary Key.
You've earned 1,300,000,000 experience.
You've earned 40,000 Luminance.
Virindi Delegate tells you, "Killing this creature will certainly impede whatever the Curator of Torment was planning."
