Harraag's Lair: Difference between revisions
Jump to navigation
Jump to search
imported>Tlosk m →Images |
imported>Arkalor No edit summary |
||
| (3 intermediate revisions by 2 users not shown) | |||
| Line 10: | Line 10: | ||
| | | | ||
| Coordinates = 60.2N 80.2W | | Coordinates = 60.2N 80.2W | ||
| Landblock = | |||
| Dereth Map = {{Map Point|60.2|N|80.2|W|Marker=Dungeon}} | |||
| Nearest Town = [[Ayan Baqur]] | | Nearest Town = [[Ayan Baqur]] | ||
| Nearest LS = 59.0S 88.4W | | Nearest LS = 59.0S 88.4W | ||
| Line 21: | Line 23: | ||
| Quest Flag = Talk first to [[Guard Winterborn]], next to [[Chief Taraash]] (locked fellow) | | Quest Flag = Talk first to [[Guard Winterborn]], next to [[Chief Taraash]] (locked fellow) | ||
| | | | ||
| Live Image = | | Live Image = Live.jpg | ||
| Live Image Caption = | | Live Image Caption = | ||
}} | }} | ||
| Line 33: | Line 30: | ||
At the entrance of [[Harraag's Hideout]], you will already see a portal to Harraag's Lair. However, you need to make your way to the bottom, and use the portal there first which flags you to use the top portal should you die. | At the entrance of [[Harraag's Hideout]], you will already see a portal to Harraag's Lair. However, you need to make your way to the bottom, and use the portal there first which flags you to use the top portal should you die. | ||
== | == Maps == | ||
[[File:0060.png]] | * Wiki Map: | ||
:[[File:0060.png]] | |||
== NPCs == | |||
* None | |||
== Creatures == | == Creatures == | ||
| Line 58: | Line 59: | ||
| Infernal Zefir | | Infernal Zefir | ||
}} | }} | ||
== Items and Objects == | |||
* {{Icon Link|Sack of Banderling Artifacts}} - 10 on corpse of [[Harraag]] | |||
* {{Icon Link|Shard of Harraag's Dagger (Quest Item)}} - 10 on corpse of [[Harraag]] | |||
== Portals == | |||
* Surface | |||
== Images == | == Images == | ||
Click image for full size version. | Click image for full size version. | ||
<gallery heights=200px widths=200px perrow= | <gallery heights=200px widths=200px perrow=3> | ||
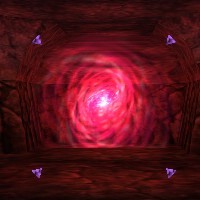
File:Harraag's Lair Live.jpg|Entrance to Harraag's Lair | |||
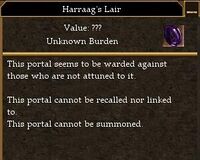
File:Harraag's Lair Entrance.jpg|Portal near drop of Hideout | File:Harraag's Lair Entrance.jpg|Portal near drop of Hideout | ||
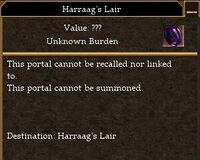
File:Harraag's Lair.jpg|Portal at end of dungeon | File:Harraag's Lair.jpg|Portal at end of dungeon | ||
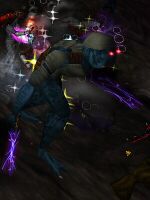
File:Harraag Live.jpg|Harraag | File:Harraag Live.jpg|Harraag | ||
</gallery> | </gallery> | ||
Latest revision as of 14:26, 4 August 2012
| Maps NPCs Creatures Items and Objects Portals Images Update History |
|
|||||||||||||||||||||||||||||||||||
General
At the entrance of Harraag's Hideout, you will already see a portal to Harraag's Lair. However, you need to make your way to the bottom, and use the portal there first which flags you to use the top portal should you die.
Maps
- Wiki Map:
NPCs
- None
Creatures
Items and Objects
 Sack of Banderling Artifacts - 10 on corpse of Harraag
 Shard of Harraag's Dagger (Quest Item) - 10 on corpse of Harraag
Portals
- Surface
Images
Click image for full size version.
-
Entrance to Harraag's Lair
-
Portal near drop of Hideout
-
Portal at end of dungeon
-
Harraag


